
Urban moss can cool a hot corner of a city, but only if you understand how fast it moves water back into the air. That water movement is urban moss evapotranspiration, and it is the piece most DIY projects skip.
I like moss because it is honest about its limits, since it dries fast, slows down fast, and shows you the physics in real time. If you can measure moss water loss with a scale and pair it with temperature, you can estimate cooling potential without buying lab gear.
This article sticks to simple measurements you can repeat on a roof, wall, or planter without turning your home into a weather station. You will end up with an evapotranspiration rate you can compare across sites and watering styles.
What evapotranspiration means for moss (in plain terms)
Evapotranspiration is water leaving a surface and entering the air as vapor, and for moss it is mostly evaporation from the plant mat. Moss has no stomata-driven plumbing like many vascular plants, so the whole cushion acts like a wet sponge drying out.
When water evaporates, it steals heat from the surface, which is why a damp moss patch can feel cool even in sun. That cooling is the same reason sweating works, and it is also why dry moss stops cooling quickly.
Urban moss evapotranspiration depends on how much water the moss can hold and how easily air can carry that vapor away. Wind, sun, and dry air speed up loss, while shade and humid air slow it down.
People sometimes treat evapotranspiration rate like a fixed trait of a species, but in cities it is mostly a site condition story. The same moss can behave like a swamp cooler on one wall and like a dead doormat on another.
The good news is you do not need a fancy flux tower to get a useful estimate. If you can track mass change over time, you can quantify moss water loss and turn that into a practical cooling number.
When moss cools well—and when it doesn’t
Moss cools well when it stays wet enough to keep evaporating while the air can accept more moisture. A breezy, sunny morning after watering often produces the biggest surface temperature reduction you will see all week.
Moss cools poorly when it is already dry or when the air is near saturation and evaporation slows. After a summer thunderstorm, the air can be so humid that the moss looks soaked but the evapotranspiration rate stays modest.
Substrate matters more than people admit, because a thin mat over hot black membrane heats fast and cooks off water early. A moss mat over a cooler, porous base can stretch cooling longer into the afternoon.
Wind can be a friend or an enemy depending on how you water. A windy roof can boost urban moss evapotranspiration for an hour, then leave you with a crisp mat that stops cooling before lunch.
If you are chasing surface temperature reduction, timing is everything, since moss can deliver short bursts of cooling rather than all-day performance. I treat moss like a peak-shaving tool, best used to knock down the hottest part of the day when people are actually outside.
Pick a test site you can monitor consistently
The site you pick will decide whether your numbers are useful, because inconsistent exposure makes your data noisy. Choose a spot you can access safely at the same times each day, even when you are busy.
Consistency beats perfection, so avoid places where shade lines crawl across the moss every hour or where sprinklers hit randomly. If you cannot control the chaos, at least document it so your evapotranspiration rate does not become a guessing game.
| Site type | What to record each visit | Why it matters for evapotranspiration |
|---|---|---|
| Sunny roof corner | Sun or cloud, wind feel, time since watering | High evaporation spikes, fast dry-down |
| North-facing wall | Shade status, drip lines, wall material | Lower heat load, slower moss water loss |
| Courtyard planter | Soil moisture, nearby irrigation, canopy cover | Humidity and splash change drying speed |
| Balcony tray | Railing wind exposure, midday sun window | Wind-driven evaporation can dominate |
Tools you can use (and what to skip)
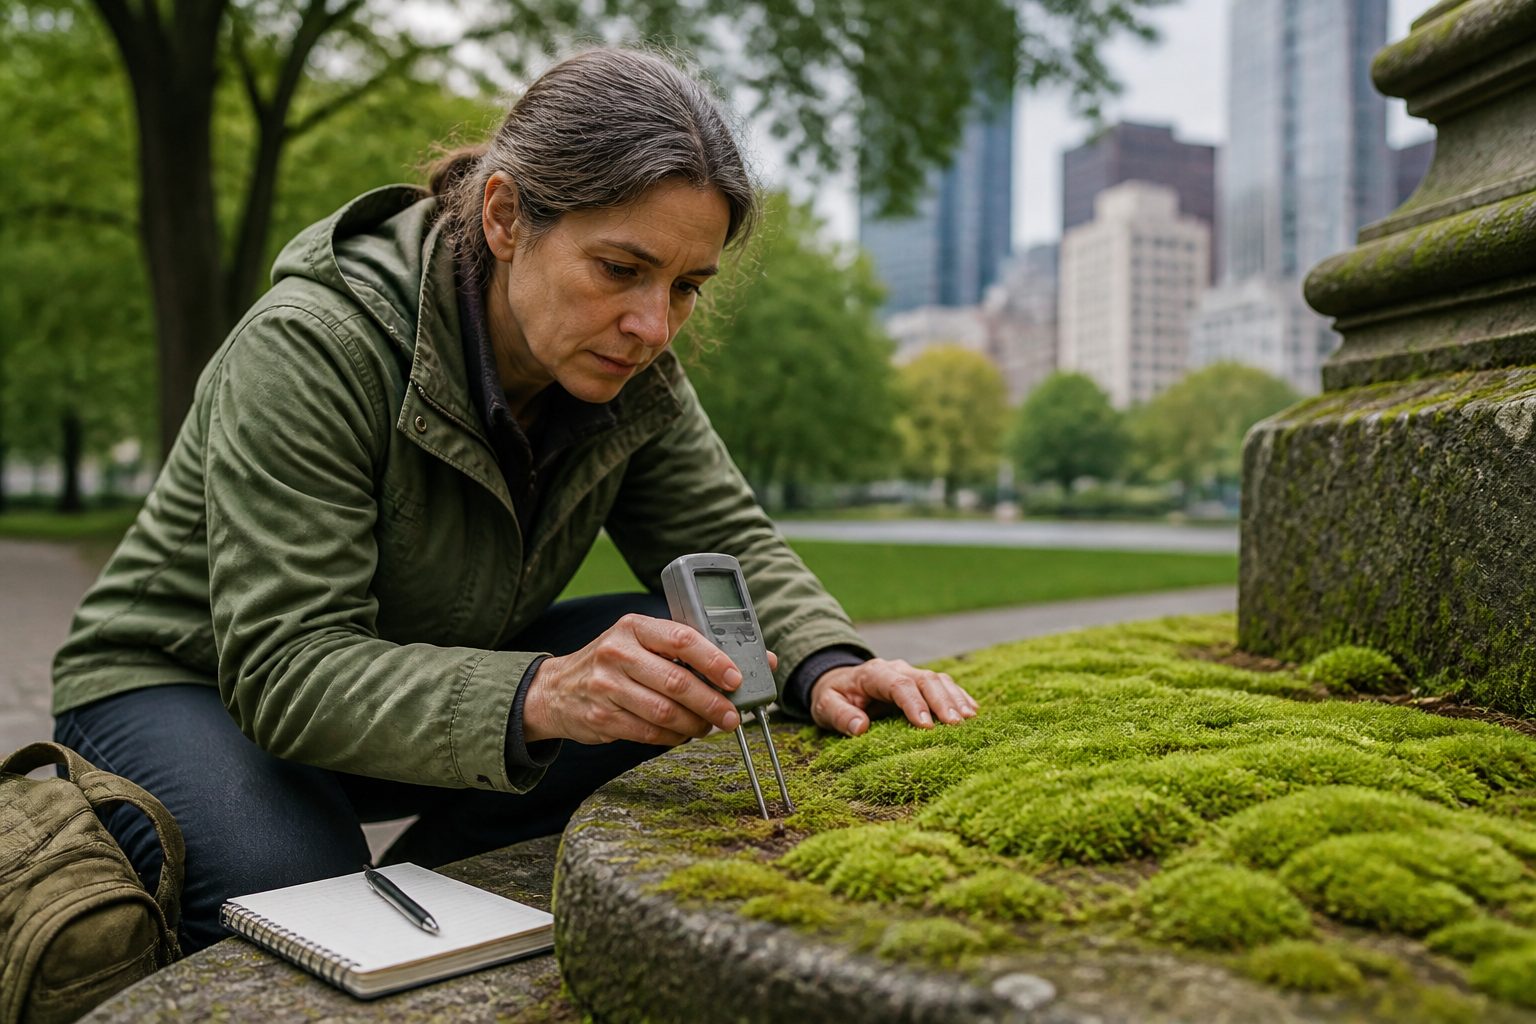
A cheap digital kitchen scale is the workhorse tool, and I prefer one that reads to 1 gram with a stable platform. If your sample is small, a jewelry scale that reads to 0.1 gram makes your evapotranspiration rate less jumpy.
For temperature, a basic infrared thermometer is fine if you use it carefully and repeat the same distance and angle. If you already own a probe thermometer, you can tape the probe to a thin metal washer and use it as a consistent surface contact point.
A notebook beats an app when you are sweaty on a roof, because you will actually write the numbers down. If you do use your phone, set up a template note with the same fields every time.
Skip expensive humidity sensors unless you plan to calibrate and shield them, because cheap units drift and cook in sun. If you want a simple humidity proxy, record local weather station humidity and focus on your own mass loss data.
Skip glossy “moss misting” gadgets that promise magic, because they usually deliver tiny droplets that evaporate before soaking the mat. For urban moss evapotranspiration tests, you want repeatable wetting, not theatrical fog.
A simple “weigh-and-wait” method to estimate water loss
The simplest method is to weigh a moss sample right after watering, then weigh it again after a fixed time under the same conditions. The mass drop is mostly water, so you can treat it as moss water loss for that interval.
You can do this with a removable tray, a shallow pot, or a small test tile you can pick up and put on the scale. The key is to keep the container and substrate constant, because changing containers changes evaporation from the non-moss parts too.
- Use a removable test tray or tile with known area
- Water until evenly wet, then let it drip for 60 seconds
- Record start mass, time, and whether sun hits the sample
- Reweigh at fixed intervals, such as 30, 60, and 120 minutes
- Stop the run when the moss looks dry and mass stabilizes
- Repeat on two different days, one sunny and one overcast
How to pair water-loss data with temperature readings
Mass loss tells you how much water left, but temperature tells you whether that loss translated into cooling where you care about it. The cleanest approach is to measure moss surface temperature and a nearby reference surface at the same moment.
Your reference can be bare roof membrane, bare brick, or the planter rim, as long as it sits close enough to share sun and wind. If you pick a reference that stays shaded while the moss is in sun, your surface temperature reduction number will be nonsense.
Take temperature readings right before each reweigh so the timestamps match. When people separate these steps by “a few minutes,” they accidentally measure a passing cloud instead of urban moss evapotranspiration.
Record three quick IR readings on the moss and average them, because IR guns can jump around on textured surfaces. Do the same on the reference surface, and keep your hand off the moss so you do not warm it.
When you plot your data, you want to see whether higher evapotranspiration rate lines up with bigger surface temperature reduction. If it does not, your site may be dominated by conduction from a hot substrate, which is a real result and not a failure.
How watering style changes evapotranspiration results
Watering style changes the shape of your drying curve, and that changes your cooling curve too. A deep soak tends to give a longer, flatter period of moss water loss, while a light mist gives a sharp spike and a fast crash.
I prefer a measured pour from a squeeze bottle or small watering can, because you can repeat the volume. If you mist, you often wet the top fuzz and leave the lower mat dry, which looks wet but does not sustain urban moss evapotranspiration.
Hard water leaves minerals that can change wetting over time, especially on wall systems where evaporation concentrates salts at the surface. If your moss starts shedding water like a waxed car, try a few runs with collected rainwater or distilled water.
Water timing matters as much as water amount, since pre-wetting before peak sun can prevent the midday shutdown. If you water at noon on a hot roof, much of the water can flash off before the moss cools the surface below.
For comparisons, keep your watering method boring and consistent, even if it is not the method you plan to use long term. Once you know the baseline evapotranspiration rate, then you can experiment with drip lines, capillary mats, or scheduled pulses.
Interpreting results for roofs, walls, and planters
Roofs usually show the biggest swings, because sun and wind are intense and the substrate can get brutally hot. Your data will often show a high early evapotranspiration rate followed by a sharp drop when the moss dries or overheats.
On walls, gravity and runoff complicate things, since water can move downward and leave the top dry. If your upper wall sample loses mass fast but does not cool much, the wall itself may be feeding heat into the moss faster than evaporation can remove it.
Planters tend to have steadier conditions because nearby soil and plants raise local humidity and reduce wind at the surface. That can reduce peak moss water loss, but it can keep cooling going for longer, which people often prefer.
If you want one number to compare sites, calculate evapotranspiration rate as grams of water lost per hour per square meter of moss area. The absolute number will not be perfect, but it will rank your sites honestly.
Look for the “useful window,” meaning the time when the moss stays cooler than the reference surface by a meaningful amount. For a roof deck people use after work, a two-hour window at 10 to 15 degrees Fahrenheit cooler can matter more than a ten-minute spike at 25 degrees.
Common measurement errors and how to avoid them
The biggest error is weighing a sample that is still dripping, because you end up measuring drainage instead of evapotranspiration. Let the sample drip for a fixed time, and wipe the tray bottom so you do not carry a hidden puddle onto the scale.
Another common error is changing the sample area without noticing, like when moss curls up as it dries and exposes bare substrate. If the mat shrinks, your evapotranspiration rate per area will look smaller even if water loss stays the same.
IR thermometers can lie on shiny or wet surfaces, and wet moss can reflect sky temperature in weird ways. Take readings from a consistent angle, avoid extreme glancing angles, and compare trends rather than obsessing over a single number.
Wind gusts can cause short-term jumps in both temperature and drying, and they can make your data look chaotic. If the day is wildly gusty, note it and run another test on a calmer day so you have a cleaner comparison.
People also forget the container itself can evaporate water, especially if you use exposed soil or a wet felt pad. If you want to isolate moss water loss, cover non-moss wet surfaces with plastic film, leaving only the moss exposed.
Turning your numbers into a practical cooling plan
Once you have a few runs, you can pick a watering schedule that matches when heat is worst at your site. If your urban moss evapotranspiration peaks for the first hour after wetting, you can time watering to start 30 to 60 minutes before the hottest period.
Use your mass loss curve to estimate how much water you need per day, then decide if that amount is realistic for your building. A moss roof that needs frequent watering can still be worth it, but you should know the number before you build a big system.
Translate surface temperature reduction into comfort by checking the surfaces people touch or sit near, like a rooftop bench wall or a planter edge. If moss cools the membrane but the walking surface stays hot, move the moss to where it can cool the surfaces that matter.
If your data shows low evapotranspiration rate but decent cooling, you may be seeing shading and insulation effects instead of evaporation. That is fine, but it means adding irrigation may not buy you much, so spend money on coverage and placement instead.
I trust small pilot patches more than big promises, so scale up only after your test patch behaves for two weeks of typical weather. When you scale, keep the same substrate depth and exposure, because changing those can erase the pattern you measured.
Conclusion
Estimating urban moss evapotranspiration does not require lab equipment, but it does require discipline about repeatable measurements. A scale, a clock, and consistent notes can give you an evapotranspiration rate that is good enough to guide design choices.
Pair water loss with temperature readings and you will see when moss actually delivers surface temperature reduction in your specific site conditions. Once you see the pattern, you can water smarter, place moss where it counts, and stop expecting miracles from a dry mat.


