Moss slurry on walls sounds easy until you watch your first coat dry into a flaky green scab and slide off in the next rain. A moss slurry recipe for walls can work, but only when you treat it like a living coating that needs grip, moisture control, and patience.
I have tried the cute internet versions with beer and yogurt, and I do not recommend them for most outdoor walls. They smell, they mold, and they often feed everything except the moss.
This guide focuses on repeatable results, not viral hacks, and it assumes you want moss that stays put through dry spells. You will get a practical recipe, realistic slurry binder options, and a clear plan for surface prep for moss and misting after slurry.
What a moss slurry is (and when it’s the wrong choice)
A moss slurry is a suspension of moss fragments in water plus a binder, applied like paint so the fragments lodge into pores and micro cracks. The goal is simple, get tiny living pieces into contact with a damp, rough surface long enough to reattach and start new growth.
Slurry is best for textured masonry, unsealed concrete, brick, and rough stone where the surface has tooth. It is a poor match for sealed paint, glazed tile, metal, plastic, and most finished stucco because there is nowhere for the moss to anchor.
If your wall gets full sun and afternoon wind, slurry usually fails unless you build shade and wind breaks for weeks. Moss does not “power through” drought the way ivy does, and the early stage is basically a dehydration test.
Slurry also frustrates people who want instant coverage, because the first month can look like nothing happened. When it works, you often see a thin green haze first, then thicker mats later when humidity and shade cooperate.
Sometimes the right move is to skip slurry and use sheet moss or small plugs pressed into mortar joints. If you can physically attach moss with mesh, pins, or a shallow pocket of substrate, you will beat slurry on success rate most of the time.
Selecting moss types that tolerate slurry handling
The moss you choose matters more than the blender, and most failures start with the wrong species. Pleurocarpous mosses that creep and branch, like many Hypnum and Brachythecium types, usually handle fragmentation better than upright, tufted species.
Urban walls often favor hardy colonizers you already see on sidewalks and mortar, not the fluffy forest floor moss people pull from logs. If you collect from a similar exposure, you are matching the moss to the wall’s heat, pollution, and dry down pattern.
Avoid moss that is already crispy, sun bleached, or full of soil, because the living tips are what regrow. I prefer springy, clean mats with visible new growth at the ends of stems, even if the patch looks a little boring.
Do not strip wild patches down to bare ground, and never take from protected areas or parks where collection is prohibited. A small handful from your own property, a friend’s shaded brick, or a nursery-grown tray goes a long way when you fragment it.
If you cannot identify the moss, you can still make good decisions by observing where it thrives. Moss that already grows on vertical or sloped masonry is a safer bet for a moss slurry recipe for walls than moss that only grows in deep soil.
Tools and ingredients you need (simple, repeatable setup)
You do not need fancy lab gear, but you do need consistency so you can repeat what worked. The biggest upgrade is dedicating one bucket, one brush, and one cheap blender or paint mixer strictly for moss, because you do not want soap residue or oil contamination.
Think of your setup like a small painting job with a moisture plan, not like a smoothie. If you can measure volumes and keep notes, you will quickly dial in the slurry thickness that matches your wall.
| Tool or ingredient | Why you need it | Practical tip |
|---|---|---|
| 5-gallon bucket | Mixing and carrying slurry | Mark quart lines with a permanent marker |
| Cheap blender or drill + paint mixer | Fragmenting moss evenly | Pulse, do not puree into green water |
| Stiff nylon brush and chip brush | Working slurry into texture | Use stiff brush for masonry, soft for delicate spots |
| Spray bottle or pump sprayer | Pre-wetting and misting after slurry | Choose a fine mist nozzle, not a jet |
| Gloves and safety glasses | Skin and eye protection | Concrete dust and lime splashes sting |
Surface preparation: cleaning, roughening, and pre-wetting
Surface prep for moss is where most wall projects are won or lost, and it is not glamorous work. Moss needs a rough, mineral surface that stays damp long enough for rhizoids to grab, and grime blocks that contact.
Start by removing loose dust, flaking paint, and chalky efflorescence with a stiff dry brush. If you can wipe the wall with your hand and your palm turns white, keep brushing until that stops.
For oily residue near grills, alleys, or driveways, scrub with plain water and a little unscented dish soap, then rinse very well and let it dry. Do not use bleach, quats, or “mold killer” products, because they can linger and suppress regrowth.
If the wall is smooth concrete or dense brick, roughen it lightly with a wire brush, sanding block, or masonry rub stone. You are not trying to carve grooves, you are trying to create micro texture so the slurry has mechanical grip.
Right before application, pre-wet the wall until it looks evenly darkened but not dripping. A damp surface slows the first dry down, and it also keeps the binder from skinning over before the moss fragments settle in.
Slurry binder choices and how they affect adhesion
Binders are the unpopular truth in wall slurry projects, because moss fragments alone do not stick to vertical surfaces for long. Slurry binder options range from “food” binders like yogurt to mineral and polymer binders that behave more like thin glue.
I avoid dairy and beer outdoors because they attract insects and grow mold fast, especially in warm, humid cities. If you want a fermentation smell on your wall, those recipes deliver, but the moss rarely benefits.
Clay based binders, like powdered bentonite or unscented kitty litter clay that you hydrate and strain, can improve tack and moisture retention. Clay also buffers the slurry so it dries less abruptly, which helps on breezy walls.
Cellulose binders, like wallpaper paste or methylcellulose, often work well because they hold water and form a thin film that stays slightly tacky when re-wet. They can still peel if you apply too thickly, so you want a thin coat worked into texture.
Acrylic or latex additives can increase adhesion, but they are a tradeoff because you are adding a plastic film to a living system. If you go this route, use tiny amounts and focus on rough mineral surfaces, not painted walls, because paint plus acrylic can shed as a sheet.
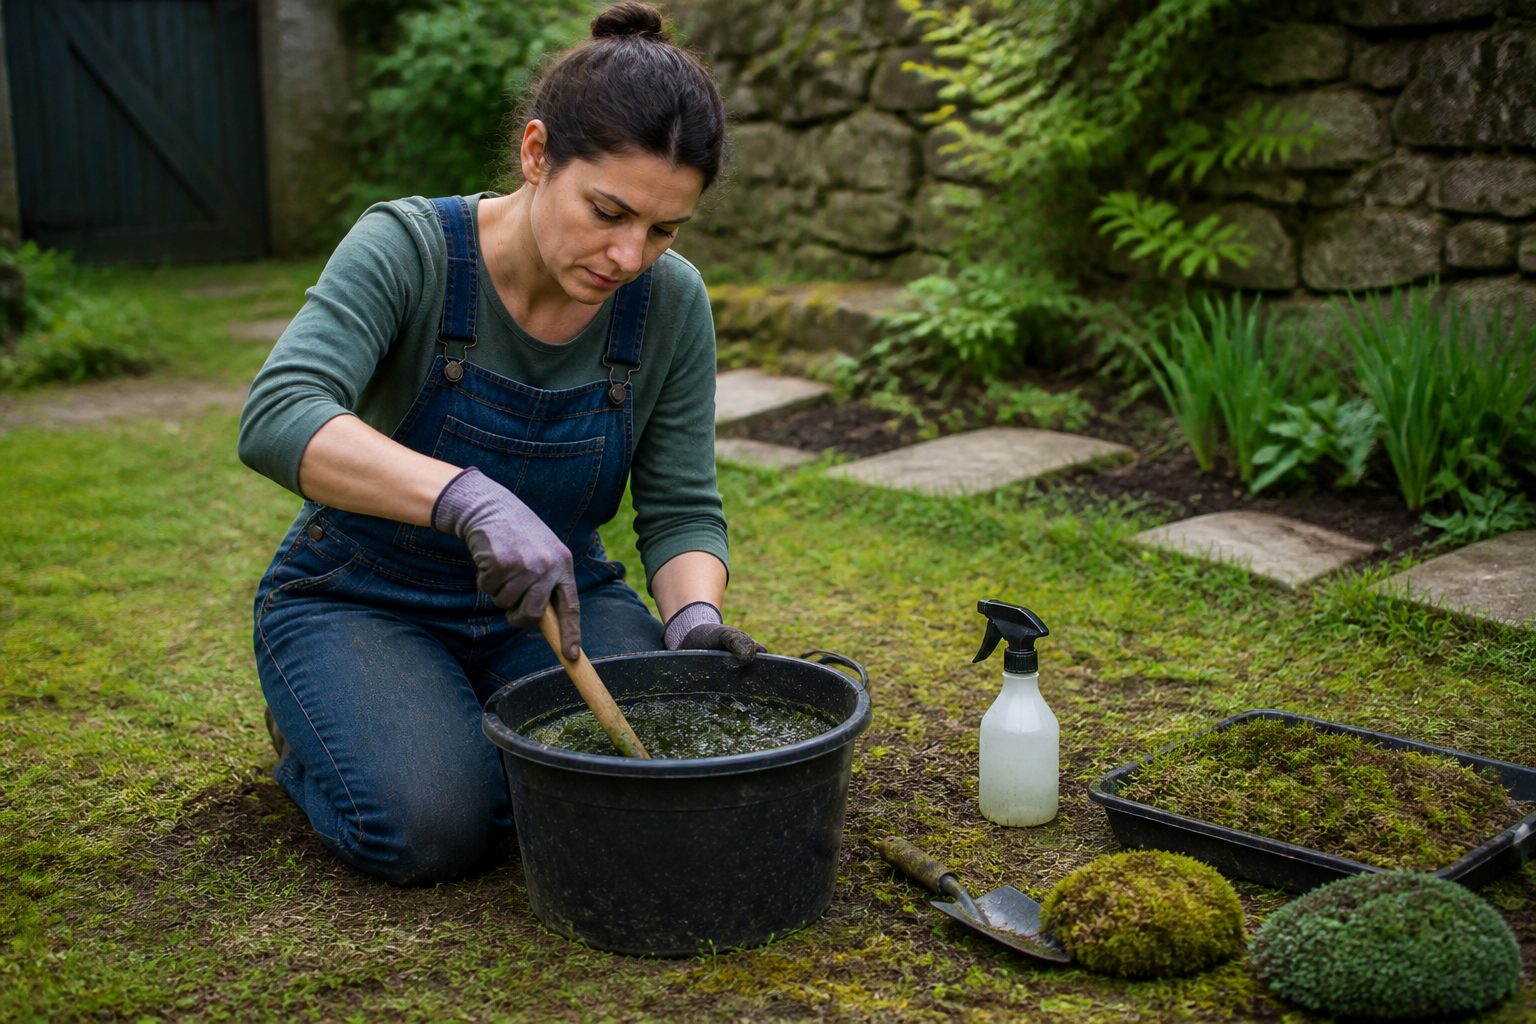
A reliable slurry recipe with mix ratios you can adjust
This moss slurry recipe for walls aims for a thick paint consistency, not a drinkable smoothie. You want visible moss bits that can lodge into the wall, because pulverized moss has less structure and dries into a flat stain.
Use clean, non chlorinated water if you can, and let tap water sit overnight if it smells strongly of chlorine. If your city uses chloramine, aging helps less, so consider filtered water for the first mix.
Start with 2 packed cups of clean moss, 2 cups of water, and 1 to 2 tablespoons of methylcellulose or wallpaper paste mixed separately according to the label. Blend the moss with water in short pulses, then stir in the binder until it coats the fragments evenly.
For rough brick that dries fast, add 1 tablespoon of hydrated bentonite clay to increase body and water holding. For very porous concrete, reduce clay and keep the mix thinner so it can soak into pores instead of sitting on top.
Adjust thickness by adding water a few tablespoons at a time, and stop when the slurry clings to a brush without running. If it drips down the wall, it is too thin, and if it forms peaks like frosting, it will crack as it dries.
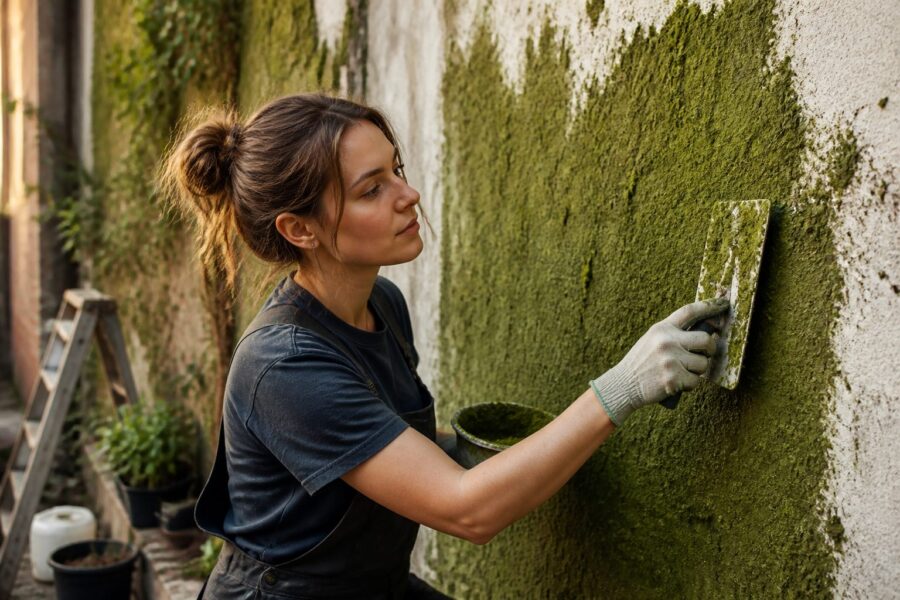
Application methods: brush, sponge, and stipple techniques
How you apply matters as much as what you mix, because you are trying to press fragments into texture instead of painting a thick layer. I treat slurry like a first coat that seeds the wall, then I come back later to fill thin spots.
A stiff brush works best on brick, stone, and rough concrete, and you should push in small circles to drive the slurry into pores. Long vertical strokes look neat but they often leave a skin on the surface that later peels.
A sponge is useful for irregular stone or carved concrete where a brush skips over high points. Load the sponge, then dab and twist so the slurry leaves behind fragments instead of a smooth film.
Stippling with a chip brush is my favorite finish pass, because it breaks up thick areas and creates micro pockets. Those tiny pockets stay damp longer, and they reduce the chance of one big sheet drying and lifting.
Work in small sections, about two to three square feet, and keep the bucket covered between dips so it does not thicken unpredictably. If the mix starts to gel, stir in a little water and do not keep brushing it forever, because overworking can pull fragments back off.
Dry-down control: keeping slurry from cracking or peeling
Dry down is the silent killer of wall slurry, and the first 72 hours are where you either keep contact or lose it. If the surface dries too fast, the binder shrinks, cracks, and takes your moss fragments with it.
The best fix is planning, apply on a stretch of cool, overcast days, or work on the shaded side of a building. Morning shade with afternoon sun is rough, because the wall heats up right when the slurry is most fragile.
Keep coats thin, even if that feels wrong, because thick coats dry with a hard outer skin and a wet interior. That skin curls as the interior loses water, and curling is what starts peeling.
If you see hairline cracks forming, mist lightly and stop touching the surface with a brush. Brushing cracked slurry turns it into crumbs, and crumbs wash off in the next rain.
On very dry days, you can tape a strip of breathable shade cloth a few inches off the wall to slow wind. Plastic sheeting can trap heat and cause condensation drips, so I only use it as a temporary rain shield with air gaps.
Aftercare: misting schedule, shade, and wind protection
Misting after slurry is not a one time thing, it is a routine, and skipping it usually means failure. The moss fragments need repeated hydration cycles without being blasted off the wall.
For the first week, mist two to four times a day depending on heat and wind, aiming for a fine fog that darkens the surface. If water runs down in streams, you are spraying too hard or too long.
Weeks two through four, drop to once or twice a day, and watch the wall rather than the calendar. If the wall dries to a pale gray by mid afternoon, increase misting or add temporary shade.
Shade matters more than people admit, because sun plus wind turns a wall into a dehydrator. A simple patio umbrella, shade sail, or a piece of shade cloth clipped to a fence can be the difference between regrowth and dust.
Protect the wall from splash and runoff, because dirty water can bury fragments in silt and algae. If you have gutters dumping onto the area, fix that first, or you will keep repainting the same patch every storm.
Troubleshooting: mold, wash-off, and patchy regrowth
Mold usually shows up when people use sugary or dairy binders, apply too thickly, and keep the surface wet without airflow. If you see fuzzy white or gray growth, stop misting at night and switch to morning and midday only.
If the slurry washes off in rain, your binder was too weak, your wall was too smooth, or you applied right before a storm. Wait for a dry window, roughen the surface more, and use a thicker binder mix applied in a thin stippled coat.
Patchy regrowth is normal, and it often maps to microclimates on the wall like sun stripes, heater vents, or wind tunnels between buildings. Treat the good patches as your proof of concept, then adapt the rest of the wall to match their conditions.
Green algae slime means the surface stays wet but the moss is not establishing, which can happen with too much nutrient and too little light. Scrub lightly with water, reduce any food based ingredients, and let the wall dry slightly between mists.
If nothing happens after six to eight weeks, do a small test square with better surface prep for moss and a different binder, then compare results. A controlled test patch beats redoing an entire wall and guessing why it failed.
Conclusion
A moss slurry recipe for walls works when you pick tough moss, prep the surface like you mean it, and manage dry down with shade and careful misting after slurry. The binder is not a gimmick, it is the difference between fragments that stay in contact and fragments that end up on the sidewalk.
If you want the shortest path to success, start with one shaded, rough test area and treat it like a living experiment you monitor daily. Once that patch takes, scale up using the same slurry binder options and the same surface prep for moss that got you real adhesion.

