Moss canopies look soft and simple, but their texture controls a lot of hard physics. If you care about moss surface roughness cooling on a roof or wall, you are really talking about how tiny bumps and pockets steer heat, water, and dirt.
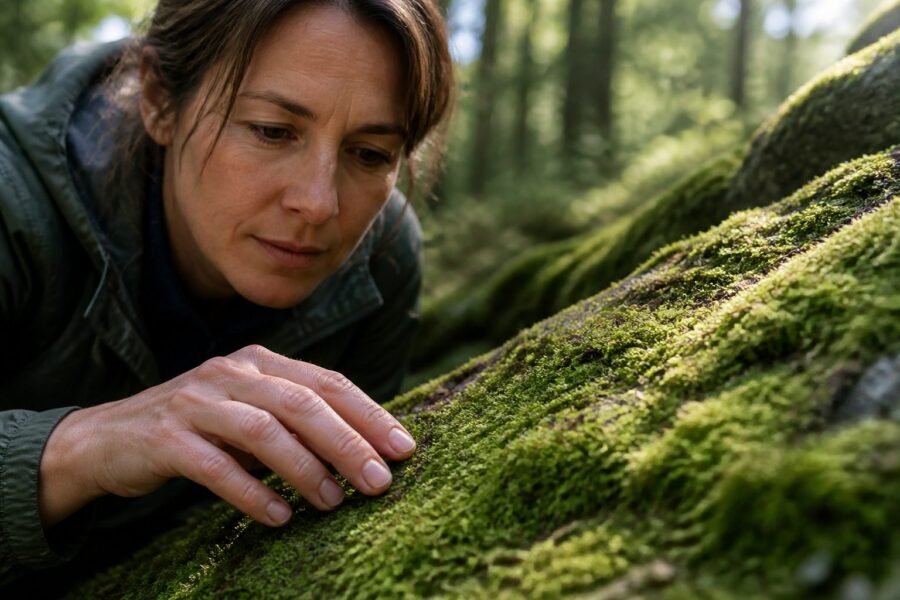
I used to treat moss mats like a green paint layer, then I watched two trays of the same species behave differently because one surface was slightly lumpier. One stayed cooler at midday and held dust in little hollows, while the smoother one dried faster and looked cleaner.
This article focuses on surface roughness you can see and manage, not lab grade measurements. The goal is to connect microtopography to cooling, drying patterns, and dust deposition in urban cultivation.
What “surface roughness” means for moss canopies
Surface roughness is the height variation across the top of a moss canopy, measured over some distance you choose. In plain terms, it is how bumpy the living surface is when you look across it at a low angle.
Microtopography is the small scale shape of that surface, including ridges, pits, and little towers made by shoots. Moss microtopography can be stable for months, or it can collapse after trampling, drought, or heavy rain.
Roughness is not the same thing as species identity, because the same moss can grow smooth in one setup and knobby in another. Light direction, wind exposure, and how often you mist can change canopy form more than people expect.
When you read about roughness in ecology, it often links to aerodynamic roughness length, which is a way to describe drag on moving air. For growers, the practical takeaway is that rougher surfaces mix air differently and that changes both leaf temperature and evaporation rate.
Roughness also sets the stage for dust deposition because particles settle into sheltered pockets. Those pockets can help moss stay moist longer, but they can also turn into clogged, salty, grimy zones that stop new growth.
Texture types you can recognize without a microscope
You do not need magnification to sort moss textures into a few useful buckets. Stand to the side, use raking light, and you will see whether the canopy reads as smooth, pebbly, tufted, or ridged.
A smooth mat looks like felt or suede, with a fairly even top and few shadows. This is common in tightly packed pleurocarpous moss grown with steady moisture and low wind.
A pebbly mat has small bumps that repeat, like a coarse sponge. You often get this when shoots grow in little clumps separated by narrow gaps that collect water and dust.
Tufted or turreted texture shows taller points and deeper voids, with obvious shadows even in flat light. Many acrocarpous mosses do this naturally, and they tend to create strong moisture gradients across a few centimeters.
Ridged texture looks like tiny waves or corduroy, sometimes aligned with water flow or prevailing wind. On roofs and sloped planters, ridges can form where growth keeps restarting after thin sheets of water shear off the canopy top.
Mixed texture is the normal urban condition, especially near edges, drains, and parapets. When you map texture types, you usually find that the roughest zones are also the zones with the most stress.
Roughness and cooling: how texture affects air mixing
Moss surface roughness cooling comes from a tradeoff between shade, airflow, and evaporation. A rough canopy creates tiny wind breaks and tiny wind tunnels at the same time, and the balance depends on bump size and spacing.
On hot, bright days, the top of a smooth mat can heat evenly because air slides over it in a thin layer. A rough mat breaks that layer up, which can pull heat away faster if the air is moving and the surface is wet enough.
| Texture pattern | What happens to air near the canopy | Cooling outcome you often see |
|---|---|---|
| Smooth felt mat | More continuous boundary layer, less turbulence at the surface | Warms evenly, cools well only when fully wet |
| Pebbly, low bumps | Small eddies form between bumps, moderate mixing | Often cooler at midday if misted, with fewer hot spots |
| Tufted, tall points | Strong shelter in pockets, strong exposure on tips | Cool pockets and warm tips, patchy temperature map |
| Ridged, aligned with wind | Channeling along grooves, reduced cross mixing | Cool strips and warm strips, depends on wind direction |
Roughness and drying: why some mats dry unevenly
Drying is where microtopography shows its personality, because evaporation depends on exposure and water storage at the same time. A rough surface holds more water in pockets, yet it also exposes more area to moving air.
In tufted canopies, the tips dry first and can go pale or brittle while the base stays damp. That unevenness can look like disease, but it is often just geometry plus wind.
Smooth mats often dry like a sheet, which makes them predictable for irrigation schedules. The downside is that once the surface film breaks, the whole canopy can flip from damp to dry quickly in sun.
Ridges and shallow gullies create runon and runoff zones, even on surfaces that look flat. If your planter has a slight tilt, water may keep feeding the same grooves, and the high spots will keep losing.
Drying patterns also depend on what is under the moss, because a spongey substrate can refill the canopy from below. On sealed membranes or dense concrete, the moss relies on surface water, so roughness drives stronger contrast between wet hollows and dry peaks.
If you see repeated dry halos around vents, parapet corners, or railing posts, suspect wind acceleration first. Roughness can soften that stress by creating sheltered pockets, but it can also create little chimneys that speed drying when the canopy is too open.
Dust capture: benefits, risks, and when it becomes a problem
Dust deposition is not random, it follows airflow and where the canopy offers shelter. Rough moss surfaces trap particles in pits and between shoots, while smoother surfaces let more dust blow or wash away.
Some dust is useful because it can add minerals and increase water holding by filling tiny voids. In cities, that same dust can carry brake wear metals, soot, and salts that stress moss during dry spells.
Watch for a dark crust that does not rehydrate evenly, because that often means fine particles have sealed the top. When that happens, mist beads and runs off instead of soaking in, and the moss below stays dry even though you watered.
Roughness can make this worse if the canopy forms deep cups that never flush. Those cups become little sediment basins, and after enough cycles they turn into compacted plugs where new shoots cannot push through.
Dust problems show up first near roads, HVAC exhaust, and roof drains where grime concentrates. If you are seeing green growth everywhere except a narrow band near a parapet, that band is often a dust and salt band, not a lighting issue.
I like dust capture when the site has clean rainfall and low salt, because it can stabilize a thin canopy and reduce splash erosion. I do not like it on busy streets with winter deicers, because the roughest mats become the most contaminated mats.
Choosing moss textures for roofs, walls, and planters
Texture choice is really risk management, because each surface has a different failure mode. A roof fights heat, wind, and grit, while a wall fights runoff streaks and drying from vertical airflow.
On extensive green roofs, I prefer low pebbly roughness over tall tufts, because it balances cooling with less tip scorch. Tall points catch wind and dry fast, which can turn into repeated dieback on exposed corners.
On walls, a slightly rough canopy can help by holding mist and fog droplets long enough to soak in. Very rough, open texture on walls can become a dust shelf, especially under overhangs where rain never rinses.
In planters, roughness interacts with splash, because raindrops can crater soft mats and create pits that grow deeper over time. A smoother mat or a mixed canopy with some firm shoots can resist that mechanical damage.
If you are designing for cooling, choose a texture that stays wet long enough to evaporate during peak heat. If you are designing for low maintenance, choose a texture that sheds dust and does not form deep sediment traps.
Species matters, but cultivation style matters more than people admit. The same moss can form a tight, smooth skin under frequent fine mist, or a rough, clumpy surface under pulsed watering and wind.
How to measure roughness in a practical, repeatable way
You can measure surface roughness without fancy gear if you pick one method and stick to it. The mistake is switching tools mid project, because the numbers will not compare.
The simplest method is a straightedge and a ruler, where you span 10 cm and record the maximum height difference from the highest shoot tip to the lowest hollow. Do this at ten random spots and write down the mean and the worst value.
A better method for microtopography mapping is side lighting plus a phone photo, taken from the same height and angle each time. You can then compare shadow density as a rough proxy for roughness, which is surprisingly consistent if you keep the light source fixed.
If you want a number you can graph, use a small grid frame and measure canopy height at each grid point with a toothpick marked in millimeters. The standard deviation of those heights is a workable roughness index for growers.
Do not measure right after watering, because shoots swell and stand up, which inflates roughness. Measure at a consistent moisture state, like two hours after misting in shade, so you can track real structural change.
Pair roughness numbers with a simple dust score, like white paper wipe tests at the same locations. When roughness rises and dust rises together, you can predict where cooling and drying behavior will shift next.
Cleaning and maintenance without damaging the canopy
Cleaning is where many moss installations die, because people treat the canopy like a patio. Moss has no cuticle and no roots, so abrasion and harsh water chemistry show up fast.
Start with the gentlest rinse that actually moves particles, usually a low pressure fan spray with collected rainwater or dechlorinated tap water. If you need to scrub, stop and rethink the design, because scrubbing changes the microtopography and often increases failure later.
For dust deposition that forms a crust, I prefer repeated soak and drain cycles rather than one aggressive blast. Wet the canopy, wait ten minutes, rinse lightly, and repeat, because the goal is to float fines out of hollows.
Avoid detergents and vinegar mixes, because they can burn shoots and shift surface pH in ways that favor algae. If you must treat salts, use volume flushing with clean water and improve drainage so the salts do not return to the same pockets.
Trim only when you have a reason, like removing dead points that keep catching dust or shading new growth. A sharp scissor cut can reduce extreme roughness, but a sloppy pull tears the mat and creates bare patches that dry out.
Maintenance schedules should follow site conditions, not the calendar. If a wall sits under a bus stop roof, it may need a gentle rinse monthly, while a courtyard planter may need almost nothing for a whole season.
Designing edges and transitions to reduce failure points
Edges are where roughness becomes a liability, because wind and runoff focus there. The canopy often turns rougher at edges as it breaks up, then it traps more dust, then it dries faster, and the spiral continues.
On roofs, use a gravel or paver border that is wide enough to stop grit from blasting directly into the moss during storms. That border also gives you a place to step, which prevents accidental compression that flattens microtopography in random patches.
On walls, avoid hard ledges that collect sediment and then dump it in a line during the first rain. A small drip edge or a textured transition strip can break that sheet flow and reduce the dirty streak that kills moss beneath.
At drain inlets, plan for a sacrificial zone where roughness and dust deposition will be highest. I would rather lose a 10 cm band near a drain than watch the whole panel fail because the drain zone turned into a salt pan.
Transitions between moss and bare substrate need a stable boundary, because creeping dieback often starts where moisture gradients are steep. A thin strip of inert mesh or a shallow recess can hold the edge down without smothering it.
If you are mixing species, put the more dust tolerant, rough forming mosses in the zones that will get dirty anyway. Put smoother, cleaner looking mats where people will stare at them up close, like entry walls and bench planters.
Using texture intentionally in climate-focused layouts
If your goal is cooling, you should design texture like you design shade cloth, with placement and exposure in mind. A rough canopy in the wrong spot can dry too fast to cool, while a moderate rough canopy in a misted corridor can stay active for hours.
In hot, windy sites, I like a patchwork where smoother mats sit on the most exposed ridges and rougher mats sit in slightly sheltered pockets. That arrangement reduces extreme drying while still giving you areas with strong moss surface roughness cooling when water is available.
For passive cooling on roofs, pair roughness with water timing, because evaporation is the engine. A short mist cycle before peak sun can make a pebbly canopy cooler than a smooth one, but the same canopy can run hotter if it dries out and turns into a dark, dusty crust.
For air quality goals, roughness can increase dust deposition where you want capture, like away from drains and away from high salt splash. You then need a rinse path, because captured dust has to leave the system eventually or it will seal the surface.
On walls near pedestrian level, avoid extreme tufting because it becomes a lint trap for urban debris. A lower relief canopy still catches fine particles, but it is easier to rinse and it stays visually even.
Think about microtopography at the module scale too, because seams and panel joints create their own roughness. If a seam sits where runoff concentrates, it will collect dust and dry as a hard line, and that line often spreads into the panel.
Conclusion
Surface roughness is the quiet driver behind why one moss canopy cools well, another dries in patches, and a third turns into a dirty crust. When you track microtopography and dust deposition together, the behavior stops looking random and starts looking predictable.
I treat texture as a design input, not a side effect, because it controls airflow and water storage at the millimeter scale. If you pick the right roughness for the site, you get better moss surface roughness cooling, fewer dry scars, and less cleaning drama.
The best practice is boring but effective: measure roughness the same way every time, map your dirty zones, and tune watering to keep evaporation working when heat hits. Moss rewards that kind of attention, and it punishes guesswork fast.


