Moss propagation looks simple until your tray starts doing weird stuff like browning, fuzzing, or sliding off the surface overnight. This guide is for moss propagation troubleshooting when you want clear causes and fixes, not vague advice.
Most failures come down to three levers you control every day: light, moisture, and airflow. When one is out of range, you see symptoms like moss turning brown, moss not attaching, or classic moss mold problems.
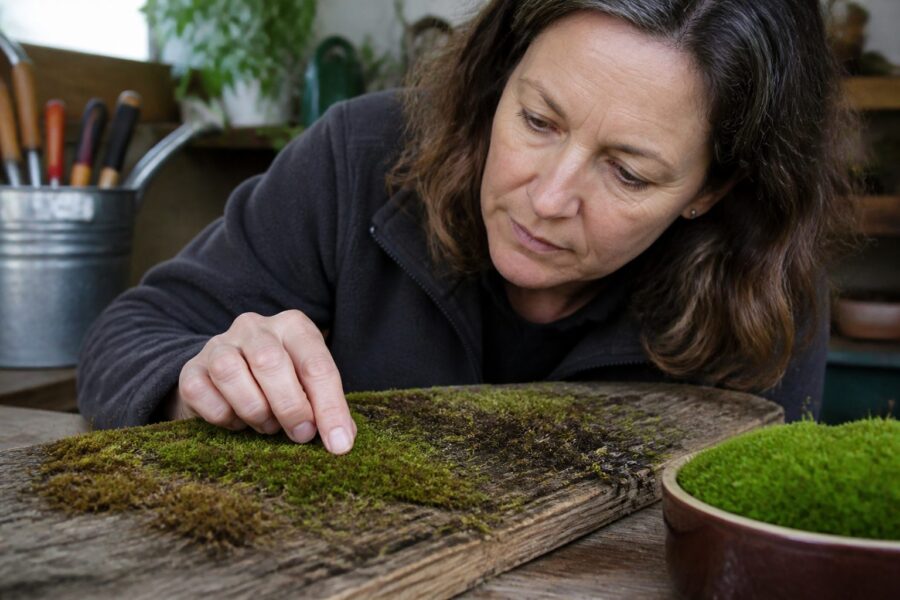
I grow moss in shallow trays, on stone, and on urban walls, and the same patterns repeat across all of them. The trick is learning which symptom points to which lever, so you change one thing instead of ten.
A quick diagnostic flow: what to check first
Start with the boring check: pick up the tray and smell it. A clean, earthy smell usually means you are dealing with light or moisture timing, while a sour or swampy smell points to stagnant water and low airflow.
Next, look at where the problem starts, because location is a clue. If damage begins at the highest points, light and drying are likely, but if it starts in low corners, waterlogging is the usual culprit.
Touch the surface gently with a fingertip and pay attention to what comes off. If green dust or strands lift easily, your moss is not attaching yet, but if the whole mat squishes, you have rot starting.
Check your light distance and schedule before you change anything else. A cheap timer and a consistent photoperiod fix more moss propagation troubleshooting cases than any fertilizer or additive.
Finally, audit how you water, not how often you water. A heavy soak that leaves puddles causes different problems than a fine mist done twice daily, even if the total water used is similar.

Browning and bleaching: separating light stress from dryness
When moss turning brown happens fast, especially with pale tips, suspect light stress before you blame water. LEDs placed too close can bleach moss in a day, and the tray can still feel damp underneath.
Dryness browning looks different, because it starts as a dull, crispy texture and spreads from the thinnest areas. You can often revive dry-stressed moss with steady misting over a week, while bleached tissue usually stays pale.
Look for a pattern that matches your light footprint. If the center under the brightest zone is paling while edges stay greener, raise the light or reduce intensity instead of watering more.
Urban indoor setups often have the opposite issue, which is too little light plus uneven drying. In that case the moss browns in patches that match airflow from a vent, and the fix is shielding drafts and watering earlier in the day.
If you are using collected sidewalk or roof moss, expect a color shift during the first two weeks. Acclimation browning is common, but it should stabilize once you match the original conditions, like shaded light and frequent dew-like misting.
I avoid “rescue soaks” for browning, because they swing conditions too hard. Instead, I mist lightly, cover loosely for a day, then uncover to keep gas exchange moving.
Blackening and mushiness: fixing waterlogging and low airflow
Blackening with a soft, collapsing texture usually means the moss stayed wet with no oxygen. This is the classic tray failure where you think you are being careful, but the bottom layer never dries at all.
Low airflow is the silent partner in this problem, especially under tight lids or plastic wrap. Moss can handle high humidity, but it cannot handle stale humidity that never refreshes.
Fix the environment first, because trimming mushy tissue alone does not stop the cause. Crack the lid, add a small fan across the room, and stop misting until the surface goes from glossy to just damp.
Then deal with the substrate, because waterlogged soil mixes keep feeding the rot cycle. If you used potting soil, expect trouble, and switch to inert options like lava rock fines, akadama, or a thin layer of screened sand.
When only a corner is black, isolate it and remove it with tweezers so it does not spread. Rot can move through a tray like a wet paper towel, and you want to create a dry break line.
After conditions improve, new growth often returns as tiny bright green points. That regrowth is your signal to resume light misting, not a signal to flood the tray again.
Moss won’t attach: improving contact, texture, and stability
If moss not attaching is your main issue, assume the fragments are moving, even if you cannot see it. A tiny shift from misting, pets, or vibration breaks rhizoids before they can grab.
Attachment needs two things at the same time: consistent moisture at the contact point and a surface with micro texture. Smooth glazed ceramic, sealed concrete, and polished stone fight you unless you rough them up first.
| Symptom | Likely cause | Fix that works |
|---|---|---|
| Fragments slide when misted | Surface too smooth or slope too steep | Roughen with sandpaper, add a shallow lip or frame |
| Green but lifts like a carpet | Contact points drying between sprays | More frequent fine mist, reduce fan speed, add light shade |
| Only the top stays green | Thick layer prevents contact | Press thinly, remove excess, use a mesh to hold |
| Edges attach but center floats | Puddling under the mat | Improve drainage, use thinner substrate layer, tilt tray slightly |
Patchy growth: why edges fail first and how to prevent it
Patchy trays usually fail at the edges first, and it is not bad luck. Edges dry faster because they have more exposure to airflow and heat from the tray rim, especially in shallow plastic flats.
Edges also get the worst water quality buildup. Minerals and salts collect where water evaporates, and that crust can trigger moss turning brown even when the center looks fine.
To prevent edge failure, water like dew instead of rain. A fine mister aimed upward so droplets fall softly keeps fragments in place and reduces the hard drying line at the border.
Create a buffer zone if you are growing a show surface for a terrarium or wall panel. I leave a one inch perimeter of bare substrate or sacrificial moss so the display area stays uniform.
Light falloff can also cause patchiness, but it tends to show as one side staying thin. Rotate the tray every few days, because indoor lights are rarely as even as we pretend they are.
If the patchiness follows your hand, it can be mechanical damage from pressing too hard. Moss likes firm contact, but mashing it into paste often slows recovery and invites moss mold problems.
Mold and fuzz: correcting humidity and cleaning safely
Moss mold problems show up as white fuzz, gray webbing, or a sour smell, and they usually start on dead bits. Mold is a signal that your humidity is high while airflow is low, or that you have too much organic debris mixed in.
Before you reach for chemicals, decide whether the mold is actually harming the moss. A tiny fuzz patch on old stems is common and often disappears once you dry the surface slightly and refresh air.
- Open the lid for 30 to 60 minutes twice daily
- Remove dead brown fragments with tweezers
- Mist less, but mist more evenly
- Top dress with a thin layer of rinsed sand
- Spot treat with 3% hydrogen peroxide on a cotton swab
- Switch to distilled or rainwater for a week
Algae takeover: reducing nutrients and adjusting light and moisture
Algae shows up as slick green film, shiny threads, or a swampy sheen that coats everything. If algae is winning, your system has too much nutrient availability, too much constant moisture, or both.
The most common trigger is using potting soil, compost, or any “plant food” mindset. Moss does not want fertilizer in propagation trays, and algae loves it.
Light can make algae worse when the surface stays wet all day. Strong light plus wet substrate is algae heaven, so shorten the photoperiod slightly and let the surface dry to matte between mists.
Scraping algae off with a spoon works, but you need to fix the cause or it returns in a week. I usually remove the top few millimeters of substrate and replace it with rinsed sand or crushed lava to cut nutrients.
Water choice matters more than people admit in urban settings. Hard tap water can feed algae and leaves crust on moss, so distilled water often improves both algae pressure and moss not attaching issues.
If algae is only on bare spots, that is good news because you can cover those spots with fresh fragments. Moss establishes faster on clean mineral grit than on a slimy film, so clean first and patch second.
Pests and hitchhikers: what you might see and how to respond
Wild moss brings company, and most of it is harmless. Springtails, tiny mites, and small isopods often show up, and they usually eat fungus and decaying bits rather than healthy moss.
Fungus gnats are the one I take seriously indoors. They breed in wet organic substrate, so if you see gnats, that is a sign you need a drier surface cycle and a more mineral base.
Snails and slugs can arrive as eggs tucked into clumps, especially from shaded garden stone. If you see clean rasped trails or missing tips overnight, isolate the tray and hand remove offenders after dark.
Aphids are rare on moss, but they can colonize nearby plants and wander. I keep moss trays away from houseplants, because mixed humidity zones often create moss mold problems and pest crossover.
For most hitchhikers, your best control is environmental. Strong airflow, a surface that dries slightly between mists, and removing decaying material keeps the ecosystem from tipping into infestation.
If you must treat, avoid broad insecticides that linger on surfaces. A rinse, a short quarantine, and sticky traps for flying adults usually solve the problem without poisoning your micro habitat.
Slow growth: realistic timelines and what actually speeds things up
Slow growth is normal, and a lot of moss propagation troubleshooting is really impatience. Many common urban mosses take four to eight weeks to look like they did anything, even when they are healthy.
Set your expectations by species and by method. Sheet moss transplanted as intact mats recovers faster than blended slurry, and acrocarp clumps often take longer to knit together than pleurocarp creepers.
Consistent moisture cycles speed growth more than higher humidity. I aim for damp most of the day, then a short dry down window, because constant saturation slows respiration and invites blackening.
Light helps, but only up to the point where you trigger bleaching. If your moss is deep green but slow, increase light gradually by raising photoperiod 30 minutes per week instead of blasting intensity.
Clean water is the underrated accelerator. Distilled or rainwater reduces mineral crust, and that alone can turn a stalled tray into steady tip growth within two weeks.
Skip fertilizer, because it tends to feed algae and cause moss mold problems long before it helps moss. If you want a “boost,” use better contact pressure, better texture, and better timing, because those are real levers.
A reset plan: how to restart a failing tray without losing everything
When a tray is failing, I reset it in stages so I do not destroy what is still alive. The goal is to keep the healthiest patches, remove the rot sources, and rebuild conditions that support attachment.
First, stop watering for 24 to 48 hours and increase ventilation, because you need the surface to firm up. This pause makes it easier to lift bad sections without smearing decay across the tray.
Second, harvest the best moss into a clean container and rinse it gently in distilled water. I pick out brown mushy bits by hand, because leaving them behind guarantees recurring moss mold problems.
Third, replace or sterilize the base, especially if it is organic. A thin mineral layer on a rigid tray, with a slight tilt for drainage, fixes many cases of blackening and moss not attaching at the same time.
Fourth, reapply in a thin, pressed layer and lock it down for stability. Mesh, window screen offcuts, or a few flat stones can hold fragments still until rhizoids grab the texture.
Fifth, restart with conservative misting and a lid that is cracked, not sealed. I would rather mist twice daily for a week than soak once and spend a month doing moss propagation troubleshooting again.
Conclusion
The fastest way to fix propagation problems is to treat symptoms as clues, not as separate disasters. Browning points you to light and drying patterns, blackening points you to oxygen and drainage, and fuzz points you to stale humidity.
If you keep notes for two weeks, you will start predicting issues before they spread. That is when moss propagation troubleshooting turns into routine maintenance, and your trays stop surprising you.
Most moss failures are reversible if you respond early and change one variable at a time. When you see moss turning brown, moss not attaching, or recurring moss mold problems, fix the environment first and the moss usually follows.

