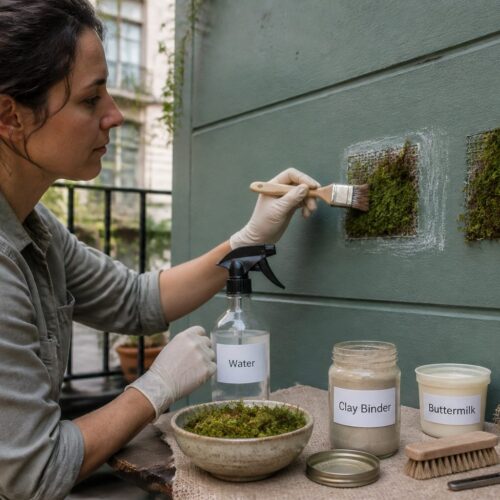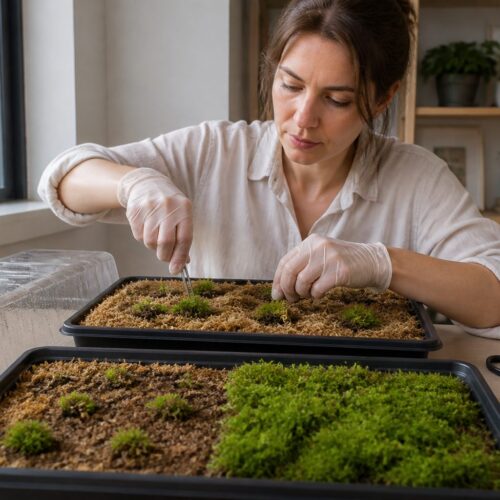

Embarking on a moss propagation project can feel like a patient experiment, where the initial effort often involves more hope than visible progress. You mix your slurry, prepare your substrate, and then the waiting game begins, leaving you wondering if anything is actually happening beneath the surface. Understanding the typical moss propagation timeline and how to effectively measure your progress is key to turning those initial hopes into tangible success.
Tracking moss growth isn’t always as straightforward as measuring a rapidly growing plant; mosses operate on a different scale and pace. This guide will walk you through what to expect at various stages, from the first subtle signs of life to full establishment, helping you gauge your moss propagation success rate tracking. We will cover practical methods for assessing coverage, the importance of consistent photography, and how to troubleshoot common issues that might hinder your urban moss cultivation efforts.
By systematically monitoring your batches, you gain valuable insights into which methods work best for different moss species and environments. This structured approach helps you refine your techniques, ensuring better outcomes in future projects and a more robust understanding of moss establishment rate. Let’s make sure your efforts are rewarded with lush, green carpets rather than patchy disappointments.
What ‘Success’ Looks Like at 2, 4, 8, and 12 Weeks
The definition of “success” in moss propagation evolves significantly as weeks turn into months, reflecting the gradual nature of bryophyte growth. In the initial stages, your expectations should be tempered, focusing on survival and the very first hints of new life rather than expansive coverage. Patience is indeed a virtue when cultivating moss, as immediate visual gratification is rarely part of the process.
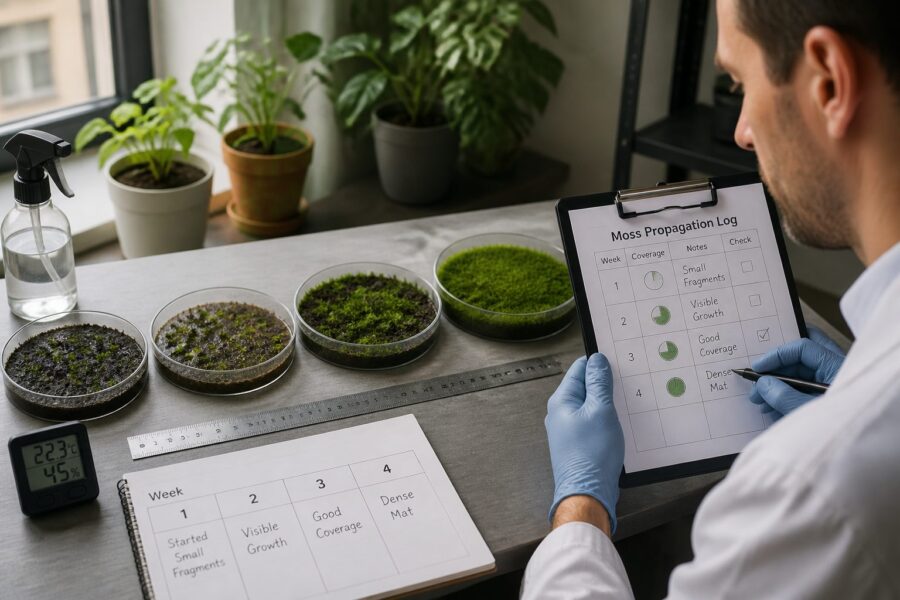
At the two-week mark, don’t expect a sudden green carpet; instead, look for the absence of decay and perhaps a slight greening or fuzziness on the substrate. This early stage is primarily about ensuring your moss fragments have settled and are not rotting, which is a common initial setback. You might see tiny, almost imperceptible sprouts, known as protonemata, if you look very closely with a magnifying glass.
By four weeks, you should observe more distinct signs of life, often appearing as a fine green film or a scattering of tiny, pin-prick sized moss plants. This is where the moss propagation timeline starts to show real promise, indicating that your environmental conditions are largely favorable for establishment. The greening should be more uniform and spread slightly beyond the original fragments, suggesting active growth.
Reaching eight weeks marks a more substantial milestone; you should now see small, identifiable moss colonies forming, with individual plants becoming visible to the naked eye. The coverage will still be patchy, but the patches themselves should be denser and more vibrant than before. This stage confirms a healthy moss establishment rate and ongoing growth, moving beyond just initial survival.
Twelve weeks is often when the true reward begins to manifest, with significant areas showing discernible moss growth and a noticeable increase in overall coverage. The patches should be expanding and starting to connect, forming a more continuous layer across your chosen substrate. This period represents a strong indicator of long-term success, as the moss has firmly established itself and is actively colonizing new territory.
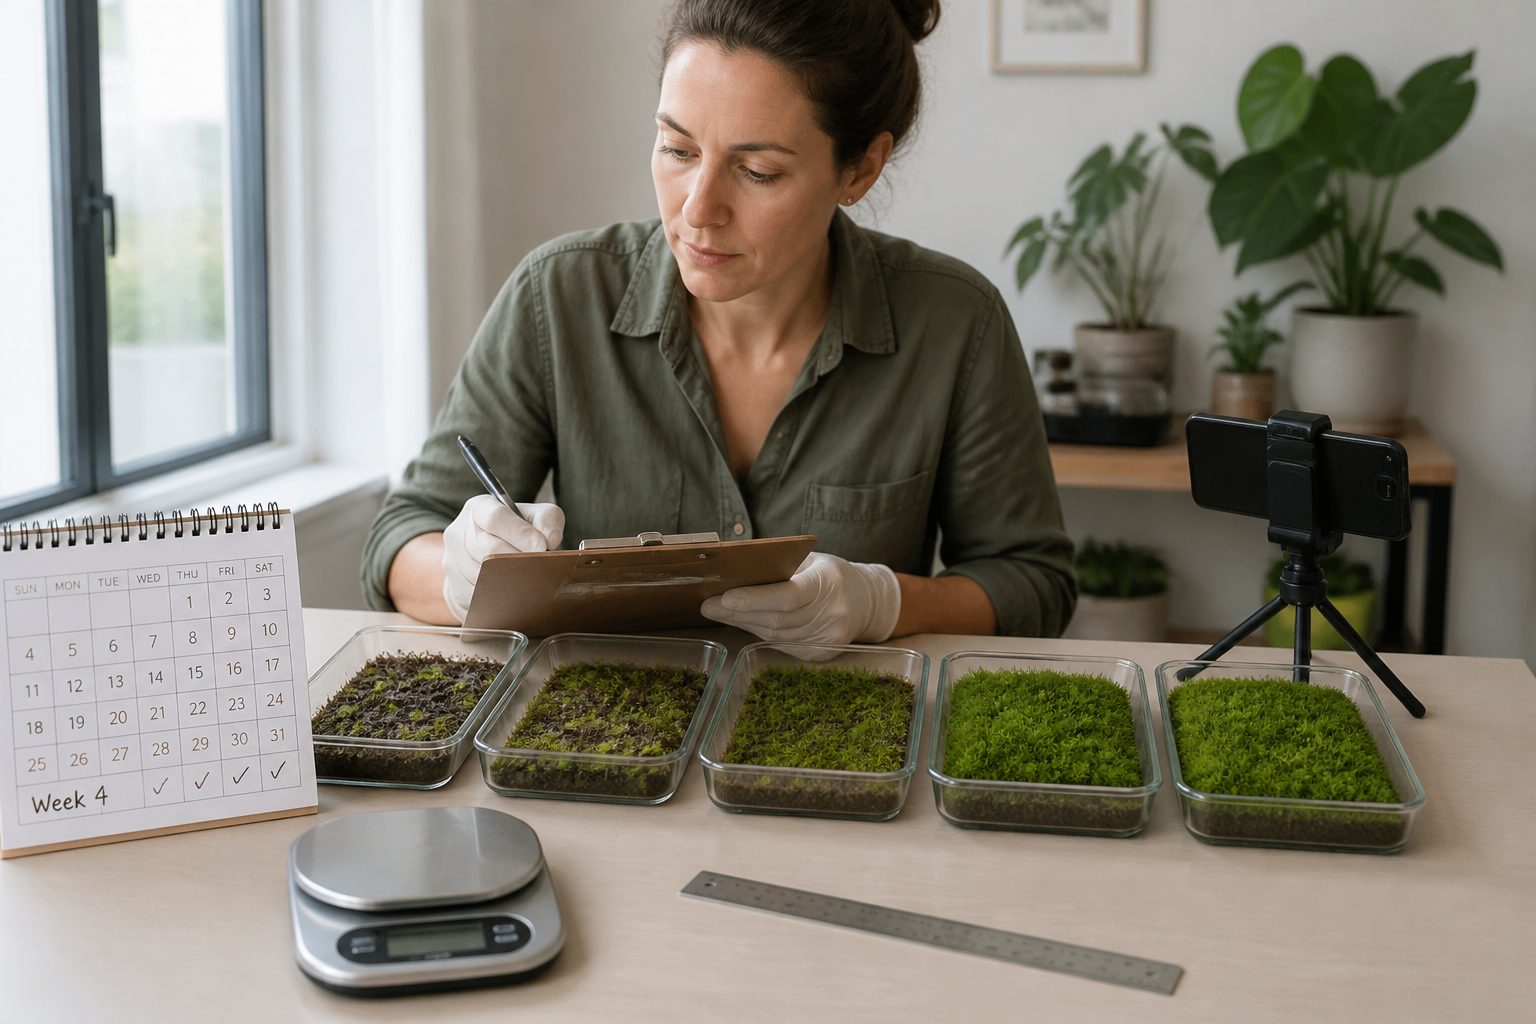
Beyond twelve weeks, the moss will continue to grow and thicken, steadily filling in any remaining gaps and deepening its green color. Your tracking moss growth efforts will shift from observing initial establishment to monitoring the health and density of the developing mat. Consistent moisture and appropriate light remain crucial for this ongoing maturation and expansion.
Each milestone provides a critical checkpoint for your moss propagation success rate tracking, allowing you to make timely adjustments to your care routine. Don’t get discouraged if progress seems slow; mosses have their own pace, and consistent, gentle care usually pays off. Observing these incremental changes helps you understand the natural rhythm of bryophyte cultivation.
How to Measure Coverage Without Specialized Equipment
Accurately measuring moss coverage doesn’t require expensive scientific tools; you can achieve reliable data with simple household items and a bit of ingenuity. The goal is to establish a consistent, repeatable method that allows you to compare progress over time, giving you a clear picture of your moss propagation success rate tracking. This low-tech approach makes monitoring accessible for any enthusiast.
One effective method involves using a grid system, which you can create by placing a clear plastic sheet marked with a grid over your moss propagation area. Use a permanent marker to draw 1-inch or 2-cm squares on the sheet, providing a uniform reference for visual assessment. This grid allows you to quantify the percentage of squares covered by moss at different intervals.
At each measurement interval, count the number of squares that have at least 50% moss coverage and divide that by the total number of squares in your grid. This gives you a percentage coverage score, offering a numerical value for tracking moss growth. Record this percentage along with the date, providing a quantitative record of your moss propagation timeline.
Another practical technique is to use a fixed frame, perhaps made from cardboard or PVC pipe, that outlines a specific area of your propagation project. By consistently evaluating the same area, you minimize variables and gain a more accurate understanding of the moss establishment rate. This method is particularly useful for larger, outdoor installations where a full grid might be impractical.
For smaller containers or trays, you can simply divide the surface into imaginary quadrants and visually estimate the percentage of each quadrant covered. While less precise than a physical grid, this method still provides a useful relative measure of growth if applied consistently. The key is to be as objective as possible each time you make an assessment.
Remember to always measure at the same time of day and under similar lighting conditions to avoid skewed results. Inconsistent lighting can make moss appear denser or sparser than it truly is, affecting your visual judgment. A simple notebook and pencil are all you need to keep detailed records of your observations and measurements.
By adopting one of these straightforward measurement techniques, you transform qualitative observations into actionable data, empowering you to make informed decisions about your propagation efforts. Regular, systematic tracking helps you identify trends and respond effectively to the needs of your growing moss. This dedication improves your overall success.
Photographing Progress: Angles and Lighting That Show Real Change
Visual documentation is an invaluable component of moss propagation success rate tracking, offering a clear and undeniable record of growth over time. Consistent photography helps you perceive subtle changes that might be missed during casual observation, providing a powerful tool for your moss propagation timeline. It allows for direct comparison and analysis of your methods.
To ensure your photos accurately reflect actual progress, consistency in camera angle, distance, and lighting is absolutely critical. Set up a dedicated “photo station” where you can place your moss project in the exact same spot for each picture. Mark the camera’s position on the floor or table to maintain consistent distance and height, ensuring every shot is comparable.
| Aspect | Recommendation for Consistency | Why It Matters |
|---|---|---|
| Camera Angle | Fixed overhead (90°) or consistent 45° side angle | Eliminates perspective distortion, shows true coverage |
| Distance | Use a tripod or marked spot for consistent lens-to-subject distance | Maintains scale, ensures comparable detail in tracking moss growth |
| Lighting | Indirect natural light (north-facing window) or consistent artificial light source | Prevents shadows, glare, and color shifts that obscure detail |
| Background | Plain, neutral background (e.g., white or black poster board) | Reduces distractions, makes moss stand out clearly |
| Focus | Ensure the entire moss area is in sharp focus, especially edges | Captures fine details of new growth and establishment |
| Reference Object | Include a coin or ruler for scale in at least one corner | Provides an objective measure of size and expansion |
Common Causes of Stalled or Failed Batches
Even with meticulous planning, moss propagation can sometimes stall or fail entirely, leaving growers frustrated and confused. Understanding the most common pitfalls helps you troubleshoot problems effectively and improve your moss propagation success rate tracking. Many issues stem from environmental factors or incorrect preparation.
One of the primary culprits is insufficient or inconsistent moisture, as mosses are poikilohydric organisms that directly absorb water from their environment. If the substrate dries out too frequently or for too long, the delicate protonemata and young gametophytes will desiccate and die. Regular, gentle misting or a self-watering system is crucial for maintaining the high humidity moss needs to thrive.
Conversely, overwatering can also lead to failure, particularly if the substrate remains waterlogged without proper drainage. Standing water creates anaerobic conditions that suffocate moss and encourage the growth of harmful molds, fungi, or algae, which outcompete the moss. Ensure your containers have drainage holes and use a well-draining substrate to prevent this issue.
Incorrect light levels are another frequent problem; too much direct sunlight can scorch delicate moss, while too little light inhibits photosynthesis and growth. Moss generally prefers indirect light or partial shade, mimicking its natural forest floor habitat. Experiment with different locations to find the sweet spot that encourages robust tracking moss growth without stress.
The quality and type of substrate also play a significant role in the moss establishment rate. Using soil that is too rich in nutrients or contains competing plant seeds can hinder moss growth. Mosses prefer lean, acidic substrates like finely crushed brick, sand, peat, or non-chlorinated soil, which provide physical support without excessive competition.
Contamination from weeds, fungi, or pests can quickly derail a propagation project. Ensure your substrate is sterilized or free of undesirable organisms before you begin. Regularly inspect your batch for any signs of mold or foreign plant growth, removing them promptly to protect your delicate mosslings.
Finally, the quality of your source moss can impact success; using unhealthy, dried-out, or diseased moss fragments will naturally yield poor results. Always select vibrant, healthy moss for propagation, ensuring it has good turgor and a strong green color. Freshly collected moss generally has the highest viability for successful propagation efforts.
Comparing Results Across Species and Substrates
Not all mosses are created equal, and their propagation success rates vary dramatically depending on the species and the substrate they are grown on. Systematically comparing your results across different moss types and growing mediums provides invaluable data for optimizing your urban moss cultivation practices. This comparative approach helps you understand the specific needs of each bryophyte.
Some moss species, like various types of carpet moss (e.g., Hypnum curvifolium or Thuidium delicatulum), are known for their relatively vigorous growth and adaptability, often showing a faster moss propagation timeline. Others, such as cushion mosses (e.g., Leucobryum glaucum), may take considerably longer to establish and spread, requiring more patience and specific conditions. Always identify your moss species if possible to set realistic expectations for its growth rate.
The substrate you choose is another critical variable impacting your moss establishment rate. Mosses generally prefer acidic conditions and a substrate that retains moisture without becoming waterlogged. Common substrates include crushed terracotta, non-chlorinated soil, sand, peat moss, or even a blend of these materials, each offering different properties.
For example, some mosses thrive on mineral-rich substrates like crushed granite or concrete, while others prefer organic matter such as decaying wood or peat. Tracking moss growth on different substrates allows you to identify the optimal growing medium for your specific local mosses. Keeping detailed notes on substrate composition for each batch is essential for meaningful comparisons.
When comparing results, consider factors like the initial density of your moss slurry or fragments, the amount of light each batch receives, and the ambient humidity. Even slight variations in these environmental controls can significantly influence your moss propagation success rate tracking. Strive for consistency in all other variables when testing different species or substrates.
You might find that a certain species establishes quickly on a brick substrate but struggles on a soil-based one, or vice versa. This empirical evidence helps you tailor your methods, avoiding a one-size-fits-all approach to moss cultivation. Documenting these differences allows you to build a personal knowledge base of effective techniques.
By conducting small-scale experiments, perhaps with multiple trays each featuring a different species or substrate, you can quickly gather comparative data. This systematic testing accelerates your learning process, leading to more successful and efficient propagation efforts in the long run. Embrace the scientific method to unlock the secrets of your specific mosses.
Adjusting Your Method Based on What the Data Shows
The real value of diligent moss propagation success rate tracking lies in its ability to inform and guide your adjustments, turning observations into actionable improvements. Without data, you are simply guessing, but with consistent records, you can pinpoint exactly what needs to change. This iterative process is how you achieve mastery in urban moss cultivation.
If your moss propagation timeline shows slow progress, or if certain batches are failing, your recorded data provides the clues needed to diagnose the issue. Look for patterns in your measurements, such as consistently low coverage percentages or patchy growth in specific conditions. These patterns often point directly to environmental factors or methodological flaws.
- Increase misting frequency if desiccation is evident
- Improve drainage if mold or rot appears
- Adjust light exposure if moss is yellowing or scorching
- Test different substrate pH levels for optimal growth
- Refine slurry consistency for better initial adhesion
- Introduce a humidity dome for consistent moisture
- Sterilize substrate to prevent competition
- Experiment with different collection times for source moss
- Add a small fan for air circulation to prevent fungal growth
When to Declare a Batch a Failure and Start Over
Knowing when to cut your losses and start a new batch is an important, though sometimes difficult, part of the moss propagation journey. Holding onto a clearly failing project can tie up resources and prevent you from moving on to more promising attempts. Establishing clear criteria for declaring a batch a failure saves time and reduces frustration in your moss propagation success rate tracking.
If, after four to six weeks, you observe no visible signs of greening, growth, or establishment, it is a strong indicator that the batch has likely failed. While moss can be slow, a complete absence of any progress within this timeframe usually means the initial fragments did not take. This lack of initial response suggests fundamental problems with your environmental conditions or source material.
Another clear sign of failure is widespread decay, mold, or fungal growth overtaking the substrate. If large sections of your moss fragments turn brown, black, or slimy, and fuzzy molds appear, the conditions are likely too wet, too poor in air circulation, or the moss was unhealthy to begin with. These issues are difficult to reverse once they become extensive, making a fresh start more efficient.
If your tracking moss growth data consistently shows a decline in coverage or vitality over several consecutive weeks, despite your best efforts to adjust conditions, it may be time to reassess. Sometimes, the initial conditions were so far off that the moss simply cannot recover, even with subsequent improvements. Recognize when a batch has gone past the point of no return.
Consider the resources you are dedicating to a struggling batch; if you are spending excessive time and effort trying to revive a project with minimal returns, that energy could be better spent on a new, more promising attempt. Your moss propagation timeline for that specific batch has essentially ended without success. Learning from the failure is the most important step.
Before you discard a failed batch, take a moment to analyze what went wrong, referring back to your detailed records and comparing them to successful batches or common failure points. Document your observations about the failure, noting any unusual smells, textures, or colors. This critical reflection informs your next attempt, turning failure into a valuable learning experience.
Finally, don’t be afraid to experiment with a completely different approach for your next batch if previous methods have consistently failed. This might involve trying a new species, a different substrate, or a drastically altered light and moisture regime. Sometimes, a fresh perspective and a clean slate are exactly what’s needed to achieve a higher moss establishment rate in your next project.
Conclusion
Cultivating moss is a rewarding endeavor that teaches patience and observation, turning humble bryophytes into miniature landscapes. Achieving consistent moss propagation success rate tracking relies heavily on your ability to monitor, document, and adapt your methods with precision. By understanding the typical growth timeline and how to measure progress, you transform guesswork into an informed practice.
From the subtle greening at two weeks to the expansive mat at twelve, each stage offers valuable insights into the health and vitality of your propagating moss. Using simple grid systems and consistent photography provides the objective data you need to assess your moss establishment rate. This systematic approach allows you to identify what works and what doesn’t, guiding your future actions.
Remember that failures are not setbacks but opportunities to learn; every stalled batch or mold outbreak offers a lesson in environmental control and species-specific needs. By comparing results across different species and substrates, you develop a nuanced understanding of urban moss cultivation. Continue to refine your techniques, apply your observations, and enjoy the satisfaction of watching your green projects flourish.
Embrace the journey of tracking moss growth, understanding that each misting, each photograph, and each recorded measurement contributes to your growing expertise. Your dedication to careful monitoring will undoubtedly lead to more vibrant, successful moss gardens. The natural world rewards those who observe its rhythms with care.