
Growing moss from small fragments or spores can feel like a frustrating challenge, especially in dry indoor environments. These ancient plants thrive on consistent moisture, a condition often hard to maintain with open trays or occasional misting. Building a dedicated moss propagation humidity box DIY style solves this problem by creating a microclimate where your moss can flourish.
A well-designed DIY moss humidity chamber gives your bryophytes the stable, damp conditions they need to spread and establish themselves. This method removes the guesswork from daily watering and protects delicate new growth from fluctuating household humidity. You can turn small scraps into lush patches with surprisingly little effort once you understand the basic principles.
This guide will walk you through constructing a low-cost, effective propagation box for moss that keeps things moist without constant attention. We will cover everything from material selection to fine-tuning the internal environment, ensuring your moss propagation humidity box DIY project is a resounding success.
Why an Enclosed Humidity Box Speeds Up Establishment
Mosses lack true roots, relying instead on tiny rhizoids to anchor them and absorb water directly through their leaves. This makes them incredibly susceptible to drying out, which halts their growth and can quickly lead to their demise. An enclosed humidity box provides the high, stable moisture levels these plants crave, mimicking their natural damp habitats.
When you place moss fragments inside a sealed or semi-sealed container, the air inside quickly saturates with water vapor. This constant humidity means the moss cells are always hydrated, allowing them to focus energy on growing new gametophytes and spreading across the substrate. It removes the stress of desiccation, which is a major hurdle for new moss colonies.
The consistent moisture also encourages the development of a healthy microbial community within the substrate, which is beneficial for moss growth. These microscopic organisms help break down organic matter and make nutrients available to the moss, creating a balanced ecosystem. A closed environment prevents rapid evaporation, keeping this delicate balance intact.
Without a humidity box, you would need to mist your moss several times a day to achieve similar moisture levels, which is impractical for most people. The enclosed chamber does the work for you, maintaining optimal conditions for extended periods. This hands-off approach makes moss propagation much more accessible and less time-consuming.
Furthermore, a DIY moss humidity chamber protects young moss from common household pests and airborne contaminants. Dust, pet hair, and even certain fungi can inhibit delicate moss growth, but the physical barrier of the box keeps these elements at bay. This protective environment gives your moss a head start without external interference.
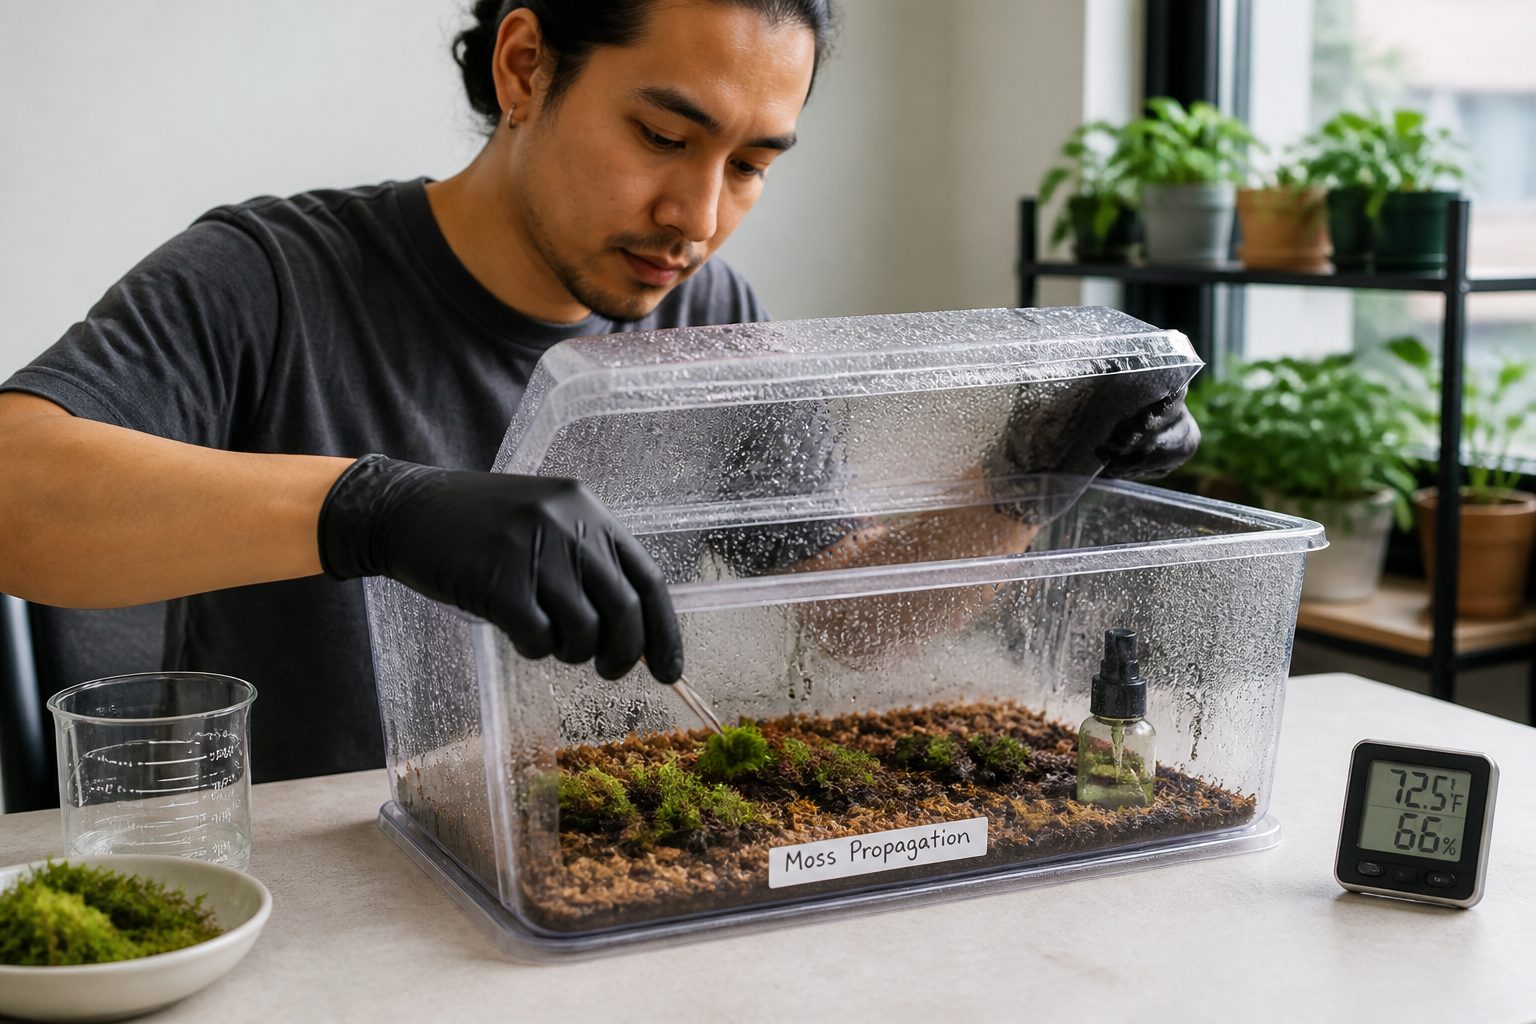
The stable temperature and humidity inside a propagation box for moss also reduce the shock of transplanting. Moss fragments often struggle to adapt to new environments, but a controlled setting minimizes this stress. You are essentially giving them a spa treatment to help them settle in and thrive.
Materials You Need and Where to Find Them Cheaply
Building an effective moss propagation humidity box DIY style does not require expensive or specialized equipment. You can assemble a robust and functional enclosure using common household items and inexpensive supplies from hardware stores or even dollar stores. Thinking creatively about repurposing materials will save you money.
The key is to find materials that are transparent for light, non-toxic, and capable of holding moisture effectively. Many suitable items might already be lying around your home, waiting for a new purpose. This approach is both economical and environmentally friendly, reducing waste while supporting your moss growing hobby.
| Material Item | Purpose | Cheap Source |
|---|---|---|
| Clear Plastic Storage Container (with lid) | Main enclosure, holds humidity | Dollar store, discount retailers, recycling bin |
| Small Plastic Tray or Lid | Base for substrate, water reservoir | Takeaway food containers, pot saucers, old Tupperware |
| Mesh Screen (optional) | Separates substrate from water | Window screen scraps, plastic craft mesh, hardware store |
| Small Fan (PC fan or USB fan) | Air circulation, prevents mold (optional) | Old electronics, online marketplaces, discount stores |
| Silicone Sealant or Hot Glue | Sealing gaps, securing components | Hardware store, craft store |
| Drill or Soldering Iron | Creating ventilation holes | Toolbox, borrow from a friend |
Building the Box: Size, Venting, and Base Tray Design
Choosing the right size for your DIY moss humidity chamber depends on how much moss you plan to propagate and the space you have available. A clear plastic storage container with a tight-fitting lid is ideal, ranging from shoe box size for small projects to larger tubs for more ambitious cultivation. Ensure the plastic is transparent to allow maximum light penetration, as opaque containers will limit growth.
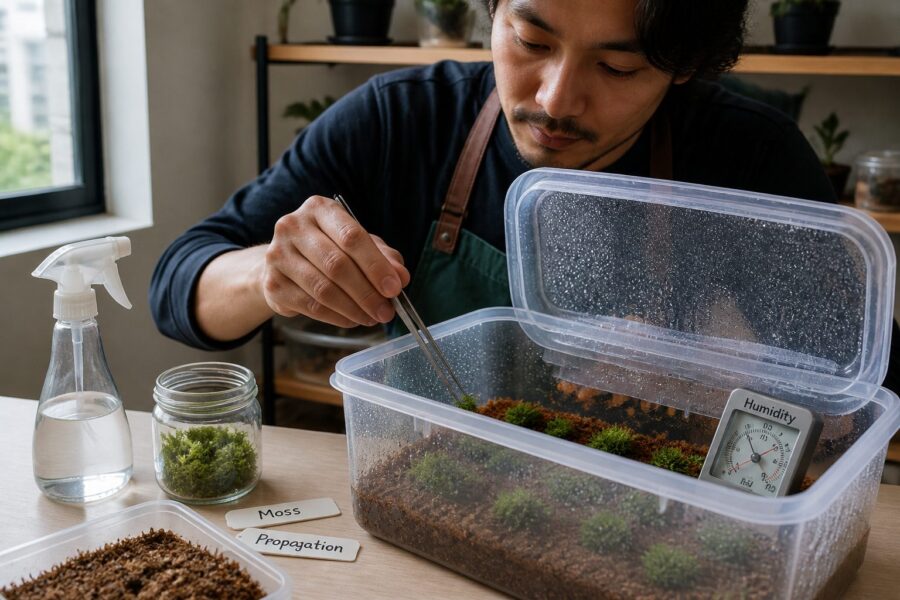
Venting is a critical aspect of your propagation box for moss, balancing high humidity with adequate air exchange to prevent mold and stagnant air. You will need to drill or melt small holes in the container, typically along the sides near the top or in the lid itself. Start with a few holes, perhaps 3-5 small ones, and you can always add more later if you notice excessive condensation or mold growth.
The base tray design is simple yet effective for maintaining a consistent water level and preventing the moss from sitting directly in water. Place a smaller, shallow plastic tray inside your main container, elevated slightly from the bottom. This creates a reservoir underneath that holds water, allowing it to evaporate and keep the air humid without waterlogging your moss.
You can elevate the inner tray by placing small plastic risers, pebbles, or even inverted bottle caps underneath it. The goal is to create a gap of at least half an inch to an inch between the bottom of the inner tray and the floor of the outer container. This space is where your water reservoir will sit, slowly releasing moisture into the air.
If you are concerned about the substrate becoming too saturated, consider adding a layer of plastic mesh on top of the base tray before adding your growing medium. This creates an additional barrier, ensuring excellent drainage and air circulation around the moss’s base. It is an extra step that can pay off in preventing water-related issues.
When creating ventilation holes, avoid making them too large or too numerous initially, as this will defeat the purpose of a humidity box. Small, evenly spaced holes allow for slow air exchange, which is exactly what you want for moss propagation. You can cover some holes with tape if you find the humidity drops too quickly, giving you precise control over the environment.
Setting Up Substrate and Placing Moss Fragments
The right substrate is fundamental for successful moss propagation in a humidity box. Mosses generally prefer acidic, nutrient-poor, and well-draining mediums that retain moisture effectively. A good mix typically includes a base of peat moss or coco coir, blended with perlite or fine gravel for drainage and aeration.
You can also use a layer of sterilized soil, especially if your goal is to grow terrestrial mosses that prefer a more earthy base. Ensure any soil used is free of pests and weed seeds by baking it in an oven at 200°F (93°C) for 30 minutes, which is a simple but effective sterilization method. This step helps prevent unwanted fungal or insect issues in your closed environment.
Once you have your chosen substrate, moisten it thoroughly until it is damp but not waterlogged, like a wrung-out sponge. Spread a layer of this prepared substrate about 1-2 inches deep into your elevated base tray within the moss propagation humidity box DIY setup. This depth provides enough material for the moss to anchor to without being excessively bulky.
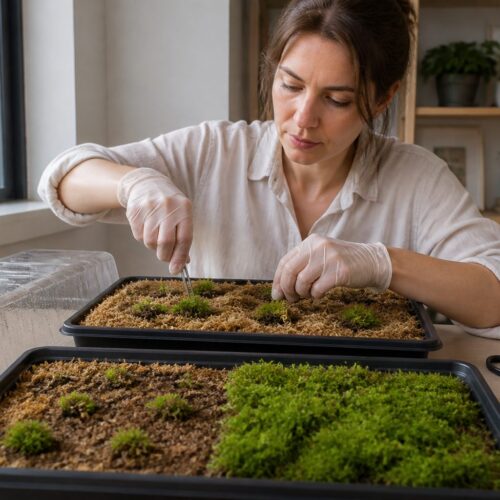
Now it is time to place your moss fragments onto the substrate. Gently tear or cut your collected moss into small pieces, roughly half an inch to an inch in size. Distribute these fragments evenly across the surface of the moistened substrate, ensuring good contact between the moss and the growing medium.
You do not need to bury the moss; simply press it down lightly to ensure it adheres to the substrate. Some people even lightly chop the moss with scissors or blend it with a little water to create a slurry, which can then be spread thinly over the surface. This method, often called “moss painting,” encourages even establishment and speeds up the colonization process.
After placing the moss fragments, give them a light misting with distilled or rainwater to settle them further and boost initial humidity. Close the lid of your DIY moss humidity chamber, and your moss is ready to begin its journey of propagation. Remember that patience is key, as moss growth can be slow but rewarding.
Controlling Humidity: Venting Schedules and Condensation Management
Maintaining optimal humidity is the core function of a propagation box for moss, but it is not a set-it-and-forget-it operation. You need to actively manage the internal environment, primarily through controlled venting and observation of condensation levels. This balance ensures high moisture without creating conditions ripe for mold or rot, which are common pitfalls in closed systems.
Excessive condensation on the lid and sides of your DIY moss humidity chamber is a clear sign that the air is oversaturated and needs more ventilation. While some condensation is normal and desirable, heavy droplets that constantly drip onto the moss can lead to waterlogging and fungal issues. A small amount of controlled airflow helps prevent these problems and promotes healthier growth.
- Open the lid briefly (5-10 minutes) every 1-2 days.
- Wipe away heavy condensation from the lid.
- Adjust vent hole size or number if needed.
- Introduce a small, slow fan for gentle air movement.
- Monitor for any signs of mold or mildew.
- Replenish the water reservoir as it evaporates.
- Observe moss health and adjust schedule accordingly.
Lighting Inside a Closed Box: What Works and What Overheats
Proper lighting is essential for moss propagation in a humidity box, as these plants still perform photosynthesis despite their humble appearance. However, the enclosed nature of the chamber means you need to be careful about the type and intensity of light you choose to avoid overheating. Excess heat can quickly cook your delicate moss and turn your humidity box into a sauna.
Mosses generally prefer indirect light or low-intensity artificial light, mimicking their natural habitats on forest floors or shaded rocks. Direct, strong sunlight is usually too intense and generates too much heat, especially when magnified by the clear plastic walls of your DIY moss humidity chamber. Position your box near a window that receives bright, indirect light, or use artificial light sources.
LED grow lights are an excellent choice for a propagation box for moss because they emit very little heat while providing the necessary spectrum for plant growth. You can use small, low-wattage LED strips or a single LED bulb positioned a foot or more above the container. This distance is important to prevent any residual heat from building up inside the sealed environment.
Fluorescent lights, particularly compact fluorescent lamps (CFLs) or T5/T8 tubes, are also viable options due to their relatively low heat output. Place these fixtures a safe distance above the box to ensure even light distribution without causing temperature spikes. Always monitor the internal temperature of your humidity box for the first few days after introducing a new light source.
Avoid incandescent bulbs entirely, as they produce significant heat that will rapidly overheat your enclosed moss environment. Even standard household LED bulbs can be too powerful if placed too close, so always opt for lower wattage and maintain a good distance. The goal is gentle illumination, not intense sun exposure.
A simple way to check for overheating is to place a small thermometer inside the moss propagation humidity box DIY setup. If the temperature consistently rises above 75°F (24°C), your light source is too strong or too close. Adjust its position or switch to a lower intensity option to protect your growing moss from thermal damage.
When to Open the Box and Harden Off Your Moss
After several weeks or months of thriving in its stable, humid environment, your moss will have established itself and grown significantly. You will notice new growth, a thicker carpet, and a generally healthier appearance, indicating that it is time to consider transitioning it out of the DIY moss humidity chamber. This process, known as hardening off, gradually acclimates the moss to lower humidity levels.
Opening the propagation box for moss too abruptly can shock the delicate plants, causing them to dry out and potentially die back. The goal is a slow, controlled reduction in humidity to allow the moss to adjust its physiology. This gradual exposure helps the moss build resilience before being fully exposed to ambient room conditions.
Begin the hardening off process by slightly propping open the lid of your moss propagation humidity box DIY setup for a few hours each day. You can use a small stick, a ruler, or even a clothespin to create a small gap, allowing more air exchange. Increase the duration of this open period gradually over a week or two.
After a week of partial opening, you can try removing the lid entirely for a few hours at a time, especially during periods of higher indoor humidity. Observe your moss closely for any signs of stress, such as browning or shriveling. If you notice these symptoms, close the lid again and slow down the hardening off process.
Once your moss seems comfortable with the lid completely off for several days, you can consider transplanting it to its final location. This might be a terrarium, a moss wall, or an outdoor garden patch, depending on the moss species and your project. Ensure the new environment still provides adequate moisture during the initial transition.
Even after hardening off, remember that moss still appreciates consistent moisture, especially during its initial days in a new spot. A light misting for the first few weeks after transplanting can help ensure its continued success. Your efforts in the humidity box will have given it a strong foundation to thrive in its permanent home.
Conclusion
Building a moss propagation humidity box DIY style is a rewarding project that vastly improves your chances of successfully cultivating these fascinating plants. By creating a stable, high-humidity environment, you give your moss fragments the perfect conditions to establish and spread. This simple enclosure takes the effort out of daily misting and protects new growth from harsh indoor conditions.
From repurposing inexpensive materials to carefully managing light and air exchange, each step in setting up your DIY moss humidity chamber contributes to its effectiveness. The beauty of this method lies in its simplicity and the impressive results it delivers, turning small scraps into lush, vibrant green carpets. Patience and observation are your best tools throughout this process.
Remember that the key to a thriving propagation box for moss is consistent moisture, balanced ventilation, and appropriate lighting. Avoid direct sunlight and excessive heat, and always monitor for signs of mold or desiccation. Small adjustments along the way ensure your moss remains healthy and happy within its cozy microclimate.
The hardening off process is just as important as the initial setup, gradually preparing your established moss for life outside the humidity box. Take your time with this transition, allowing the moss to acclimate slowly to lower humidity levels. This careful approach prevents shock and ensures long-term success for your cultivated bryophytes.
Ultimately, a homemade humidity box empowers you to grow moss with confidence, transforming small pieces into thriving colonies for terrariums, moss gardens, or other creative projects. Embrace the process, learn from your observations, and enjoy the unique satisfaction of propagating these ancient and resilient plants. Your efforts will be rewarded with beautiful, verdant displays.