Moss division propagation is the fastest way I know to turn one healthy patch into several without waiting on spores or slurry experiments. If you can keep the new pieces in close contact with a surface and keep them damp, moss usually cooperates.
Division works because moss already stores its growth points across the mat, so each chunk can restart as long as it stays alive. The trick is splitting cleanly, then managing the first two weeks when drying and lifting are most likely.
Urban growers run into extra problems like hot balcony wind, reflective concrete, and tap water that leaves mineral crust. This guide sticks to practical steps for dividing moss mats, keeping divisions moist, and speeding up the moss regrowth timeline.
What “division” means for moss and why it’s reliable
Division is simply cutting or tearing a moss mat into smaller pieces and moving them to new spots. Each piece keeps living stems and leaf tips, so it keeps photosynthesizing while it reattaches.
Moss does not need roots to make division work, it needs contact and moisture. If the underside stays damp and pressed to a surface, rhizoids form and the mat locks in.
I trust moss division propagation more than blending moss, because you keep the mat’s structure intact. A clean chunk resists drying better than a thin smear of fragments.
Division is also predictable because you can judge the donor patch before you cut it. If the donor mat is springy, green, and actively growing at the edges, the divisions usually take.
The biggest failure I see is people treating moss like a houseplant cutting and letting it sit “kind of damp.” Moss wants steady moisture at the contact zone, especially in the first week.
Another reason division is reliable is that you are not asking moss to reinvent itself in a new form, you are just relocating it. As long as you do not let it cook in sun or dry into crispy chips, it usually rebounds.
Moss also tolerates being handled more than people expect, especially when it is hydrated. You can lift, trim, and press it down without killing it, as long as you avoid grinding the leaf tips into mud.
When division fails, it is rarely mysterious, because the symptoms point to a basic issue like poor contact or repeated drying. That feedback loop is why I recommend division to beginners who want fast results without complicated setups.
Division is not instant, though, and it helps to define what “success” looks like. Success is the mat staying in place and staying green through multiple dry-down cycles, not immediate visible growth.
In most cases, the moss is already “alive” on day one, but it is stressed and adjusting to a new microclimate. The reliability comes from giving it a stable, damp interface long enough to anchor and resume normal growth.
Best candidates for division: mat-formers vs loose growers
Mat-forming mosses are the easiest for dividing moss mats because they peel up in sheets and hold together. Common urban candidates include sheet moss, many Hypnum types, and compact cushiony mats that knit into a felt.
Loose growers can still be divided, but they behave more like handfuls of stems than like a carpet. You can do it, but you will spend more time pinning, top dressing, or netting them down.
Look at the donor patch edges, because the edge tells you whether it is actively expanding. If the edge is pale, brittle, or full of debris, your moss regrowth timeline will be slower after division.
Avoid mats with a thick brown thatch layer unless you can trim it off, since that layer blocks contact. If the green layer is only on top and the underside is dusty, it tends to lift after you move it.
If you do not know the species, judge by structure instead of names. A mat that peels like felt is a better division candidate than a mat that breaks into confetti when you touch it.
I also pay attention to how the mat holds water after misting, because that tells you how forgiving it will be on a balcony. A mat that darkens evenly and stays dark for a while is easier than one that beads water and dries in minutes.
Cushion moss can be divided too, but it behaves differently than sheet types because it grows in domes and clumps. I treat cushion divisions like plugs, seating them into shallow depressions so they do not rock or roll.
Very tall, shaggy mosses can look lush but fail after division because the lower stems are already shaded and weak. If you want to use them, trim height first so the division is not trying to support a big top with a stressed base.
If your donor moss is growing on soil, it often brings a thin layer of soil with it, which can help it reattach in a tray. If it is growing on bark or stone, it may come up cleaner and need more careful seating to avoid air gaps.
One of the best signs of a good candidate is a mat that has little new tips creeping over adjacent surfaces. Those tips are already in “attachment mode,” which makes the transition after division much smoother.
If you are harvesting from the wild or from shared spaces, be selective and take only what you can keep alive. A smaller amount of high-quality, actively growing moss beats a big bag of stressed, half-dead material every time.
Timing your divisions: weather, humidity, and indoor options
Timing matters because the first days after splitting are basically a race between rehydration and drying out. Cool, cloudy weather with high humidity gives you the easiest wins for moss division propagation.
If you live in a city with harsh sun angles and hot walls, do divisions in early morning and move them into shade right away. Indoor setups work year round if you control light and keep divisions moist with a clear lid or humidity tent.
I like to plan divisions around a stretch of stable weather, because constant swings make aftercare harder than it needs to be. A windy day can undo a week of progress if it dries the edges repeatedly.
Humidity is not just a comfort factor, it is the difference between misting twice a day and misting ten times a day. If your local humidity is low, you can still succeed, but you need a tighter microclimate like a tray with a lid.
Rainy periods are great for dividing moss mats outdoors, but puddling is still a problem if water sits under the mat. I aim for damp, not submerged, because stagnant water encourages slime and weak attachment.
If you are working indoors, watch for the dry blast from heating and air conditioning vents, because it acts like constant wind. A tray that looks fine on a shelf can dry out fast if it is in the path of moving air.
Light timing matters too, because bright light increases evaporation even if the air feels cool. I prefer morning light or bright shade while divisions are settling, then gradually increase light once they are anchored.
For indoor timing, I like to start divisions when I know I will be home for a few days to monitor moisture. The first 72 hours are the easiest time to correct problems like lifting seams or dry corners.
In apartments, a bathroom with a window can be a surprisingly good moss recovery room because humidity spikes daily. You still need light, but that humid baseline makes keeping divisions moist much less stressful.
If you are dividing moss for a terrarium, you can do it any season, but you should still avoid working with bone-dry donor moss. Hydrate the donor first, then divide, then give it a calm, humid week to reattach.
| Situation | Best time window | What to adjust |
|---|---|---|
| Cool, rainy spring week outdoors | Any day, late morning to afternoon | Light shade, avoid puddling |
| Hot, dry summer balcony | Early morning or evening | Deep shade, frequent misting, wind block |
| Air conditioned apartment grow tray | Any time | Humidity dome, gentle airflow, bright indirect light |
| Winter windowsill with low humidity heat | Midday when room is warmest | Use a lid, reduce drafts, watch condensation |
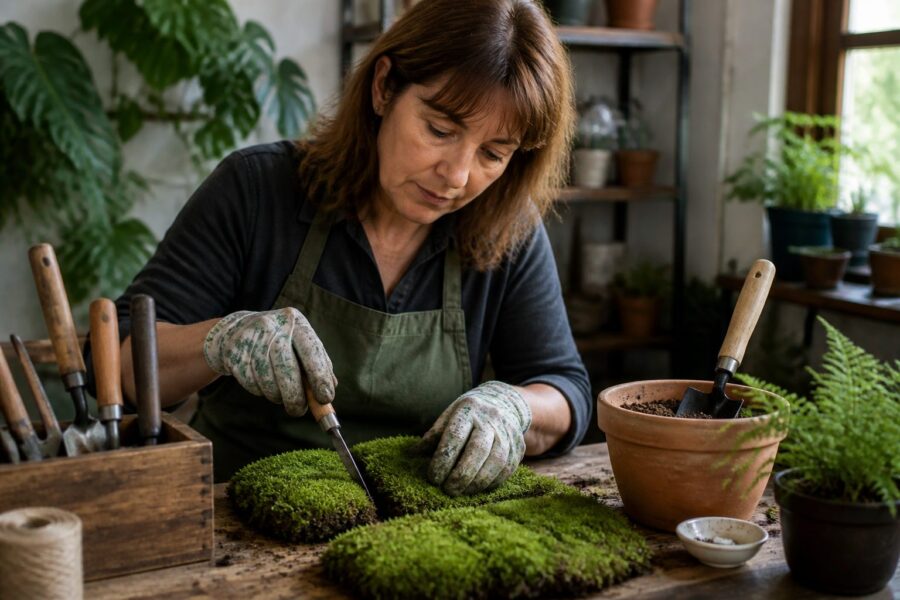
Tools and hygiene: clean cuts and contamination control
Clean tools make cleaner divisions, and cleaner divisions reattach faster. I use small scissors, a thin spatula or butter knife, and a spray bottle with clean water.
For cutting, a sharp blade beats tearing when the mat is dense and springy. For lifting, a thin spatula slides under the mat without ripping the underside into fuzz.
Hygiene matters most when you are moving moss onto sterile or semi sterile substrates like bonsai soil, akadama, or fresh coco coir. A quick wipe of blades with isopropyl alcohol reduces mold spores hitchhiking on the cut edges.
Keep a separate container for debris and dead brown bits, because those bits seed fungus and algae. If you see snail eggs, tiny slugs, or springtails, decide whether you want them before you carry them into an indoor tray.
Tap water can add mineral crust that looks like pale dust on leaf tips after a week. If your city water is hard, use rainwater, distilled water, or filtered water for the first month of keeping divisions moist.
I also like to have tweezers on hand, because they let you remove tiny bits of rot or algae without disturbing the whole mat. A soft paintbrush is useful too, especially for brushing grit off leaf tips after seating.
If you are collecting moss from outdoors, a quick rinse can remove dust and some insects, but do not blast it like you are washing lettuce. Gentle swishing in a bowl of water is enough to dislodge sand and city grime.
Quarantine is worth doing if you are adding divisions to a terrarium with expensive plants, because hitchhikers multiply fast in humid enclosures. I keep new moss in a separate tray for a week so I can spot pests before they spread.
Mold is not always a disaster, but it is a sign your balance is off. If you start clean and keep airflow gentle, you usually avoid the kind of fuzzy outbreak that smothers new growth points.
Even the surface you work on matters, because moss picks up whatever it touches. I like a clean cutting board or a shallow tray so the divisions do not sit in dirty runoff while I am preparing the receiving area.
If you are using a mister, make sure it sprays fine rather than blasting a jet that lifts edges. A fine mist keeps contact intact while still rehydrating leaf tips and the underside.
How to split a moss mat without shredding it
Start by hydrating the donor mat, because dry moss snaps and turns into crumbs. Mist it well, wait ten minutes, then mist again so the underside softens.
Lift from an edge and slide your spatula under the mat in short strokes. If the mat fights you, do not force it, wet it again and work slower.
Once you have a sheet, flip it over and inspect the underside for soil clumps and dead thatch. Trim away the thickest brown layer so the living green can sit closer to the new surface.
Make divisions with a straight cut when you want neat seams, like on a stepping stone or a bonsai slab. Use gentle tearing when the mat is loose, because tearing keeps more stems intact than chopping through them.
Size matters more than people admit, because tiny bits dry too fast in urban air. For most setups, I aim for pieces at least two inches wide, then fill gaps later once the first round grabs.
If the donor mat is very thick, I sometimes split it like a layer cake by peeling off the green top layer from the brown base. That gives you more usable surface area and reduces the dead layer that prevents good contact.
When you cut, try to avoid sawing motions that shred leaf tips, because shredded tips brown faster. A firm, single cut with sharp scissors usually leaves cleaner edges that recover more evenly.
I also keep divisions oriented the same way they were growing, especially for mats that have a clear “top” and “bottom.” Flipping a mat upside down can work, but it tends to slow the moss regrowth timeline because the underside is not built for light.
If the mat comes up with a lot of soil stuck to it, do not obsess about removing every grain. Just remove the big clumps that create bumps, because bumps become air pockets when you press the division onto a flat surface.
For very fragile moss that breaks easily, I divide by folding the mat gently and separating along natural seams. That approach feels slower, but it preserves intact strands that reattach faster than chopped fragments.
I like to stage divisions on a damp paper towel while I work so they do not dry out in the open air. Even a few minutes of drying in summer wind can make the edges curl, which makes seating harder later.
If you are dividing multiple types of moss, keep them separated so you do not mix growth habits in one patch by accident. Mixed mats can look cool, but they also dry unevenly and make troubleshooting harder when something browns.
Preparing receiving surfaces and substrates for divisions
Moss sticks when the receiving surface is clean, slightly textured, and consistently damp. Smooth glazed ceramic and polished stone are frustrating unless you add a thin gritty layer for grip.
For soil based trays, level the surface and press it firm before placing divisions. Soft fluffy substrate shrinks after watering, and that shrinkage breaks contact under the moss.
On rock or concrete, scrub off algae and dust, then rinse well. A thin smear of damp fine soil or crushed granite grit can act like mortar under the mat.
Wood is tricky because it dries fast and can leach tannins, but it still works if you keep it shaded and wet. I prefer cork bark for indoor builds because it holds moisture longer than most driftwood.
Before you place anything, mist the receiving surface until it is evenly wet but not dripping. That first contact moment sets the tone for the moss regrowth timeline, since dry contact creates air gaps you will fight for weeks.
If you are working with a tray, shallow trays are easier than deep pots because you can control moisture at the surface. Deep pots often stay wet below while the top dries, and that mismatch encourages lifting.
I avoid rich potting mixes for moss, because they feed algae and make the surface slick. Lean mixes like sand, fine grit, decomposed granite, or bonsai soil hold structure and keep the interface stable.
pH is not something I obsess over, but I do notice that moss struggles on surfaces that crust with lime. If your concrete or stone leaches minerals, adding a thin layer of inert grit can buffer the moss from direct contact.
For indoor terrariums, I like to pre-wet the background surface and let it sit for a few minutes before placing divisions. That pause lets the surface absorb water so the moss is not sitting on a slippery film.
If you are attaching moss to a vertical surface, texture is everything. Even a light sanding of smooth stone can create micro-grip that helps rhizoids find purchase.
Cleanliness matters here too, because a dusty surface becomes a sliding layer when wet. A quick rinse and wipe can be the difference between a mat that grabs in a week and a mat that keeps drifting.
If you are using top dressing, sift it so you are not placing sharp chunks under the mat. Big particles create pressure points that keep the rest of the underside floating slightly above the surface.
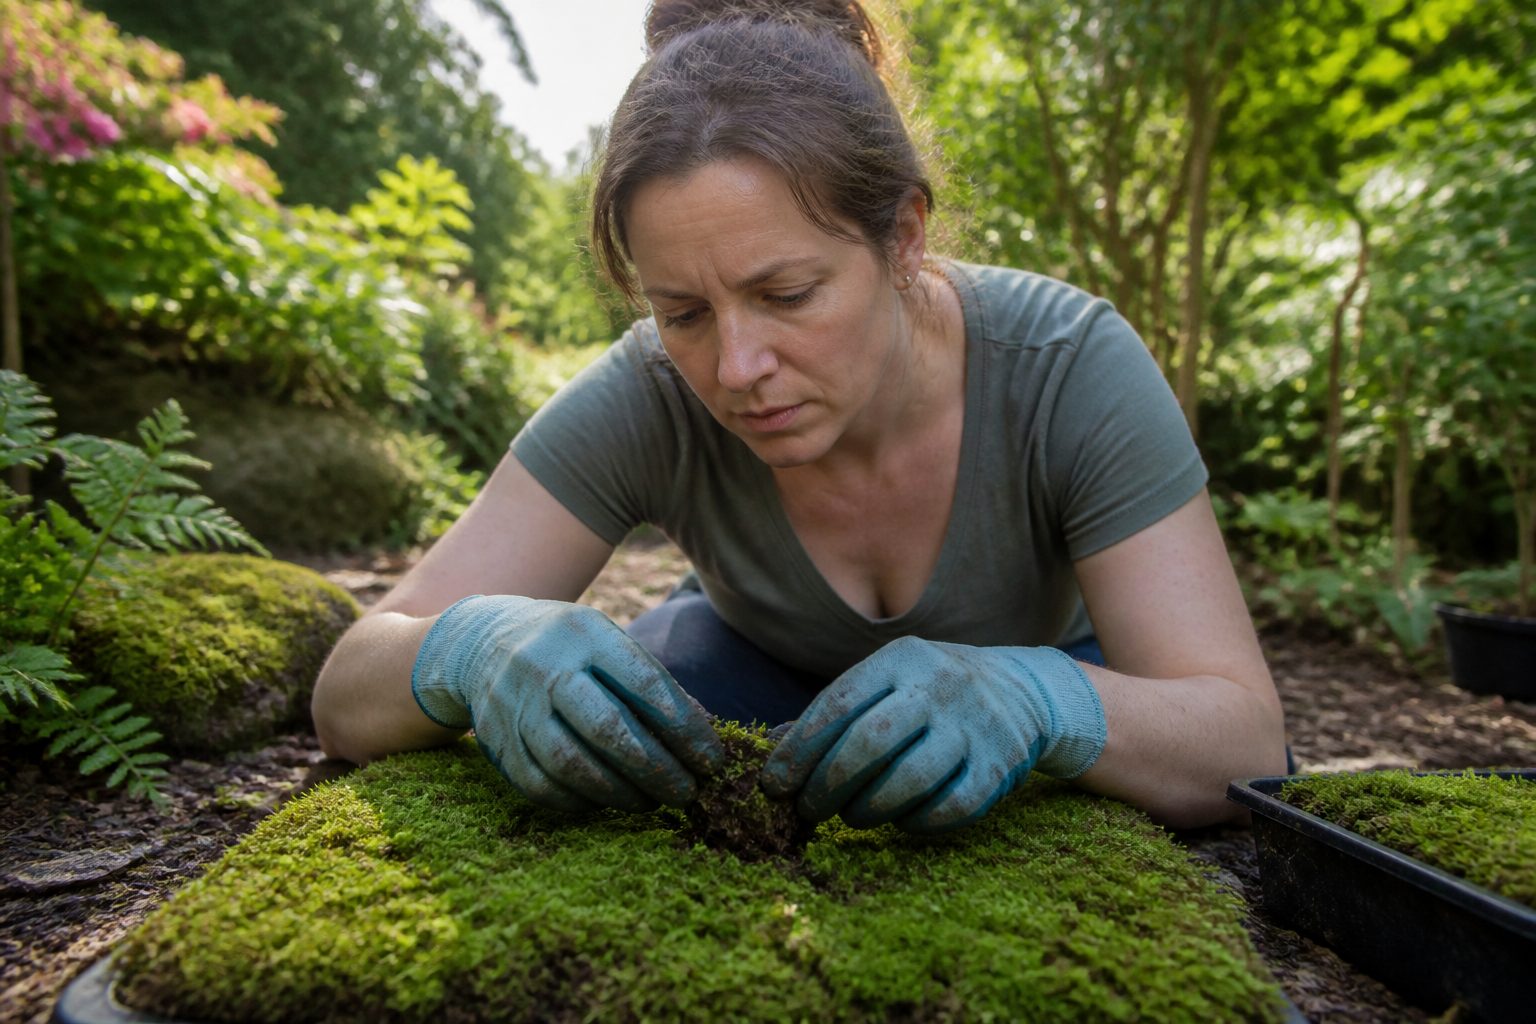
Seating divisions: pressure, contact, and edge sealing
When you set a division down, press it like you mean it, but do not crush it into paste. You want the underside to touch everywhere, especially along seams and corners.
I use a clean flat tile or the bottom of a jar to tamp large pieces evenly. For small pieces, fingertip pressure works, and you can feel when the mat stops sliding.
Edges dry first, so edge sealing is a real tactic, not a gimmick. Dust a little fine soil or sifted substrate along the edge and mist it in so the edge stays humid.
If the surface is vertical or sloped, you need mechanical help for the first week. Cotton thread, fishing line, or a loose mesh net holds divisions in place until rhizoids grab.
Spacing depends on your patience and your misting habits. Tight seams give a faster “finished” look, but small gaps can be fine if you plan to encourage lateral spread later.
I like to mist right before seating and then press again after a minute, because the mat relaxes as it hydrates. That second press often eliminates tiny air pockets you did not notice at first.
If you are patching a large area, work from one side to the other so you do not keep brushing against already placed pieces. Moss shifts easily when wet, and accidental nudges create seams that dry out faster.
For seams, I overlap slightly rather than trying to butt two edges perfectly. A small overlap hides the join and reduces the chance that both edges curl away from the surface at the same time.
On trays, I sometimes use small flat stones as temporary weights on stubborn corners. I remove them after a few days once the mat stops springing back.
If you use thread or line, keep it snug but not tight enough to cut into the mat. The goal is gentle contact, not strangling, because crushed lines can leave permanent dead stripes.
Edge sealing can also be done with tiny bits of matching moss tucked into the seam like caulk. Those little tufts hold humidity and often become the first places that new growth appears.
Once everything is seated, I do a final fine mist from above and from the side to wet the edges. That last pass is less about watering and more about settling the mat into the texture of the surface.
Aftercare routine: moisture, shade, and gentle airflow
Aftercare is where moss division propagation succeeds or fails, and it is mostly about moisture management. Keep divisions moist all day for the first week, then start letting the surface barely dry between mistings.
Shade is non negotiable at first, because bright sun cooks the thin cut edges. Bright indirect light is enough to keep growth moving without pushing evaporation too hard.
Airflow should be gentle, because stagnant humid air invites mold and algae films. A small fan across the room works better than a fan pointed directly at the tray.
Watch the color each day, because moss tells you what is happening if you pay attention. A healthy division goes from dark wet green to lighter green as it dries, then back to dark green after misting.
For indoor trays, crack the lid once you see steady condensation, since constant dripping can rot centers. If you see fuzzy white mold on substrate, remove it with tweezers and increase airflow instead of spraying chemicals.
I treat the first week like a holding pattern where the only goal is preventing repeated crisping. If you see edges curling upward, that is your cue to mist sooner or reduce airflow hitting that spot.
Misting technique matters, because a heavy spray can physically lift a fresh division. I aim the mist upward and let it fall like fog so the moss gets wet without being pushed around.
If you are using a humidity dome, do not seal it airtight for days on end. A quick daily vent keeps the air fresher and reduces the chance of sour smells and bacterial slime.
Temperature swings can cause condensation cycles that drench the mat at night and dry it hard during the day. If that is happening, move the tray away from windows and exterior walls where the swings are strongest.
I avoid fertilizing newly divided moss, because nutrients mostly feed algae at this stage. Moss will regrow on light and water alone, and it usually does better when the surface stays lean.
If you are growing outdoors, wind is often the hidden enemy, even in shade. A simple windbreak like a board or a clear storage bin flipped on its side can stabilize moisture without turning the area into a swamp.
In the second week, I start testing attachment by gently touching an edge after misting. If it feels like it is gripping rather than sliding, you can slowly reduce misting frequency and encourage stronger anchoring.
If you see mineral crust starting to form, switch water sources and gently rinse the mat with soft water. That crust blocks leaf surfaces and can slow photosynthesis, which drags out the moss regrowth timeline.
By week three or four, you should see subtle thickening at edges or new tips filling tiny gaps. That is when you can increase light slightly, as long as you keep the moisture routine consistent.
Encouraging lateral spread: trimming and gap-filling tactics
Once divisions attach, your goal changes from survival to sideways growth. Lateral spread is how you shorten the moss regrowth timeline and hide seams from dividing moss mats.
Trimming helps because it removes tired tips and forces new branching at the edges. I trim only after the mat resists a gentle tug, which is usually two to four weeks after division indoors.
When you trim, think of it like shaping a carpet edge rather than mowing a lawn. You want to clean up ragged bits and encourage a dense border that creeps outward.
Gap filling works best when the filler tufts match the original moss, because different mosses spread at different speeds. Mixing types can leave you with one aggressive species swallowing the rest, which looks messy in small trays.
I like to keep a small “nursery” patch of extra moss so I always have matching filler on hand. That nursery can be a simple plastic container with damp grit and bright indirect light.
Top dressing is underrated because it stabilizes moisture at the seam line. A thin dusting of fine grit or sifted substrate in gaps gives new tips something to crawl over instead of drying out in open air.
If you want faster spread, keep edges slightly more humid than centers for a while. Moss expands from active edges, so edge-focused misting is a practical way to direct growth without overwatering everything.
- Trim ragged edges with small scissors
- Press loose seams back down after misting
- Top dress gaps with sifted fine substrate
- Pin tiny filler tufts with toothpicks
- Mist edges more often than centers
- Remove fallen leaves and grit weekly
Weekly cleanup sounds fussy, but it is what keeps moss looking like a mat instead of a debris trap. A single stuck leaf can shade a spot long enough to create a brown patch underneath.
If you are working on stone, you can also encourage spread by keeping the stone slightly cooler and damper than the surrounding air. Shade cloth, a deeper tray, or a moisture-retentive underlayer can make the edges creep faster.
Sometimes the best “gap filler” is just reseating, because seams open when a piece shifts. A quick mist and firm press can close a seam and restart lateral growth without adding anything new.
If you are impatient, you can divide again once the first divisions are stable, but do not rush it. Repeated cutting before the mat rebuilds strength tends to create thin, weak patches that dry too easily.
I also watch for vertical fluffing, because some mosses grow upward before they spread sideways. If that happens, a light trim can redirect energy into denser, flatter growth that fills seams better.
In indoor builds, rotating the tray can help even out growth if one side gets more light. Even light encourages even spread, which keeps the finished surface looking intentional instead of lopsided.
Troubleshooting: browning centers, lifting corners, and slow take
Browning centers usually come from trapped wetness with no airflow, or from a thick thatch layer you did not remove. Peel back the worst spot, trim dead material, and reseat the living edge ring with firm pressure.
Lifting corners are almost always a contact problem, not a “bad moss” problem. Mist, press the corner down, and add a dusting of fine soil to weigh it and seal humidity at the edge.
If the whole piece slides around, your receiving surface is too smooth or too wet. Roughen the surface, blot excess water, and try again with a thinner layer of moisture at the interface.
Slow take happens when the division dries repeatedly in the first week, even if it greens up after misting. Fix your keeping divisions moist routine by increasing mist frequency, blocking wind, or using a temporary humidity dome.
Algae slime shows up when light is high and the surface stays wet, especially on nutrient rich soil mixes. Reduce light intensity, increase airflow, and switch to leaner top dressing like sand or fine grit near the moss.
If you see tips turning white rather than brown, that is often mineral buildup or sun scorch rather than rot. Switch to softer water and reduce direct light, then watch for new green tips emerging from the base.
A patch that stays green but never seems to “grab” is usually sitting on tiny air gaps. Lift one edge, add a thin smear of damp fine grit, and press again so the underside has something to bite into.
If the moss is drying too fast outdoors, the solution is often not more water but less exposure. Move it deeper into shade and block wind, because constant misting in sun just creates a cycle of wet-then-baked stress.
If you get fungus gnats indoors, it usually means the substrate is too organic and too wet. Let the surface dry slightly between mistings and consider switching future builds to a grittier base.
Sometimes browning is just transplant shock, especially if the donor mat came from a very different light level. Give it time, because the old tips may fade while new growth adapts and replaces them.
If a division turns black and mushy, that is rot, and it will spread if you ignore it. Remove the rotten section completely, clean the surface, and reseat only firm, green material.
Birds and squirrels can peel moss up like free carpet if you are growing outdoors in containers. A temporary mesh cover can save your work until attachment is strong enough to resist curious claws.
If growth is slow but stable, check your light, because deep shade can stall moss even when moisture is perfect. Increase brightness gradually, aiming for bright indirect light rather than a beam of sun.
When in doubt, simplify the variables by changing one thing at a time. If you adjust moisture, light, and airflow all at once, you will not know which fix actually helped your moss regrowth timeline.
Conclusion
Moss division propagation works because you are moving living structure, not starting from scratch. Clean cuts, tight contact, and a realistic plan for keeping divisions moist do most of the work.
If you want a faster moss regrowth timeline, start with mat formers, make pieces large enough to stay damp, and seal edges like you are patching fabric. Once everything grabs, trim and fill gaps with small tufts until the seams disappear.
Dividing moss mats is a skill you get better at quickly, because the feedback is immediate and honest. When a patch fails, it usually points to one fixable issue, contact, moisture, light, or airflow.
The nice part is that you do not need fancy gear to get good results, just consistency and attention. If you can keep the first week calm and damp, the rest usually turns into routine maintenance.
Once you have one successful round, you can scale up by repeating the same process and improving your setup each time. Over time, you end up with a steady supply of donor mats and a much shorter path to a finished moss surface.

