Urban moss is everywhere once you start looking, on brick stoops, shaded concrete, old retaining walls, and the damp side of street trees. That availability tempts people to grab a handful and call it propagation, but sloppy collection usually fails fast.
If you care about moss propagation harvesting ethics, treat collection like taking cuttings from a neighbor’s plant, you ask, you take little, and you leave things tidy. Low impact methods also give you cleaner material with fewer dead stems, less grit, and fewer surprises at home.
This article focuses on collecting moss responsibly in cities where ownership, contamination, and foot traffic complicate the usual advice. I will stick to practical steps you can do with basic gear and a bit of patience.
Why low-impact harvesting improves your propagation results
When you peel up a thick mat, you usually take the living tops plus the older, stressed layer underneath. That lower layer breaks apart, turns anaerobic in a jar, and drags your success rate down.
Small, careful samples stay oxygenated and bounce back faster once you rehydrate them. The pieces also fit better into slurry style propagation because you can clean them without shredding everything into mush.
Low impact harvesting also forces you to notice microhabitat details that matter later, like whether the patch grew on mortar, bark, or compacted soil. If you ignore that, you end up trying to establish sidewalk moss on a sunny planter edge and wondering why it crisps.
There is also a selfish reason to be gentle, you get less trash. A patch that stays intact keeps its own moisture and stays cleaner than a torn up scrape full of sand and leaf fragments.
Good moss salvage techniques start with restraint, because the best donor material is the material that never overheats, never dries hard, and never gets crushed. If your goal is reliable propagation, the low impact path is the efficient path.
Identifying good donor patches in urban environments
Start by thinking about legal access, because a perfect patch behind a fence is still a bad choice. Public right of way areas can still be maintained by a city crew, so pick spots where you are not interfering with plantings or restoration work.
Look for patches with clear margins and consistent texture, not fuzzy mixed mats full of weeds and algae. If you see a lot of black crust, oily sheen, or salt staining, move on because that stress often follows the moss home.
Shade matters more than you think in cities, since glass and pale walls can bounce heat into places that look shady. A donor patch that stays green through a dry week is usually a better bet than a patch that disappears every time the weather turns.
Avoid sites near heavy dog traffic, curb edges with road spray, and storm drain splash zones. Those patches can grow fine in place, but they often carry grit and contaminants that complicate indoor recovery.
When you find a candidate, zoom in and check the growing tips, because they should look intact and springy when damp. If the tops crumble or the color is mostly gray and tan even after rain, you are looking at a patch that is barely hanging on.
When to harvest: timing around weather and growth cycles
In cities, timing is mostly about moisture and temperature, not a calendar date. I prefer to collect after a gentle rain or a foggy morning, when the moss is hydrated but not waterlogged.
Avoid harvesting right before a heat wave or a hard freeze, because donor patches and your collected material both take a hit. If you must collect in summer, do it early and keep the sample cool and shaded immediately.
| Situation | What you will see on site | Best move |
|---|---|---|
| Day after light rain | Moss is pliable, tips look glossy, substrate is damp | Collect small plugs and keep them loosely packed |
| After heavy downpour | Mats are saturated, grit washes onto surfaces | Wait 12 to 24 hours for drainage, then collect |
| Dry spell, mild temps | Moss looks dull, curls slightly, crunchy at edges | Skip collection or pre mist and return later |
| Hot afternoon on pavement | Surface is warm, moss is brittle, edges are pale | Do not harvest, you will crush and desiccate it |
| Late fall cool and damp | Growth is slow but stable, fewer insects and weeds | Good time for clean samples and easy aftercare |
Tools and containers that prevent crushing and drying
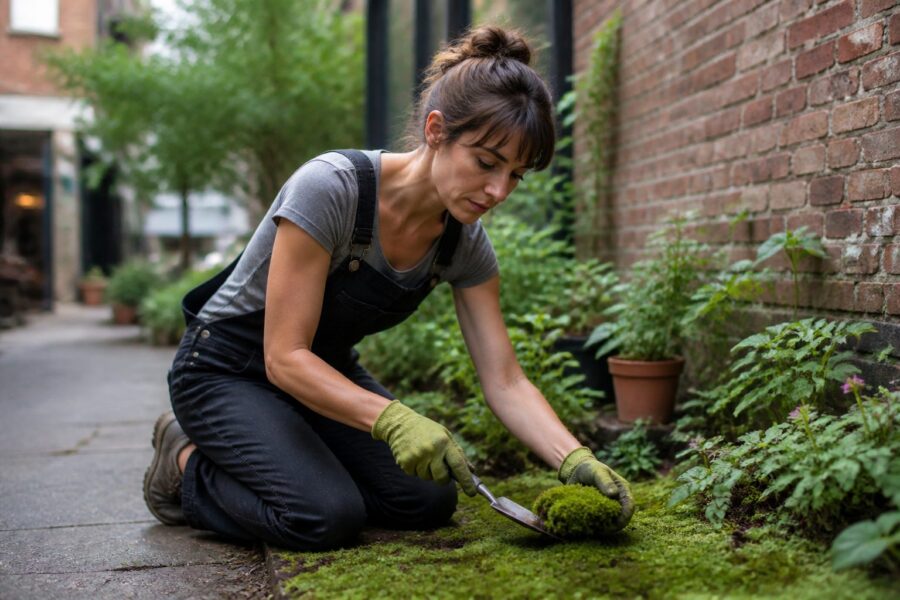
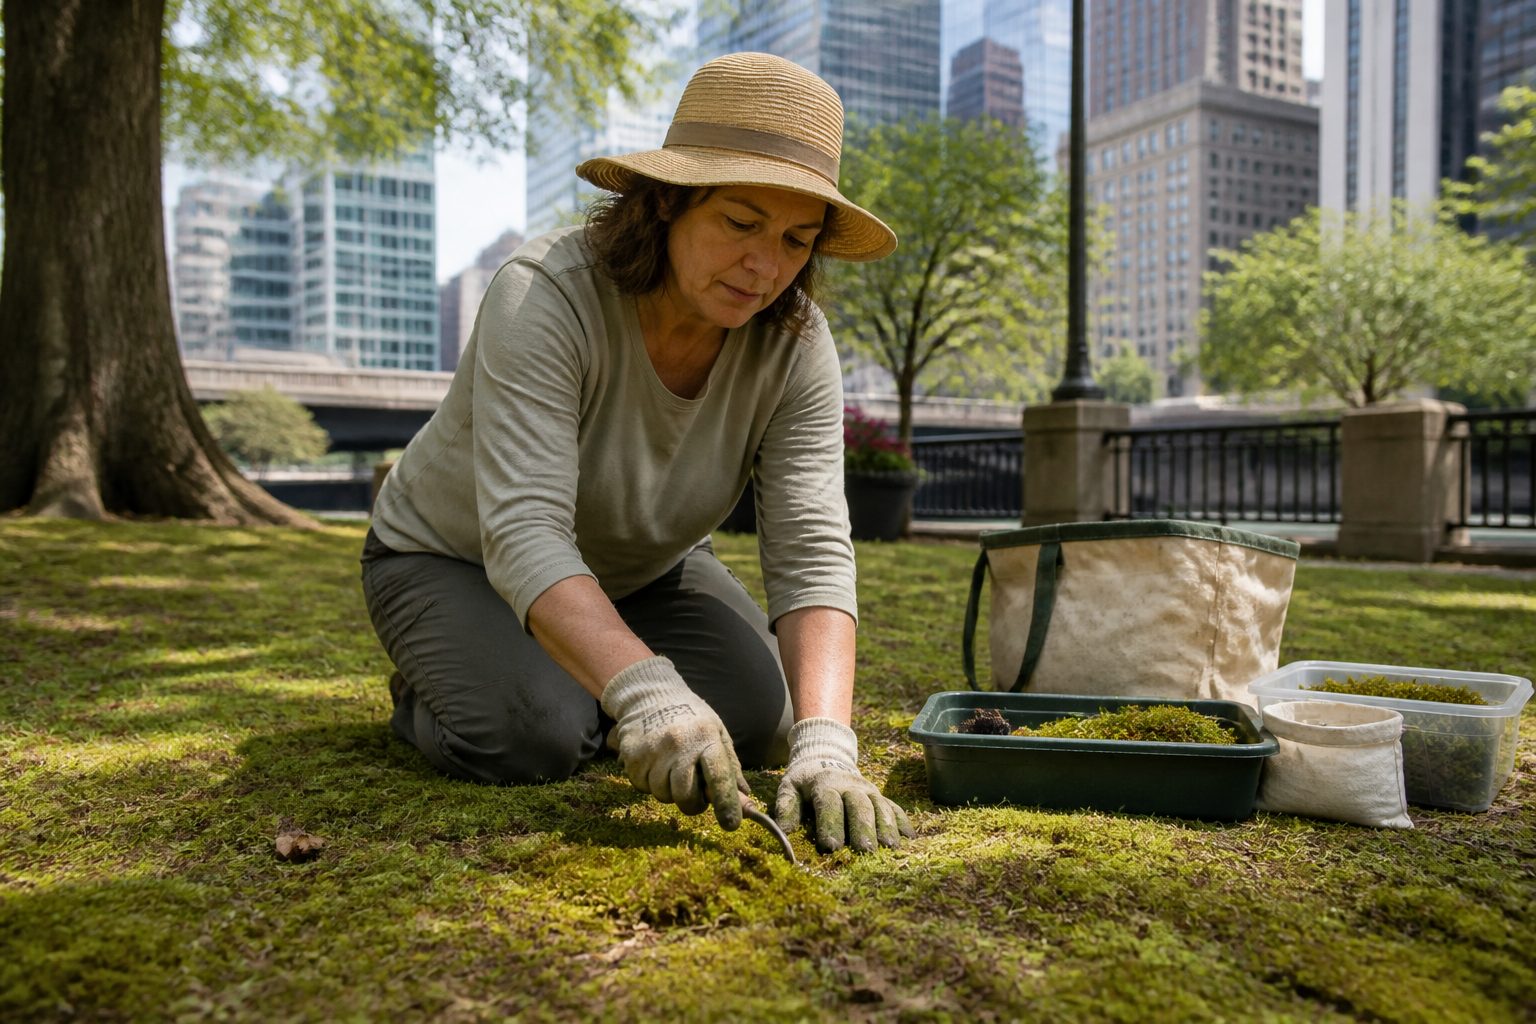
You do not need fancy gear, but you do need the right shapes and materials. A thin butter knife, a plastic putty knife, or a small paint scraper can lift edges without tearing stems.
For containers, I like rigid deli cups or a shallow plastic food box with a snap lid. Bags work in a pinch, but they invite compression and turn your sample into a bruised wad.
Bring a small spray bottle with clean water, because urban surfaces dry fast once the sun hits them. A quick mist keeps the moss flexible so you can separate a clean piece instead of ripping the whole mat.
Pack a few paper towels or a clean cotton cloth, since you sometimes need to buffer moisture in the container. You want humid air, not standing water sloshing around and soaking everything.
Labeling tape and a pen sound boring, but they prevent mystery samples later. If you mix collections, you lose the site clues that make moss donor patch recovery and home establishment easier.
How to take small amounts that regrow well
Think in thumbnails, not handfuls, because moss spreads from fragments and edges. A few small plugs from several spots usually outperform one big chunk that suffers in transit.
Start at the edge of the patch and lift gently until you can see how it attaches to the substrate. If it is anchored into soil or mortar, take only the top layer and leave the base intact.
For sheet forming moss on concrete, slide your tool under the mat and aim for a thin peel that keeps the growing tips together. Thick peels trap debris and take longer to recover, even if they look impressive in your container.
For tufted moss on soil, pinch and twist lightly to separate a few tufts while leaving surrounding tufts untouched. That spacing helps the donor patch refill, which is the core of moss propagation harvesting ethics.
As you collect, remove obvious weeds, bark chunks, and snail shells right away. Cleaning later is harder, and the extra material can rot and foul the microclimate around your moss.
Leaving the site stable: minimizing disturbance and mess
Urban sites get noticed, so leave them looking like you were never there. If you scatter crumbs of moss and dirt across a walkway, someone will sweep it, and the donor patch takes the blame.
Press lifted edges back down so remaining moss stays in contact with its substrate. That contact matters for moss donor patch recovery because loose edges dry first and unravel in wind.
If you accidentally lift a larger flap than you wanted, do not keep tearing until it looks even. Put it back, mist lightly, and press it flat with your palm for a few seconds.
Do not dig holes in soil patches or pry mortar from brick, because that crosses from collecting moss responsibly into damaging the site. If a patch is glued on so hard that you must gouge, pick a different patch.
Take a quick photo after you finish, because it helps you remember what you left behind. That habit also keeps you honest about how much you took, which matters if you plan to revisit.
Transport and short-term storage: keeping moss viable on the way home
Heat is the enemy during transport, especially in a parked car. Put the container in a shaded bag and keep it out of direct sun, even if the trip is short.
Keep the moss humid, not soaked, and crack the lid if condensation pools. A swampy container can turn sour fast, and you will smell it before you see the damage.
If you collected from multiple sites, keep them separated so you can match each sample to its microhabitat later. Mixing samples also mixes pests, and that is how one tiny slug becomes a home terrarium problem.
For storage under 24 hours, a cool room and a closed container with a barely damp towel is usually enough. For longer than that, open the container daily for a minute to refresh air and check for mold.
If a sample dries a bit in transit, do not panic and drown it when you get home. Controlled rehydration works better and keeps delicate tips from sloughing off.
Rehydration and recovery: helping donor material bounce back before propagating
When you get home, give your moss a recovery day before you start shredding it into slurry or pressing it onto a new surface. That pause is where a lot of propagation attempts quietly succeed or fail.
Rinse gently in a bowl of cool water to float off grit, then lift the moss out instead of pouring it through a strainer. A strainer can snag stems and break tips, especially with feathery species.
After rinsing, spread the moss on a clean tray lined with a damp paper towel and cover it loosely with a clear lid. You want high humidity with some air exchange, so prop the lid with a pencil if you see heavy condensation.
Place the tray in bright shade, like near a north facing window or under a grow light set low. Direct sun through glass can cook a wet tray in an hour, and the damage looks like sudden browning at the tips.
Check for hitchhikers while the moss is relaxed and open, because that is when you can spot mites, springtails, and tiny snails. If you find pests, isolate the sample and decide whether you can manage it before you mix it into a larger propagation batch.
Tracking what you collected: simple notes that improve future success
If you want repeatable results, write down what you did, even if it is messy. Memory turns into fiction faster than you think, especially after you collect a few times.
Your notes should connect the sample to real conditions, like “north side brick, under maple dripline, stays damp” or “concrete step, morning sun, dries by noon.” Those details tell you how to set humidity and light when you start propagation.
Record the date and weather, because that helps you spot patterns in recovery and mold issues. A sample collected during a humid week may arrive already loaded with spores, while a dry week sample may need slower rehydration.
Take one close photo and one wide photo, and keep them in the same album as your notes. When you compare photos later, you can see whether your donor patch recovery approach is working or whether you are slowly stripping a spot.
This is also where you keep yourself aligned with moss propagation harvesting ethics, because data makes you accountable. If a patch looks worse each visit, the notes remove your ability to pretend it is fine.
Establishing a “mother patch” so you harvest less over time
A mother patch is a small, controlled area where you grow the same moss you like to use, so you stop relying on wild or street side collection. It can be a shallow tray outdoors, a shaded corner of a balcony planter, or a dedicated section of a terrarium.
Pick a substrate that matches where your moss came from, because moss is picky in a plainspoken way. Sidewalk sheet moss often prefers gritty mineral surfaces, while soil tufts usually want a thin soil layer with leaf mold.
Start the mother patch with your healthiest recovered pieces, not the scraps you are unsure about. If you seed it with stressed material, you end up nursing it forever and you still feel tempted to go collect more.
Keep conditions stable for a month, and resist the urge to constantly mist and poke. Overwatering is the common mistake, and it invites algae that smothers new growth.
Once the mother patch thickens, harvest from it using the same small plug method you use outdoors. That habit makes collecting moss responsibly a default behavior, not a special occasion rule.
Conclusion
Urban moss collection can be respectful and effective if you treat donor patches as living communities, not free craft supplies. The payoff is real, because careful sampling stays alive, stays clean, and establishes faster.
Use low impact moss salvage techniques, transport with care, and give your material a recovery window before you propagate it. Keep notes, build a mother patch, and your practice of moss propagation harvesting ethics will get easier every season.

