Terrariums make moss propagation in terrariums almost unfairly efficient, because you can control moisture, light, and cleanliness in a way a windowsill pot never allows. If you have ever watched a moss patch stall out on a rock or turn brown after one dry afternoon, a closed container feels like a reset button.
I like terrariums for propagation because they let you run small experiments without wrecking your whole collection. You can test a new substrate, tweak terrarium humidity control, and see results in weeks instead of guessing for a season.
The catch is that the same stability that helps moss establish can also trap problems. If you ignore airflow and cleanliness, you will learn about preventing mold in terrariums the hard way.
Propagation also gets easier to track in a terrarium because you can see everything from above and from the side. That visibility makes it obvious when you are overwatering, underlighting, or letting debris accumulate.
If you are new to moss, a terrarium keeps the learning curve gentle because mistakes happen in slow motion. You can correct course before the whole patch dries out or gets overwhelmed by algae.
Why terrariums are ideal for propagation (and what can go wrong)
Moss does not have roots, so it depends on surface moisture and humid air to stay metabolically active. A terrarium holds that boundary layer of humidity right where the leaves need it.
When you do moss propagation in terrariums, fragments do not have to survive repeated dry downs while they try to attach. That steady moisture is what turns loose bits into a cohesive mat.
The controlled setup also limits windblown spores, pet hair, and random fungal dust that land on open trays. You still get microbes, but you get fewer surprise contaminants.
Terrariums also stabilize day to night swings, which matters more than most people expect. Moss can handle cool nights, but it hates bouncing between dry heat and cold drafts.
Because the environment stays consistent, you can actually learn what your moss likes instead of reacting to random weather. That is why terrariums make indoor moss lighting setups feel more predictable.
What goes wrong usually starts with overconfidence and a lid that never opens. Stagnant air plus constant wet surfaces is an open invitation for mold, algae, and sour smells.
Another common failure is treating the terrarium like a sealed aquarium, where more water always feels safer. Moss wants humidity, but it also wants oxygen around the stems and a surface that is not slimy.
Heat is another quiet problem, especially in glass jars near a sunny window. A terrarium can jump 15 to 25 degrees in an hour, and moss does not forgive that kind of spike.
Heat problems are sneaky because the moss may look fine for a day and then suddenly fade or bleach. Once the tips are cooked, recovery is slow even if you fix everything else.
Mineral buildup can also become a long-term issue in closed systems, since nothing flushes out naturally. If you mist with hard water, you can end up with a crust that blocks light and holds moisture in the wrong way.
Even when nothing “bad” happens, growth can stall if the terrarium is too dark or too wet. The goal is a stable middle ground, not maximum humidity at all costs.
Choosing a container: ventilation styles and size planning
Pick the container based on how willing you are to manage airflow, not on how pretty it looks on a shelf. A wide opening makes maintenance easy, and a narrow neck makes you postpone maintenance until trouble starts.
Closed terrariums are great for fast establishment, but they require intentional venting. I crack the lid daily at first, then shift to a schedule once the moss shows new growth.
Ventilated lids, cork tops, and containers with gasketed lids all behave differently. A gasketed lid holds humidity so well that terrarium humidity control becomes about preventing saturation, not about adding moisture.
If you want the easiest learning setup, choose a container that can be fully closed but also easily left slightly ajar. That lets you “tune” the environment without rebuilding anything.
Plastic food containers are not glamorous, but they are excellent propagation tools because they are lightweight and easy to clean. They also make it simple to run multiple trials with different substrates or light distances.
Glass looks better and scratches less, but it can trap heat faster under window light. If you use glass, treat placement like part of the container choice, not an afterthought.
Size matters because moss spreads sideways, and propagation works best when fragments can knit together. A shallow, wide container gives you more usable surface area than a tall vase.
Small containers also swing faster, which can be good or bad depending on your habits. If you tend to over-mist, a bigger container gives you more buffer before everything turns soggy.
Large containers are forgiving, but they can hide problems in corners where airflow is weakest. I like to keep the footprint manageable so I can inspect every section without moving a whole landscape.
Plan headspace too, since condensation needs somewhere to form without dripping constantly onto the moss. If the lid is only an inch above the substrate, you will get drip points that rot small patches.
Headspace also gives you room for gentle air exchange when you vent. A little vertical space helps the terrarium behave less like a sealed bag and more like a tiny room.
If you are building multiple propagation containers, standardize them so you can compare results. When every jar is different, it is harder to learn what actually changed the outcome.
Building the base layer: drainage, barrier, and substrate options
A terrarium base is about moisture buffering, not about feeding the moss like a houseplant. You want a setup that stays humid while the surface avoids turning into a swamp.
Drainage layers buy you time when you accidentally over-mist, and they reduce the odds of anaerobic funk. I still treat them as insurance, because the real fix is better watering habits.
In a closed container, the drainage layer also helps keep the substrate from staying uniformly saturated. That separation creates a more breathable zone right where the moss stems sit.
The barrier layer is not optional when you use fine substrates, because fines migrate downward over time. Once the drainage layer clogs, it stops acting like drainage and starts acting like a wet sponge.
I keep the substrate layer thinner than most people expect, especially for propagation. Moss does not need deep soil, and extra depth just stores extra water.
If you are using wood, bark, or rocks as a hardscape, set them before you place moss. Rearranging later usually rips up the new attachment points and sets you back weeks.
For many species, a slightly textured surface helps with attachment more than any fertilizer ever will. A mineral mix with small grains gives stems something to grip without staying muddy.
I avoid rich potting soils in closed builds because they feed algae and bacteria too easily. If you want faster green growth, better light and stable moisture usually beat extra nutrients.
Charcoal is often included in terrarium recipes, but it is not magic. If you use it, treat it as a minor odor buffer, not a substitute for airflow and cleanup.
| Layer or material | What it does | When I use it |
|---|---|---|
| LECA or lava rock (1 to 2 inches) | Creates a water reservoir and keeps the substrate from sitting in pooled water | Closed containers, beginner builds, anything with a tight lid |
| Mesh or landscape fabric barrier | Keeps fine substrate from washing into the drainage layer | Any build with coco coir, milled sphagnum, or fine sand mixes |
| Long fiber sphagnum (thin pad) | Buffers moisture and discourages rapid drying at the surface | Propagation trays, sloped builds, or when fragments are very small |
| Mineral substrate (akadama, pumice, sand mix) | Stays airy, drains fast, and limits nutrient load that feeds algae | Indoor moss lighting setups where growth is fast and algae can compete |
| Organic substrate (coco coir, peat blends) | Holds water longer but can sour if kept too wet | Open terrariums or containers that get frequent airflow |
If you are unsure which direction to go, start more mineral than organic. You can always add moisture with misting, but it is harder to remove a soggy, sour substrate once it is established.
I also like to keep a small “test corner” with bare substrate, because it shows you how wet the surface really is. If that corner stays glossy and green with algae, the moss is probably living in a swamp.
When you slope a substrate for a landscape look, remember that water will migrate downhill. The low end often needs more ventilation or a thinner substrate layer to avoid constant saturation.
If you want to propagate on rock, place the rock so it is stable and not rocking on the drainage layer. A shifting rock is a slow-motion shredder for new moss attachment.
Selecting moss for terrariums: growth habits and texture
Not all moss behaves the same indoors, and the differences show up fast in a terrarium. Some species creep and knit into carpets, while others grow upright and look scruffy when chopped.
Sheet moss sold for crafts often includes several species mixed together, plus bits of soil and bark. It can work, but it also brings hitchhikers that complicate preventing mold in terrariums.
I also find that craft moss is sometimes harvested and dried in a way that stresses it hard. If it takes longer to rebound, it is not always your terrarium doing something wrong.
Locally collected moss can be very resilient if it comes from a similar light and humidity environment. The downside is that outdoor moss often carries more insects and more random spores.
For a smooth, low profile look, I reach for pleurocarpous mosses that spread laterally. They press into a substrate well and recover from fragmenting without sulking for months.
Pleurocarpous types also tend to hide seams better, which is useful when you are patching bare spots. Once they knit, the terrarium looks intentional instead of like a repair job.
For texture, acrocarpous mosses can look great as little tufts, especially in miniature city scenes or rock gardens. The downside is that tufts dry out at the tips first, so your watering rhythm has to be tighter.
Acrocarpous tufts also trap debris more easily, which means you need to be more disciplined about cleanup. A tiny dead leaf can turn into a mold hotspot when it gets lodged in a tuft.
Match the moss to your light plan, because moss lighting indoors changes growth form. Under stronger grow lights, some moss stays compact, while in dim corners it stretches and looks thin.
If your goal is fast propagation, choose species that tolerate frequent moisture without collapsing. Some delicate mosses look amazing, but they punish beginners with sudden browning when conditions drift.
Texture mixing is fun, but do it with restraint in small containers. When one species grows faster, it can smother the slower one and make the terrarium look messy instead of layered.
If you are unsure what you have, treat it like a mixed planting and observe how each patch reacts. The terrarium will tell you which moss is happy by where it expands first.
Preparing moss: rinsing, quarantine, and fragmenting
I treat incoming moss like produce, because it often carries soil particles, fungus gnats, and decaying leaf bits. A careful rinse in cool water removes a lot of the junk that later becomes a mold buffet.
I rinse gently because aggressive rubbing breaks stems and creates more damaged tissue than you need. The goal is to remove debris while keeping the moss structure intact.
Quarantine is boring, but it saves you from infecting every terrarium on the shelf. I keep new moss in a separate container for two weeks and watch for gnats, white fuzz, and sour smells.
During quarantine, I keep the setup slightly drier than my main terrariums so problems show themselves. If something is going to melt or mold, I would rather see it early.
If I find insects, I remove what I can manually and reset the container with fresh substrate. I avoid heavy pesticides in propagation builds because moss can be sensitive and the terrarium traps residues.
When you fragment moss for propagation, aim for pieces that still have intact stems and leaf clusters. Pulverizing it into green dust can work for slurry methods, but it often turns into algae soup indoors.
Fragment size is a balance between coverage and stability. Bigger fragments establish faster, while smaller fragments fill gaps better once conditions are dialed in.
I use scissors for clean cuts and tweezers for handling, since fingers mash delicate tips. If the moss is gritty, I soak it briefly and swish it, then pour off the dirty water.
If the rinse water comes out tea-colored or full of floating debris, I repeat until it runs mostly clear. That extra minute of prep saves days of fighting mold later.
After prepping, I let the moss drain on a clean towel until it is damp, not dripping. Starting with dripping wet fragments makes terrarium humidity control harder for the first week.
I also sort out any brown or mushy parts before planting, even if it means losing some volume. Dead tissue is not “compost,” it is just fuel for problems in a closed container.
If you are working with multiple species, prep them separately and label them immediately. Once everything is cut into fragments, it is surprisingly easy to mix them up and lose track.
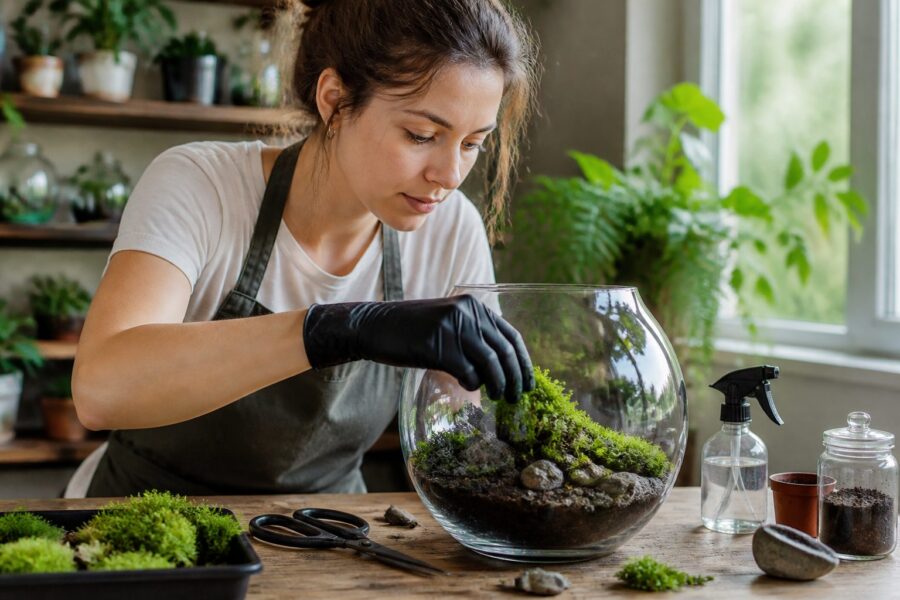
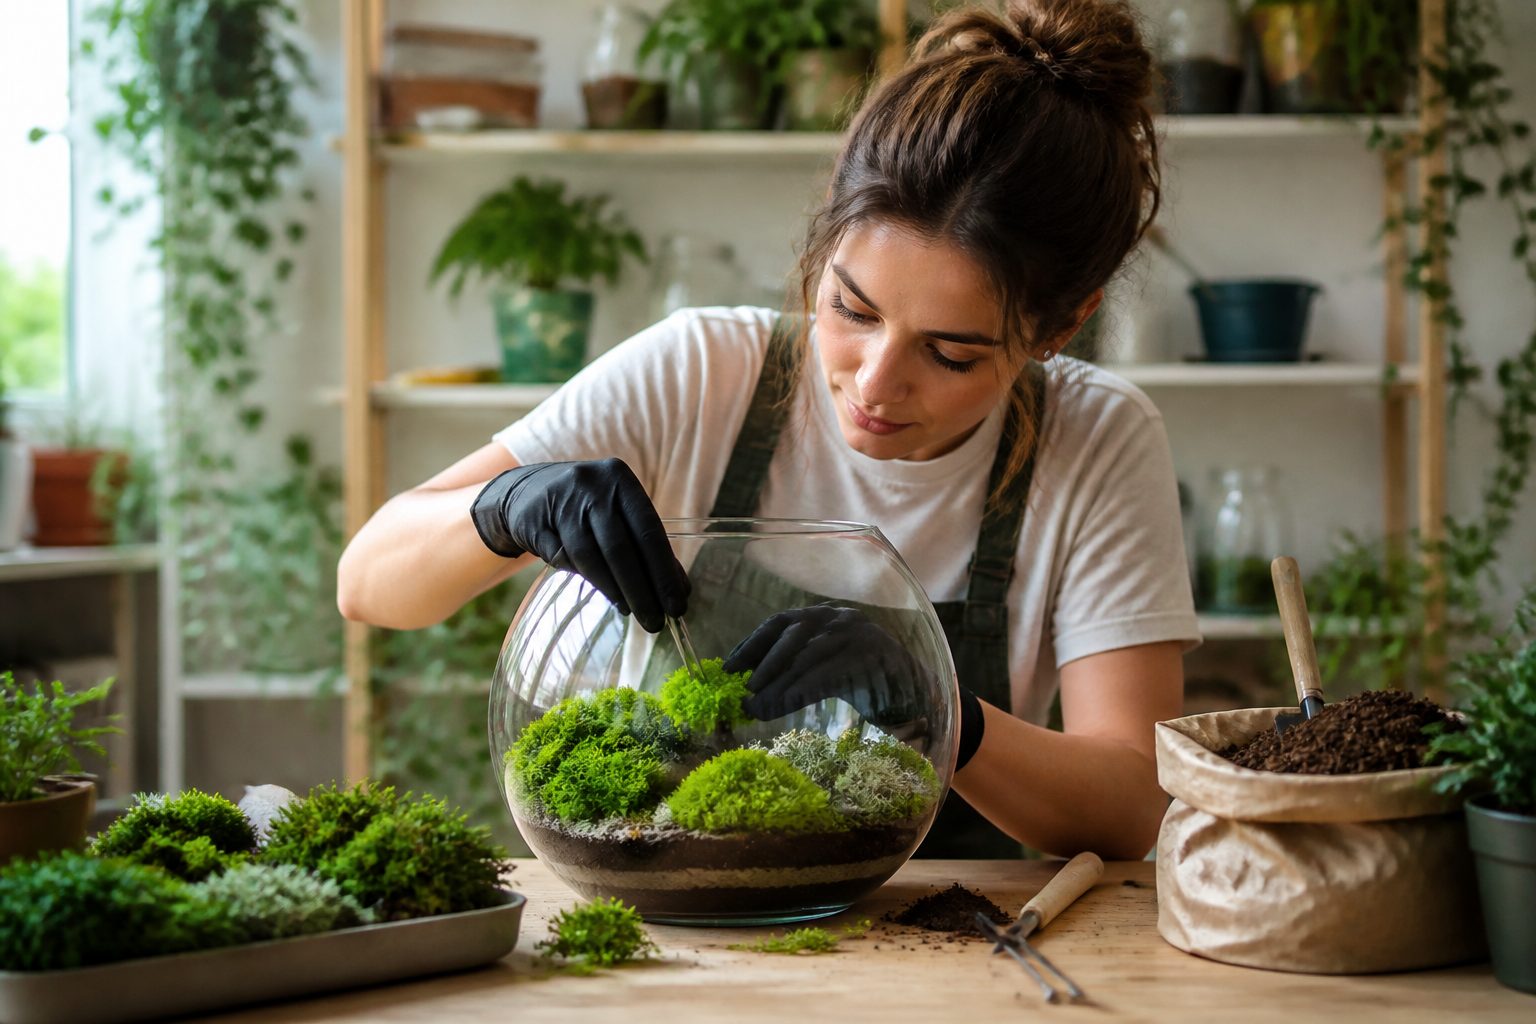
Planting techniques: pressing, pinning, and patch layout
Good planting is mostly about contact, because moss attaches where stems touch a stable surface. If fragments sit on top like loose confetti, they dry at the edges and float when you mist.
I press fragments into the substrate with a spoon or gloved fingertips until they look slightly flattened. That tiny bit of compression helps the moss stay put while it starts new growth points.
If the substrate is too fluffy, pressing just makes the moss sink and disappear. In that case, I firm the substrate first and mist lightly so the surface has some grip.
Tufts need a different approach than sheets, because they want to stand up and they catch droplets. I often trim the base slightly so the tuft sits flatter and makes better contact.
Pinning is underrated for the first two weeks, especially in containers you will vent frequently. A pinned patch stays stable through airflow changes and light handling.
When laying patches, I avoid stacking layers of moss like shingles. Thick layers stay wet in the middle and tend to rot before they ever knit into a mat.
- Press fragments firmly into a damp, level surface
- Pin tufts with stainless insect pins or bent paper clips
- Lay patches edge to edge with small gaps for expansion
- Avoid burying tips, keep green tissue exposed
- Use a mister that produces fine fog, not droplets
- Label species and date for tracking establishment
I like to leave intentional pathways of bare substrate or rock so I can see how moisture moves. Those gaps also reduce the chance that one moldy patch spreads straight across the whole surface.
If you are propagating multiple mosses in one container, keep them in separate zones at first. Once they establish, you can blend edges, but early separation makes troubleshooting much easier.
After planting, I mist once to settle everything and then stop touching it for a couple of days. Constant adjustments usually do more harm than good because they break contact points.
If fragments keep lifting, it is usually because the mister is too aggressive or the surface is too wet. Switching to a finer mist and slightly drier surface often fixes it immediately.
Light setup: window light vs grow lights and timing
Light is where indoor growers usually overthink and then under-deliver. Moss lighting indoors needs consistency more than intensity, because the plant is small and dries fast when pushed too hard.
Bright, indirect window light can work if the terrarium never overheats. Direct sun through glass is a quick way to cook the top layer and trigger condensation cycles that drip constantly.
Window light also changes across seasons, which can make a stable terrarium suddenly unstable. If your moss looks great in spring and struggles in midsummer, heat and day length are usually the reason.
If you use window light, rotate the container occasionally so one side does not hog all the brightness. Uneven light can make moss grow lopsided and leave shaded areas prone to algae.
Grow lights make propagation predictable, especially in winter or in apartments with limited windows. A simple LED bar in the 5000K to 6500K range usually grows moss fine without fancy settings.
I prefer lights that are dimmable or easy to raise and lower, because small changes matter. A few inches of distance can be the difference between compact growth and stressed tips.
I run 10 to 12 hours a day for most setups, and I shorten it if algae starts getting ambitious. If you see the moss bleaching or turning yellow, back the light off before you change anything else.
Too much light often shows up as pale tips and a dry, crispy look even when humidity is high. The terrarium can be humid and still be stressing the moss if the light is pushing evaporation too hard.
Distance matters more than wattage claims on a box, so measure with your eyes and adjust slowly. I start lights farther away, then move them closer over a week while watching the tips.
If you are running multiple terrariums on one shelf, keep the light height consistent and adjust photoperiod instead. That way you are not constantly changing the environment for everything at once.
I also like a dark period that is actually dark, because constant light encourages algae and keeps the terrarium too warm. A simple timer is one of the best tools for stable growth.
When moss is happy, it looks hydrated without looking glossy, and the color stays even across the patch. If only the edges look good, the center may be too wet or too shaded.
Humidity and watering: misting routines that avoid saturation
Terrarium humidity control is about keeping the air moist while letting the surface breathe. If the substrate stays glossy wet all day, you are watering too often or misting too heavily.
I prefer frequent light misting during the first week, then I taper once the moss stays in place. The goal is a consistently damp surface, not puddles between fragments.
Early on, I aim to mist just enough that the moss looks refreshed and slightly darker. If droplets are pooling on the leaves, I went too far and I vent longer to compensate.
Once the moss starts knitting, I shift from “schedule watering” to “response watering.” I mist when the surface looks dull and dry, not because the calendar says it is time.
Use clean water, because minerals build up on tiny leaves and make them look dusty or burnt. Distilled or reverse osmosis water is the easiest choice if your tap water leaves spots on glass.
If you only have tap water, letting it sit can help chlorine dissipate, but it will not remove hardness. Hard water can work, but you may need occasional wipe-downs and a more open venting routine.
Watch the glass, since it tells you what the terrarium is doing when you are not looking. Heavy condensation all day means you need more venting, and bone dry glass means you need more moisture or a tighter lid.
I like a pattern where condensation appears overnight and clears partially during the day. That rhythm usually means the terrarium is humid but not locked in a permanent fog.
When I do a deeper watering, I add a small amount to the substrate edge instead of spraying the moss directly. That keeps the leaves from staying wet for hours, which is a common trigger for mold patches.
If your container has a drainage layer, deeper watering can be a controlled way to recharge humidity without soaking the surface. The reservoir evaporates slowly and keeps the air stable.
Venting is part of watering, even if it feels like a separate task. If you mist and then immediately seal the lid, you are basically locking in wet leaves with no way to dry.
I also avoid misting right before lights go off, because the terrarium cools and stays wet longer. Morning misting gives the system time to breathe and balance before night.
Mold and algae prevention: airflow, cleanup, and spot treatments
Preventing mold in terrariums starts before you ever see fuzz, because mold loves still air and decaying bits. If you build clean and keep surfaces from staying soaked, you cut most outbreaks off at the start.
Airflow is the lever people ignore, mostly because closed terrariums look tidy when they stay sealed. I vent daily during establishment, even if it is only for five minutes.
Once things are stable, I still vent a few times a week to reset the air. That small habit prevents the terrarium from turning into a stagnant, sweet-smelling mold incubator.
Cleanup is not glamorous, but it is the difference between a display and a biology experiment. I treat any decaying speck like a future problem and remove it early.
Remove dead leaves, bark crumbs, and any slimy patches as soon as you notice them. I use tweezers and a small spoon, and I try not to stir the whole substrate like I am mixing batter.
If you stir everything, you spread spores and you bury healthy moss under disturbed substrate. Gentle, targeted removal keeps the rest of the container stable.
If mold shows up in one corner, I isolate it with a physical cleanup first. After that, a light mist of 3% hydrogen peroxide diluted 1:3 with water can knock it back without nuking everything.
I apply spot treatments carefully and then vent longer than usual, because chemical moisture plus a sealed lid is still moisture. The goal is to correct conditions, not to rely on sprays as a routine.
Algae usually means too much light on a nutrient rich surface, plus constant wetness. Switching to a more mineral substrate and dialing back misting often works better than any chemical fix.
Algae can also appear when moss is slow to establish and leaves bare, wet substrate exposed. Faster knitting from better contact and slightly higher airflow often reduces algae by removing its favorite habitat.
If you see fungus gnats, they are usually breeding in wet organic material. Letting the surface dry slightly between misting and removing decaying debris usually cuts their numbers quickly.
When in doubt, reduce variables and make one change at a time. A terrarium is small, so big changes can swing it from moldy to bone dry in a day.
Establishment timeline: what healthy new growth looks like
In the first week, healthy moss often looks boring, and that is fine. You want stable color and no melting, not instant spread.
During this first stretch, I focus on whether fragments stay in place and whether the container smells clean. A fresh, earthy smell is normal, but anything sour usually means too much wetness and not enough airflow.
By weeks two to four, you should see tips that look fresher and slightly brighter than the older tissue. In moss propagation in terrariums, that tip growth is your sign that fragments have rehydrated and restarted active growth.
You may also notice the moss starting to grip the substrate when you lightly tug with tweezers. If it lifts easily like a loose carpet, it is still in the “resting on top” phase.
New growth usually shows up at edges first, where light and air reach the stems. If the centers stay dark and soggy, you pressed too thickly or kept it too wet.
If edges brown while centers stay wet, that is often a sign of uneven moisture distribution. It can happen when condensation drips in one spot and the rest of the surface dries too much.
By weeks four to eight, patches start knitting, and the surface looks less like scattered pieces and more like a single mat. This is when you can slowly reduce humidity, because the moss holds its own moisture better.
This is also when you can start trimming stray bits and re-pressing small lifted corners. I keep adjustments minimal, because established moss tears more easily than it looks.
If you hit week six with no change, look at light and airflow before you blame the moss. Weak moss lighting indoors and constant saturation stall growth more often than species choice does.
Sometimes “no change” is actually slow progress that is hard to see day to day. Taking a weekly photo from the same angle makes the timeline obvious and keeps you from overcorrecting.
Once a mat is established, it becomes more resilient to brief venting and minor drying. That is when a terrarium stops feeling fragile and starts feeling like a stable little ecosystem.
Conclusion
A clean terrarium setup turns moss propagation in terrariums into a repeatable process, but only if you treat airflow and moisture like adjustable controls. The best builds look almost boring on day one, because they are stable and easy to maintain.
Focus on a container you will actually open, a base that drains, and light you can keep consistent. If you keep terrarium humidity control steady and practice preventing mold in terrariums with quick cleanup, fast establishment follows.
Once you get one container dialed in, you can copy the method and scale it up without guessing. Moss rewards small, consistent habits, and terrariums make those habits easy to repeat.
If something goes wrong, treat it as a signal to adjust conditions rather than a reason to scrap the whole build. With careful venting, clean water, and patient light management, most moss bounces back and keeps spreading.

