
Cultivating moss on unconventional surfaces like glass and glazed tile presents unique challenges for urban moss growers. These smooth, non-porous materials do not offer the natural grip and moisture retention that moss typically needs to thrive. However, with the right techniques, you can achieve beautiful and lasting moss installations on these slick substrates.
Understanding the fundamental differences in how moss interacts with low-porosity materials is the first step towards success. This guide will walk you through practical strategies for successful moss propagation glass glazed surfaces, from surface preparation to ongoing care. We will cover everything you need to know to establish moss on glass terrarium walls or even growing moss glazed tile outdoors.
Achieving moss attachment smooth surfaces requires a blend of clever engineering and botanical understanding. You need to mimic the conditions moss finds appealing, even when the substrate itself seems entirely unsuitable. Let’s get into the specifics of making your non-porous moss dreams a reality.
Why Glass and Glazed Surfaces Resist Moss Attachment
Mosses are non-vascular plants, meaning they do not have true roots to absorb water and nutrients from the soil. Instead, they absorb moisture directly through their leaves and rhizoids, which are hair-like structures used primarily for anchorage. Glass and glazed surfaces offer no natural pores or rough texture for these rhizoids to latch onto.
The lack of porosity also means these surfaces dry out quickly, creating a hostile environment for moss. Water simply runs off or evaporates rapidly, leaving the moss dehydrated. This rapid moisture loss is a significant hurdle for any moss propagation glass glazed surfaces project.
Furthermore, without microscopic crevices, there is no place for organic matter or dust to accumulate and provide even minimal nutrients. Moss needs some particulate matter to gather moisture and nutrients, which smooth surfaces inherently lack. This makes sustaining moss growth a continuous battle against desiccation and starvation.
The smooth, often chemically treated nature of glass and tile can also present an unfavorable pH or surface tension for moss spores and fragments. Spores might slide off before germinating, or water might bead up instead of spreading evenly over the surface. Overcoming these inherent properties requires active intervention rather than passive observation.
Many urban environments feature abundant glass and glazed tile, making these surfaces tempting targets for greening efforts. However, growers must recognize these material limitations before embarking on any project involving moss on glass terrarium designs or growing moss glazed tile. Simply slapping moss onto a windowpane will almost certainly lead to disappointment without proper preparation.
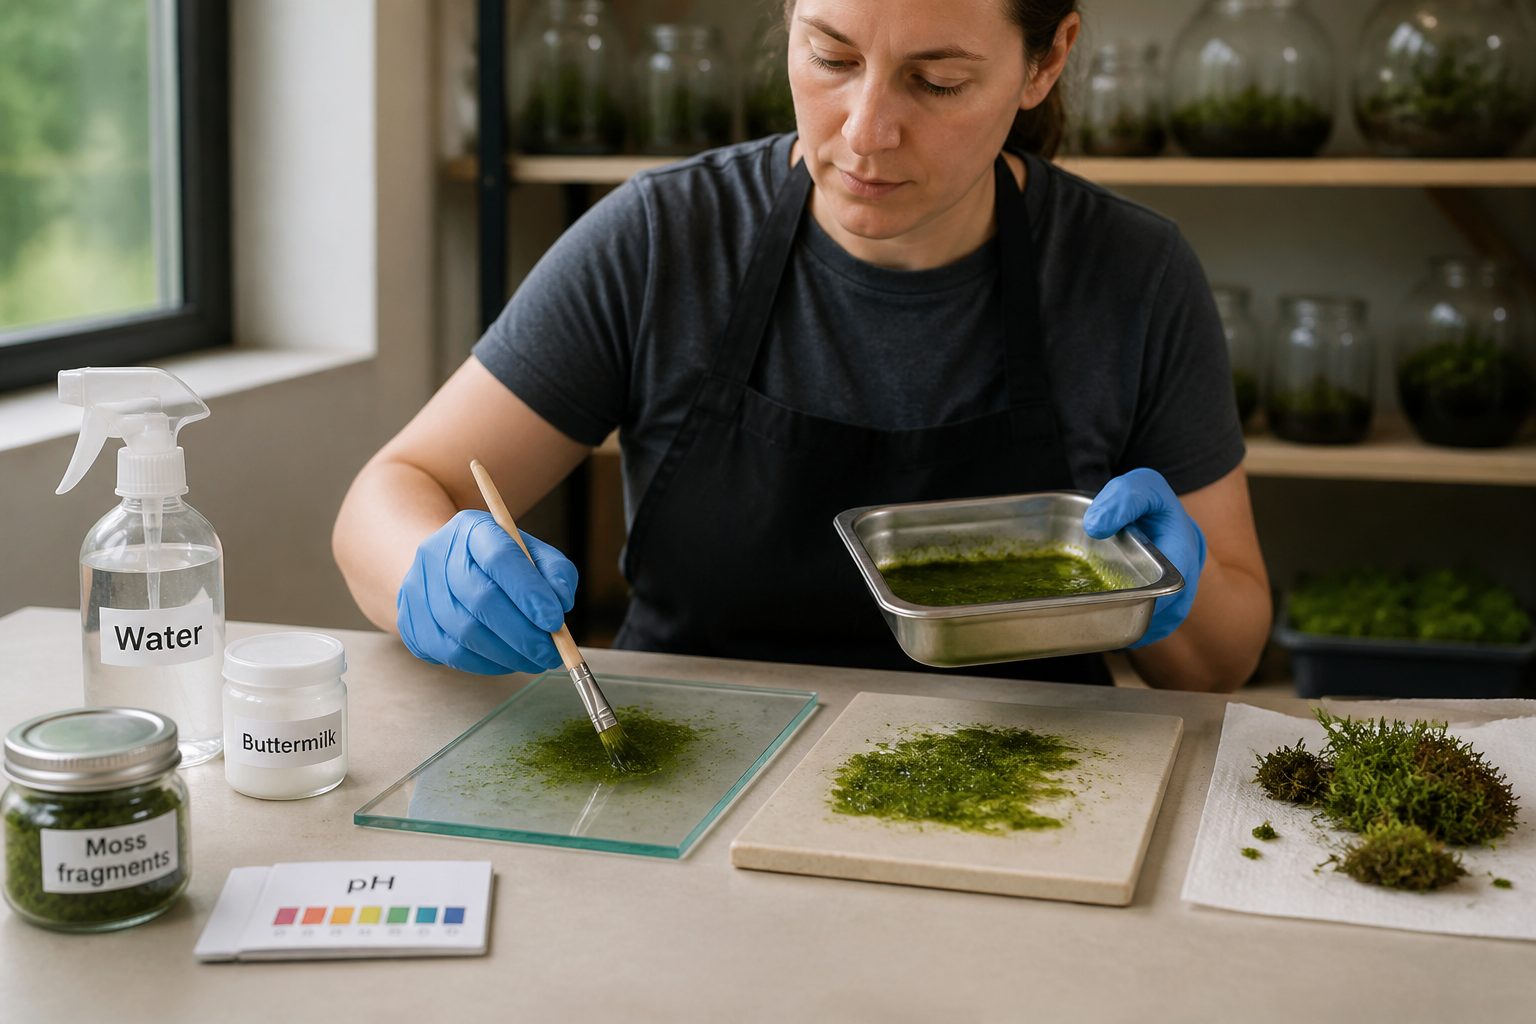
Successful moss attachment smooth surfaces requires creating an artificial microhabitat that compensates for these natural deficiencies. You are essentially tricking the moss into believing it has found a more hospitable home. This often means altering the surface itself or introducing an intermediary layer.
Surface Scoring and Etching to Create Grip
One direct approach to improving moss attachment smooth surfaces involves physically altering the surface itself. Scoring or etching creates microscopic ridges and valleys that mimic the natural texture found on rocks or tree bark. These tiny imperfections provide rhizoids with something tangible to grip, significantly improving the chances of successful moss propagation glass glazed surfaces.
For glass, you can use a glass etching cream or a rotary tool with a fine grinding bit. Etching cream creates a frosted, rough texture on the glass, which is perfect for encouraging moss to take hold. Always follow the manufacturer’s instructions for etching cream and wear appropriate safety gear.
When working with glazed tile, a Dremel tool or similar rotary tool equipped with a diamond-tipped bit can effectively score the surface. Make light, crisscrossing patterns across the area where you want the moss to grow. The goal is to create a network of shallow scratches, not deep gouges.
These etched or scored areas also help retain a thin film of moisture, which is incredibly important for moss survival. Water collects in the created depressions, slowing down evaporation and extending the hydration period for the moss. This simple physical modification addresses two major problems simultaneously.
A word of caution: etching or scoring is a permanent modification to the surface. Consider the aesthetic implications and placement carefully before you begin this process. This method is particularly effective for moss on glass terrarium backgrounds or fixed architectural elements where permanence is desired.
Some enthusiasts even use sandpaper for lighter scoring on less delicate glazed surfaces, though this requires considerable effort for a significant effect. The key is to create enough texture that water beads less and moss fragments can settle. The more surface area you can create at a microscopic level, the better your moss will fare.
Adhesive and Substrate Carriers for Smooth Surfaces
Since direct attachment is challenging, many successful moss propagation glass glazed surfaces projects rely on an intermediary layer. This carrier layer provides both grip and a moisture-retentive substrate for the moss to colonize. It is often the most reliable method for growing moss glazed tile and creating intricate moss on glass terrarium designs.
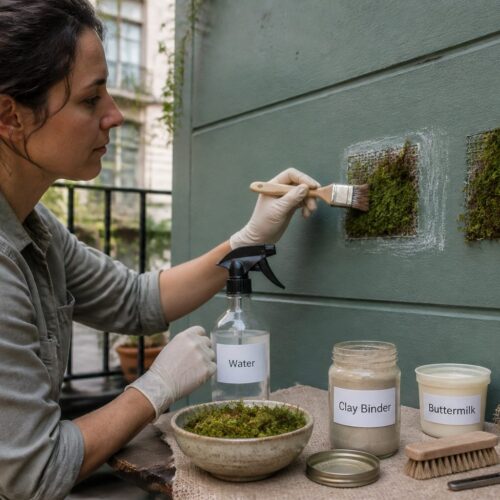
Common carrier materials include thin sheets of felt, coco coir mats, or even a specialized moss slurry made with yogurt or buttermilk. These materials are then affixed to the smooth surface using a non-toxic, waterproof adhesive. The adhesive needs to be safe for your environment and for the moss itself.
| Carrier Material | Advantages | Considerations |
|---|---|---|
| Felt or Burlap Fabric | Excellent water retention, easy to cut and shape, provides good grip for rhizoids. | Can degrade over time, may require stronger adhesive, visible if not fully covered by moss. |
| Coco Coir Matting | Sustainable, good moisture retention, provides an organic substrate. | Thicker profile, can be harder to attach smoothly, may release fibers initially. |
| Moss Slurry (Yogurt/Buttermilk) | Direct application, provides nutrients, fills small crevices, natural adhesive. | Can mold if humidity is too high or air circulation is poor, requires frequent reapplication. |
| Liquid Nails/Silicone (Non-Toxic) | Strong, waterproof adhesive for attaching other carriers, durable. | Not a carrier itself, needs to be specifically non-toxic for plants, messy to work with. |
| Hydroponic Grow Mat | Designed for moisture, sterile, provides a stable base. | Can be expensive, might look unnatural until moss covers it, limited shapes. |
When using felt or coco coir, cut the material to the desired shape and size before applying a thin, even layer of adhesive to the back. Press it firmly onto the glass or tile, ensuring good contact and no air bubbles. Allow the adhesive to cure completely according to its instructions before introducing any moss.
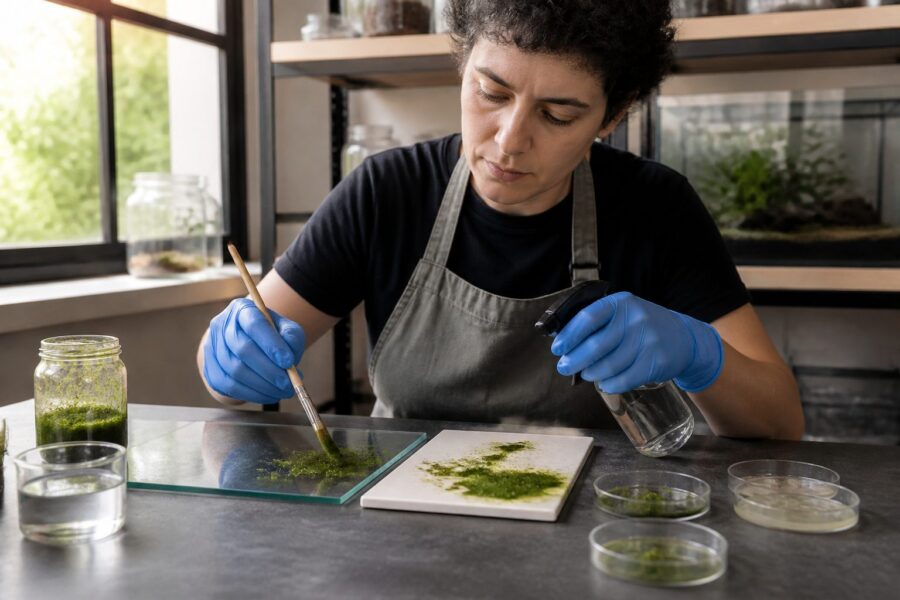
For moss slurry, blend live moss fragments with a binder like plain yogurt, buttermilk, or even a gelatin solution. This creates a paintable mixture that can be applied directly to the surface, offering both a substrate and a temporary adhesive. It is a more organic approach to moss attachment smooth surfaces, though it demands more frequent attention.
Some growers experiment with thin layers of soil or peat attached with clear silicone, but this can introduce issues with mold and excessive weight. The goal is a light, porous layer that holds moisture without becoming waterlogged or a breeding ground for unwanted fungi. Experimentation is often key to finding what works best in your specific setup.
Remember that the carrier material is only as good as its adhesion to the smooth surface. A failing adhesive means a failing moss installation, regardless of how happy the moss itself may be. Choose your adhesive wisely and ensure it cures properly to create a lasting bond.
Best Species to Try on Glass and Tile
Not all moss species are equally suited for moss propagation glass glazed surfaces; some are far more forgiving of challenging conditions. Pioneer species that naturally colonize disturbed or exposed areas often perform best on non-porous materials. These mosses are typically more resilient and adaptable to fluctuating moisture levels.
Sheet mosses (Pleurozium schreberi, Hypnum curvifolium) are excellent choices because they grow in dense, mat-like formations. These mats create their own microclimate, holding moisture more effectively than individual strands, which is a big advantage for moss on glass terrarium walls. Their ability to spread laterally helps cover the smooth surface quickly.
Cushion mosses (Leucobryum glaucum), also known as pincushion moss, are another good option, especially for creating raised, sculptural elements. Their compact, spherical growth habit allows them to retain a significant amount of water within their own structure. While slower to spread, their distinct look makes them popular for growing moss glazed tile in decorative displays.
Haircap moss (Polytrichum commune) can also be surprisingly effective, particularly in outdoor settings where it receives more consistent natural moisture. This moss has a robust structure and can tolerate more direct light than many other species. Its upright growth habit creates a textured, forest-like appearance.
For terrariums, Java moss (Taxiphyllum barbieri) is a popular aquatic moss that can also grow emersed, or partially submerged. While technically an aquatic plant, it can tolerate high humidity terrestrial conditions and will readily attach to glass or rocks inside a closed terrarium. Its fine texture provides a delicate green carpet.
When selecting moss, always choose local species if possible, as they are already adapted to your region’s climate and light conditions. Sourcing moss from your own yard or a nearby natural area ensures you are getting a species that can handle your specific environmental factors. This local adaptation significantly increases your chances of success with moss attachment smooth surfaces.
Avoid delicate, shade-loving species that prefer consistently damp, porous substrates, as these will almost certainly struggle on glass or tile. Focus on the hardy, resilient types that show a tendency to colonize bare ground or rocks in their natural habitat. Observing what grows well in similar conditions around you is a very good indicator.
Humidity Management for Non-Porous Installations
Humidity is the single most important factor for successful moss propagation glass glazed surfaces, even more so than light. Mosses absorb water directly from the atmosphere, so a consistently high humidity level is non-negotiable for their survival on non-porous materials. Without sufficient ambient moisture, moss will quickly dry out and perish.
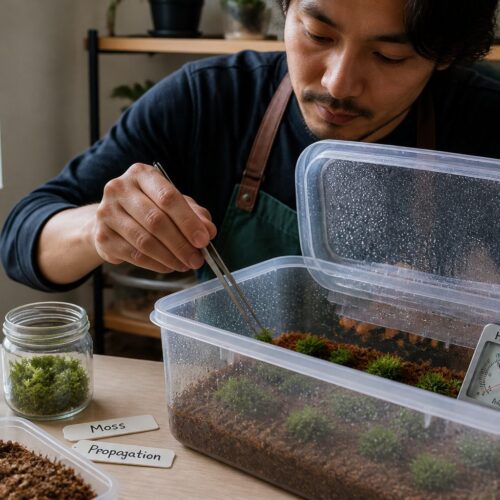
For indoor moss on glass terrarium setups, maintaining high humidity is relatively straightforward. A closed or mostly closed container traps moisture, creating a self-sustaining humid microclimate. Regular misting, perhaps once a day or every few days depending on the seal, helps keep the moss plump and green.
Outdoor growing moss glazed tile installations require more active humidity management, especially in drier climates. Consider placing your moss in a location that receives morning sun but afternoon shade, which reduces evaporation rates. Creating a drip system or using a mister on a timer can provide consistent hydration throughout the day.
Some growers use a layer of sphagnum moss or coco coir around the base of their glass or tile installations to help wick and retain moisture. This acts as a humidity buffer, slowly releasing water vapor into the air around the moss. It supplements the direct misting and provides a more stable environment.
Monitoring the moss itself is your best indicator of humidity levels. If the moss looks shriveled, crispy, or has lost its vibrant color, it is likely too dry and needs more frequent watering or increased ambient humidity. Adjust your misting schedule or add elements like a small water feature nearby to boost local moisture levels.
Conversely, excessive humidity with poor air circulation can lead to mold or rot, especially in enclosed terrariums. It is a delicate balance: you want high humidity, but also enough air exchange to prevent stagnation. Occasionally opening a terrarium lid for a few minutes can help refresh the air inside.
Successful moss attachment smooth surfaces hinges on understanding and consistently meeting these humidity demands. It is a constant dance between providing enough moisture and preventing too much stagnation. Pay close attention to your specific environment and adjust your care routine accordingly.
Indoor vs. Outdoor Glass: Key Differences to Plan For
The environment dramatically impacts the success of moss propagation glass glazed surfaces, with indoor and outdoor settings presenting distinct challenges and opportunities. Understanding these differences is essential for effective planning and long-term viability. What works well in a controlled indoor terrarium might fail spectacularly on an exposed outdoor window.
Indoor moss on glass terrarium projects benefit from stable temperatures, controlled humidity, and protection from harsh weather. You can precisely manage light levels and water, creating an ideal microclimate for delicate moss species. The main concern indoors is often preventing mold due to excessive moisture and lack of air circulation.
- Sunlight exposure and intensity
- Temperature fluctuations (daily and seasonal)
- Wind exposure and desiccation risk
- Rainfall and natural hydration
- Pest and pathogen presence
- Pollution and airborne debris
- Maintenance frequency and access
- Desired aesthetic and longevity
Outdoor growing moss glazed tile faces extreme variability: direct sun, strong winds, heavy rain, and freezing temperatures are all potential threats. Mosses must be incredibly hardy and able to withstand rapid changes in conditions. Choosing locally adapted species that naturally grow on exposed rocks or walls in your area is particularly important for outdoor success.
For outdoor installations, consider the orientation of the surface. North-facing walls or glass that receive indirect light are generally better than south-facing ones that get intense, drying sun. Windbreaks can also help reduce desiccation, offering some protection to your moss. You are essentially trying to create a sheltered microclimate within a larger, more volatile one.
Pest management is another difference; indoor terrariums are relatively safe, while outdoor moss can attract slugs, snails, or insects. Regular inspection and gentle removal of pests are important for maintaining healthy outdoor moss. Outdoor moss also receives natural “showers,” which can help wash away dust and airborne pollutants.
The materials themselves might also behave differently; outdoor glass or tile might be subject to more mineral deposits from rain or sprinkler water. This can affect the moss over time, requiring periodic gentle cleaning. Always consider the long-term environmental factors when planning any moss attachment smooth surfaces project.
Ultimately, indoor projects offer more control and allow for experimentation with a wider range of mosses. Outdoor projects demand resilience and careful site selection, but can offer a grander, more natural aesthetic. Each environment requires a tailored approach to ensure the moss thrives and persists.
Maintenance and Reattachment Over Time
Even with careful planning, moss propagation glass glazed surfaces is not a “set it and forget it” endeavor; ongoing maintenance is essential for long-term success. Mosses, like all living things, require consistent attention to remain healthy and vibrant. Regular checks can prevent minor issues from becoming major problems.
The most important maintenance task is consistent watering or misting, especially if your humidity management isn’t fully automated. Observe your moss daily and mist as needed to keep it moist but not waterlogged. The frequency will depend on your specific environment and the moss species you are growing.
Periodically, you might notice small patches of moss beginning to detach from the glass or glazed tile. This is a normal part of the growth cycle or a sign of insufficient attachment or humidity. Gently press loose sections back into place or reapply a small amount of moss slurry or adhesive to re-secure them.
Weeding is another task, particularly for outdoor installations or open terrariums where foreign spores can settle. Remove any unwanted weeds, fungi, or algae that compete with your moss for resources or block light. Early intervention is key to preventing these invaders from taking over your moss display.
Light pruning can also encourage denser growth and maintain the desired aesthetic for your moss on glass terrarium. Use small, sharp scissors to trim back any overly leggy or unruly sections. This also helps remove any browned or dead pieces, keeping the entire installation looking fresh and green.
If a large section of moss dies or detaches, do not despair; moss is resilient and can often be coaxed back to life or replaced. Collect fresh moss fragments, create a new slurry, and reapply it to the bare patches. This allows you to continually refresh and improve your moss attachment smooth surfaces project.
Consider the long-term aesthetic you want to achieve with your growing moss glazed tile. Some growers prefer a wild, natural look that evolves over time, while others maintain a more manicured appearance. Your maintenance routine should align with these artistic goals, ensuring your moss display remains a source of enjoyment.
Conclusion
Cultivating moss on glass and glazed surfaces is a rewarding endeavor that brings a unique touch of nature to urban environments. While these low-porosity materials present distinct challenges, they are far from impossible to overcome with the right strategies. By understanding moss’s needs and adapting your techniques, you can achieve stunning green displays.
Remember that successful moss propagation glass glazed surfaces hinges on careful surface preparation, thoughtful selection of carrier materials, and diligent humidity management. Choose resilient moss species and tailor your approach to whether your installation is indoors or outdoors. Regular maintenance ensures your moss thrives for years to come.
Embrace the experimentation that comes with growing moss glazed tile or creating a beautiful moss on glass terrarium. Each project offers lessons and opportunities to refine your methods. The patience and observation you invest will be repaid with the serene beauty of living moss, transforming smooth, artificial surfaces into vibrant, natural art. Your efforts will lead to beautiful and lasting moss attachment smooth surfaces.