Moss looks effortless on old stone walls, but in an urban garden it usually takes a little planning and some stubbornness. If you want moss propagation on stone to work on purpose, you have to treat the rock like a growing medium, not a decoration.
Stone dries faster than soil, heats up more, and gives young moss almost nothing to grab. The good news is that once moss attaches, it can handle a lot, including city dust, wind tunnels between buildings, and irregular watering.
I have had the best results when I stop chasing “perfect” and focus on repeatable conditions, steady moisture, gentle light, and texture. This article breaks down what actually matters, from stone porosity to moss attachment techniques that hold on to everything from pebbles to boulders.
Matching moss to stone: porosity, texture, and moisture retention
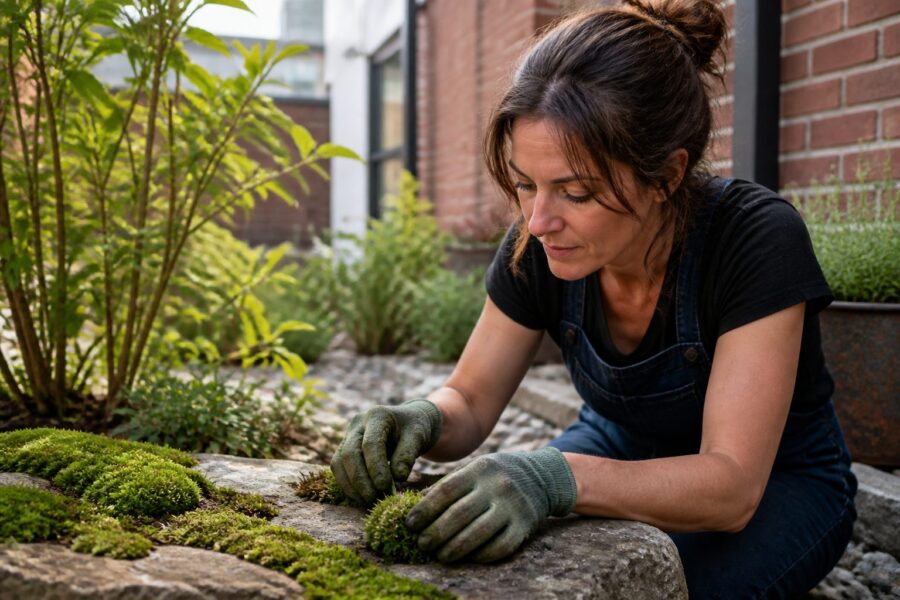
Moss does not “root” into stone, it anchors with tiny filaments and then spreads across the surface. That means the first job is contact, and the second job is moisture that lasts long enough for new growth to knit itself down.
Stone porosity controls how long a rock stays damp after watering or rain. A porous rock can keep a thin wet layer in its pits and pores, while dense stone may look wet for five minutes and then turn bone dry.
Texture is the other half of the equation, because a slick face gives your moss nothing to “key” into. Even when moss looks like it is sitting flat, it usually starts in microscopic scratches, grain boundaries, and tiny chips.
Moisture retention is not only about the stone, it is about the microclimate around it. A rock that sits under a shrub canopy, beside a fountain, or in the shade of a north wall behaves like a different material than the same rock in full sun.
Pick moss that matches the drying pattern you can realistically provide. If your stones dry every afternoon, choose tougher, faster recovering species from sidewalks and roof edges, not the delicate, constantly damp moss from streambanks.
Choosing stones for success: slate, granite, lava rock, and more
Stone choice decides how hard moss propagation on stone will be, so start with rocks that forgive mistakes. I like slate, lava rock, and weathered brick because they stay cooler and give natural crevices without much prep.
Slate has thin layers and a faint grain that holds water in the seams. It also splits into plates, which makes it easy to build a shaded “moss face” that does not bake all afternoon.
Granite is durable but often too smooth when it is freshly cut or tumbled. If you can find older granite with a roughened surface, or pieces that already have lichens and stains, moss attaches faster.
Lava rock is almost unfairly easy because the pores act like mini reservoirs. The tradeoff is that it can crust with mineral deposits if you use hard tap water, so plan on occasional rinses.
Moss on limestone is possible, but it is a special case because the chemistry can push the surface pH high. Some mosses tolerate it, yet many common urban mosses slow down on fresh limestone until the surface weathers and collects a little organic grime.
Cleaning stone without leaving films that block attachment
Cleaning is worth doing, but the wrong cleaner leaves a residue that blocks moss attachment techniques from working. If water beads up like it is on a waxed car hood, you have a film problem.
I avoid soaps, scented detergents, and anything labeled “shine” because they cling to pores and change surface tension. A stiff nylon brush, plain water, and patience do more for moss propagation on stone than a chemical blitz.
| Cleaning goal | Best approach | What to avoid |
|---|---|---|
| Remove loose dirt and dust | Rinse, then scrub with a nylon brush | Dish soap and degreasers |
| Strip algae slime | Scrub, then soak in plain water and rinse again | Bleach residue left unrinsed |
| Remove old potting mix stains | Scrape gently, then brush under running water | Wire brushes that polish soft stone |
| Neutralize unknown residues | Multiple long rinses, then air dry and re-wet test | Sealants or “stone enhancer” products |
Creating micro-texture: safe roughening and crevice use
If your stone is too smooth, you can fix that without turning it into rubble. The goal is micro-texture, small scratches and pits that hold water and grab moss fragments.
For dense stones like granite, I use a masonry rubbing stone or coarse sandpaper, and I stop as soon as the shine is gone. You want a matte surface that stays wet a little longer, not deep gouges that look artificial.
For slate, I usually do nothing because the layers already provide edges and seams. If you must roughen slate, do it lightly, since aggressive grinding can create flaky spots that shed later.
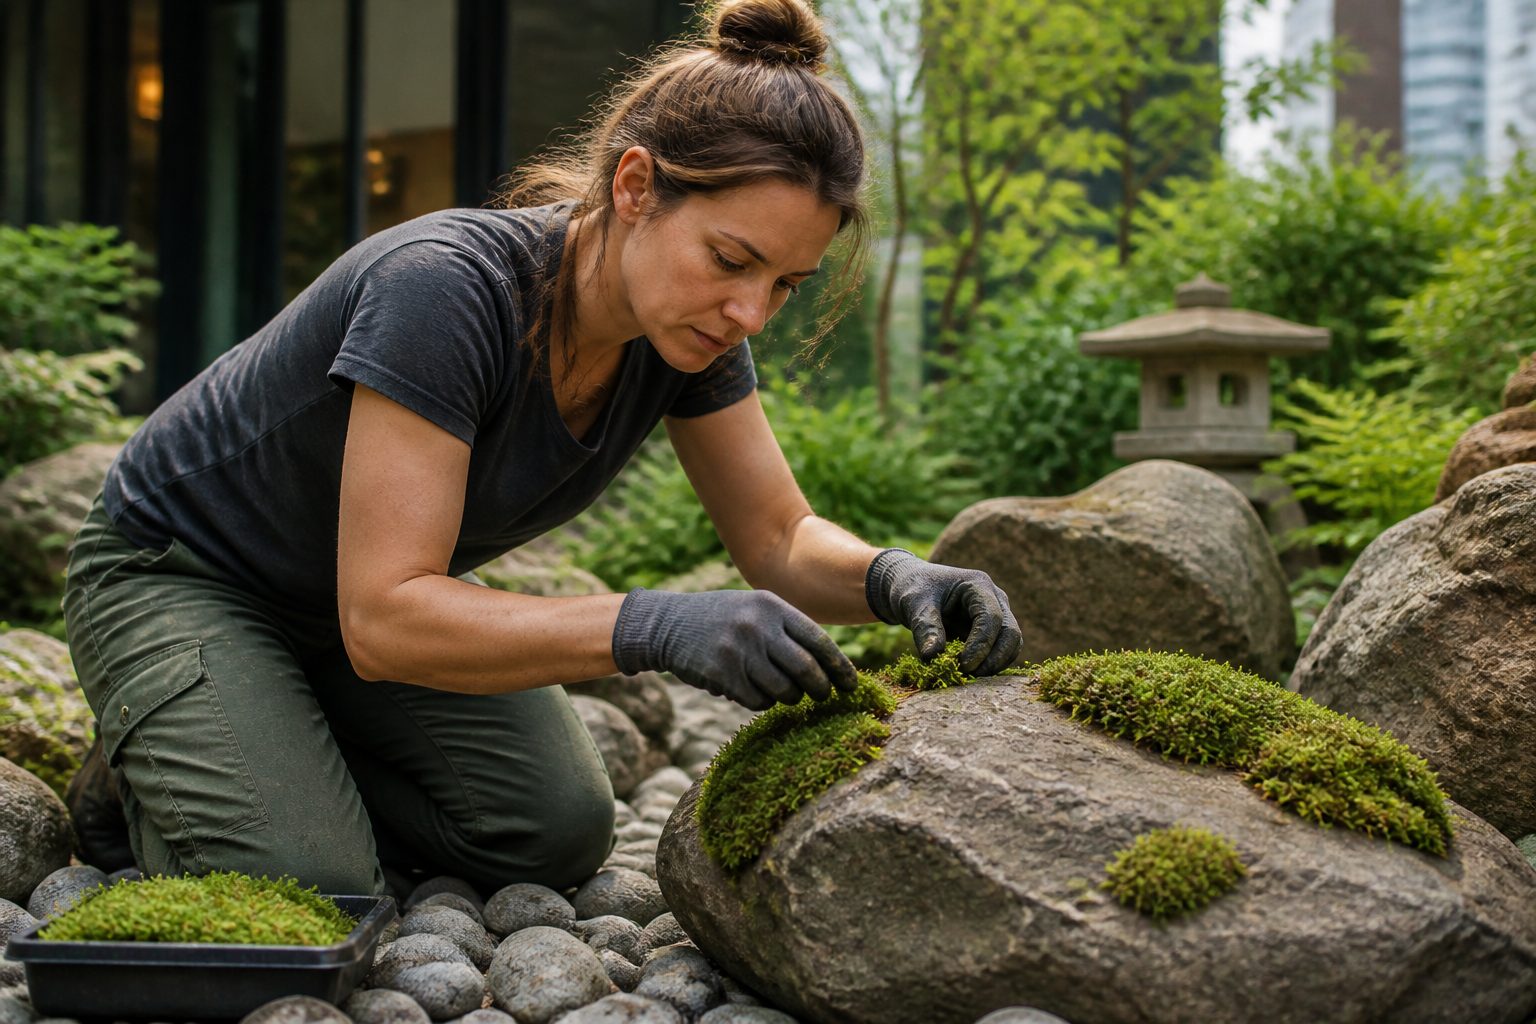
Natural crevices are better than anything you can carve, because they already mimic where moss starts in the wild. A narrow crack that stays shaded for part of the day is basically a nursery bed.
Do not ignore the underside of a rock that sits slightly raised on pebbles or a stand. That hidden, humid strip near the bottom edge often colonizes first, then creeps upward when conditions improve.
Propagation methods on stone: fragments, pressed patches, and slurry
There are three reliable ways to start moss propagation on stone, and each one fits a different situation. I use fragments for quick coverage, pressed patches for clean lines, and slurry only when the stone has good tooth.
Fragments are exactly what they sound like, you tear or snip moss into small pieces and press them into damp texture. This method forgives uneven stones, because you can tuck bits into every pit and seam.
Pressed patches work best when you can harvest intact sheets from your own yard or a friend’s shady wall. The trick is to press hard enough for contact, then keep the patch evenly damp so it does not curl and lift at the edges.
Slurry has a reputation for being magical, but it fails when people paint it onto smooth rock and walk away. A slurry needs roughness, steady moisture, and time, and it usually starts as a thin fuzz that looks like algae before it looks like moss.
If you make slurry, skip sugary ingredients that attract gnats and mold in city planters. Blend moss with water, maybe a pinch of clay or fine soil for body, then brush it into texture and cracks where it will not wash off.
Using crevices and edges to “lock in” new growth
Crevices do more than hold moisture, they physically protect young moss from wind and hose spray. If you want fast results, treat cracks, edges, and chips as your primary planting zones.
I often start by packing tiny fragments into one reliable crack and letting that spot become a “mother patch.” Once that patch thickens, it sheds bits downhill and outward, and the stone starts to green up without constant intervention.
- Press fragments into hairline cracks with a fingertip
- Anchor edges with a dusting of fine clay or sifted soil
- Start on the shaded side, then expand toward brighter faces
- Use flat stones with a slight tilt so water lingers, not sheets off
- Plant under lips and overhangs where evaporation slows
- Avoid exposed top ridges that heat first and dry first
Watering stone surfaces: soak cycles vs frequent misting
Misting feels right, but it often evaporates before it helps, especially on warm rock. I get better attachment when I use soak cycles that actually wet the stone pores and keep the surface damp longer.
A soak cycle can be as simple as watering until runoff, waiting ten minutes, then watering again. That second pass is the one that matters, because the stone has cooled and the pores have started taking up water.
In containers, I sometimes submerge smaller stones in a tub for five minutes, then set them back in place. This is not elegant, but it is effective when you are trying to establish moss on a stubborn piece of granite.
Frequent misting has a place when the air is dry and the stone is already shaded and cool. If you mist, do it in the morning so the surface dries slowly, not at night where stagnant dampness can invite algae films.
Water quality matters more on stone than in soil because there is no buffer. If your tap water leaves white crust, switch to rainwater or filtered water, or you will end up scrubbing mineral scale off your new moss.
Light placement and heat: avoiding sun-baked rock problems
Sun on rock is harsher than sun on soil, because the stone stores heat and radiates it back into the moss. That heat pulse can undo a week of progress in one afternoon, even if you watered in the morning.
I aim for bright shade or dappled light, especially during establishment. East light is friendly, while west light in summer can cook the surface and turn moss crispy by dinner time.
Watch how your site behaves on the hottest day, not the average day. A stone that looks shaded at noon might still get an hour of direct sun at 4 p.m., and that one hour is often the deal breaker.
In tight urban courtyards, reflected light and heat bounce off walls and windows. If you can, pull the stone a foot away from a south facing wall, or add a small plant nearby to break up the heat.
If you insist on mossing a sunny boulder, start on the north side and accept that coverage will be uneven. You can coax moss around the shoulders over time, but a fully sun blasted top face usually stays bare.
Stabilizing stones in containers and landscapes
Movement is the quiet killer of new moss because it breaks contact before the filaments can grip. If your stone wobbles when you water, your moss attachment techniques will keep failing for reasons that look mysterious.
In pots, I seat stones into a firm base layer, then wedge with smaller rocks so nothing rocks back and forth. Loose decorative gravel on top looks nice, but it rarely stabilizes a heavy piece well.
On the ground, I set stones slightly into soil or decomposed granite so they do not shift with foot traffic or freeze thaw cycles. If you place a stone on bare dirt, it often sinks unevenly and cracks the new moss line.
Think about where water runs when you irrigate, because runoff can peel fresh fragments right off a sloped face. A small change in angle, even a few degrees, can turn a wash zone into a gentle seep zone.
For vertical stones, I start moss in the protected bottom corners and side seams first. Once those areas thicken, they act like anchors that help the rest of the surface colonize.
Maintenance: filling gaps and guiding moss to spread naturally
After the first month, maintenance becomes less about watering tricks and more about small corrections. Moss spreads in fits and starts, so you keep nudging it back to good contact and good moisture.
If you see a patch lifting, press it back down on a damp day and pin it with a pebble in the corner for a week. I do not use glue, because most adhesives create a sealed layer that blocks water and can fail ugly later.
Gaps are normal, especially on dense stone with low stone porosity. Fill them by pressing in fresh fragments, then water with a gentle soak cycle so the bits settle into texture instead of floating away.
Watch for algae sheen, because it often shows up before moss really takes. If the stone stays slimy, increase airflow, cut back on night watering, and scrub lightly, since moss does not like competing with slick biofilm.
Over time, moss will choose its favorite routes, usually seams, shaded edges, and spots where dust collects. If you work with that pattern instead of fighting it, moss propagation on stone starts to look natural instead of forced.
Conclusion
Moss on stone is slow, and that is part of its appeal, but you can speed up the early phase with smarter choices. Start with the right rock, respect stone porosity, and build texture and crevices into your plan.
If you want a single rule that keeps paying off, keep the stone cool and evenly damp until attachment is real. Once the moss grips, your job shifts to light tweaks, occasional soaking, and filling small gaps before they turn into bare streaks.
Even tricky projects like moss on limestone can work if you accept slower establishment and focus on protected seams first. When your stones stop wobbling, your water stops crusting minerals, and your moss attachment techniques stay consistent, the green will hold.

