Moss identification using simple keys is the fastest way I know to turn a green smudge on a wall into a name you can use in notes, photos, and cultivation logs. You do not need a microscope to get started, but you do need a method that keeps you honest.
Most people get stuck because they try to match a moss to a picture, and pictures lie when lighting, moisture, and scale change. A moss dichotomous key feels old school, yet it forces you to look at features that stay stable across seasons.
This article gives moss ID steps you can run on a sidewalk crack, a roof patch, or a planter rim in under ten minutes. The goal is practical accuracy, not a heroic species call made from one blurry phone shot.
What an identification key does (and what it doesn’t do)
An identification key is a decision tool that narrows options by forcing you to choose between two or more character states. When you use a field key bryophytes resource well, you trade vibe matching for repeatable observations.
A key does not guarantee a species name, because your specimen can be sterile, damaged, or outside the region the key was written for. Keys also assume you understand the terms, so a little vocabulary work pays off fast.
The best outcome of moss identification using simple keys is often a confident family or genus, because that level is where many urban mosses sort cleanly. If you can write “likely Bryaceae” or “probable Brachytheciaceae” with reasons, you are doing real science.
Keys also train your eyes, and that skill carries over to cultivation because you learn what healthy leaves, stems, and sporophytes look like. After a few weekends, you stop calling everything “sheet moss” and start noticing textures, sheen, and leaf posture.
One warning, keys can tempt you into speed running choices you did not actually verify. If you guess at three couplets in a row, you did not use a key, you rolled dice with botanical punctuation.
The minimum observations you need before you start
Before you open a moss dichotomous key, collect a small set of baseline observations in the same order every time. This routine keeps your notes comparable across sites, which matters in urban surveys where microhabitats change block to block.
First, record substrate and exposure, like concrete, brick mortar, tree bark, compacted soil, or rotting wood, plus sun level and irrigation splash. Many common city genera show strong preferences, and that context can catch an ID that looks plausible but sits on the wrong surface.
Second, check moisture state, because dry mosses often curl, twist, or hide leaf details that you need for moss ID steps. If you can, mist the patch lightly and wait two minutes, then look again for leaf spread and color shift.
Third, estimate patch structure, like tight cushions, scattered tufts, or creeping mats that stitch across the substrate. Growth pattern is one of the few traits you can trust without magnification, and it drives the first big split in most field key bryophytes guides.
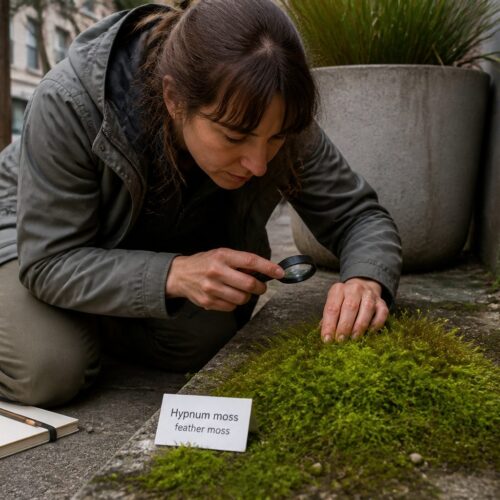
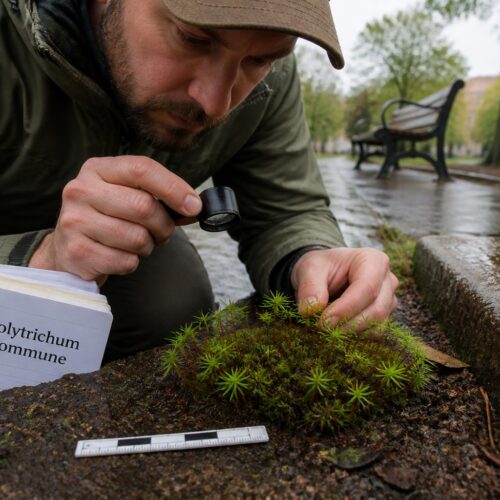
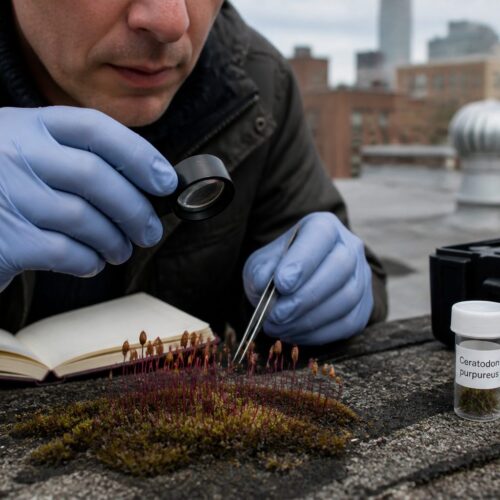
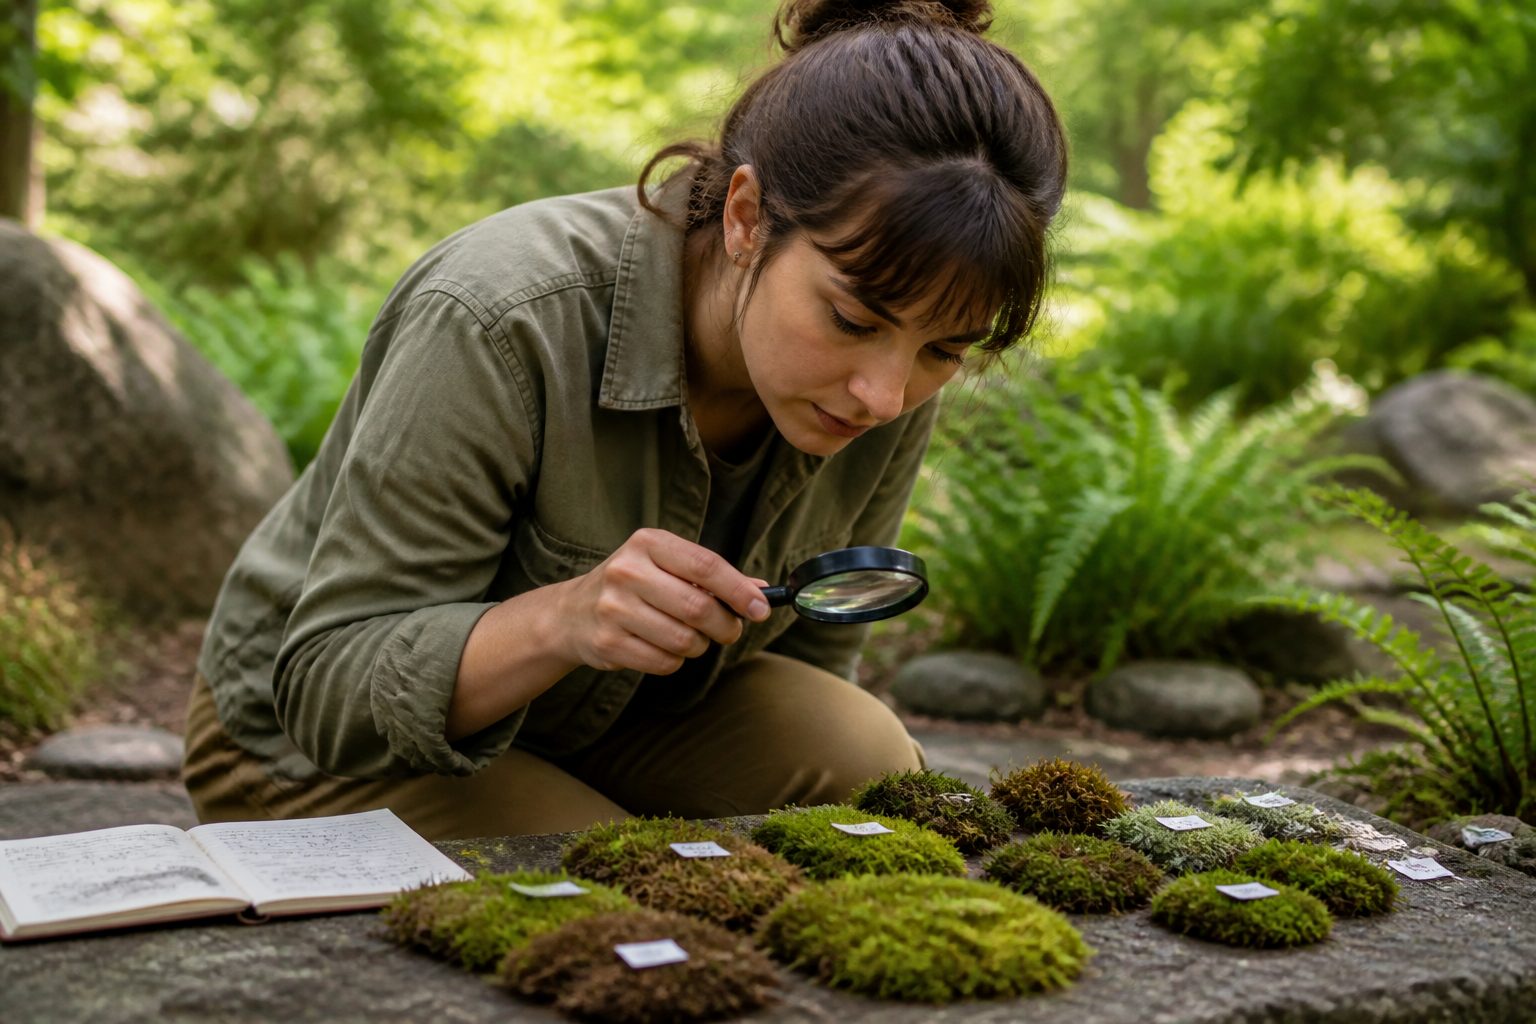
Fourth, take a scale photo with a coin or your fingernail, then a close photo of a single shoot tip. You will forget what you saw, and your future self deserves evidence when you compare your result to herbarium images later.
Step 1: Growth form and acrocarp vs. pleurocarp split
The acrocarp versus pleurocarp split is where moss identification using simple keys usually starts, and it is worth slowing down here. Get this wrong and the rest of your couplets will feel confusing, because you are walking through the wrong hallway.
Acrocarps tend to grow as upright tufts or cushions, with sporophytes coming from the tips of main stems. Pleurocarps tend to creep and branch, making mats, with sporophytes arising from short side branches.
| Quick check | Acrocarp tendency | Pleurocarp tendency |
|---|---|---|
| Patch look from 2 feet away | Tufts or cushions | Carpets or wefts |
| Main stem direction | Mostly upright | Mostly creeping |
| Branching pattern | Few branches | Frequent branching |
| Sporophyte position (if present) | At stem tips | On short lateral branches |
| Common urban examples | Syntrichia, Bryum | Brachythecium, Hypnum |
Step 2: Leaf costa and leaf margin decisions
After the growth form split, most moss dichotomous key paths ask about the costa, the midrib that may run partway or all the way up the leaf. A cheap 10x hand lens is enough for this, and it is one of the best purchases for field key bryophytes work.
Start by answering whether the costa is absent, short and double, single and ending midleaf, or single and reaching the tip. In urban mosses, that single decision can separate big groups like many pleurocarps with weak or double costae from acrocarps with a strong single costa.
Then check whether the costa ends below the apex or sticks out as a short point, because some keys treat an excurrent costa like a separate trait. When you see a tiny stiff tip that is clearly costa tissue, write it down, because you will forget and later argue with yourself.
Leaf margins matter too, and you can often see them even when the costa is hard to judge. Look for margins that are flat, recurved, or strongly revolute, since rolled edges can make a leaf look narrower than it is.
Finally, decide if the margin is entire or toothed, and do not overcall teeth on a damaged leaf. If you only see jagged edges on the oldest leaves near the base, assume wear first and confirm on fresh leaves near the tip.
Step 3: Leaf tip features (hair-points, cusps, rounded tips)
Leaf tips are where moss ID steps start to feel satisfying, because you can often see the answer without technical gear. A hair-point, a blunt rounded apex, or a sharp cusp can send you to very different parts of a key.
Hair-points are common in dry, sun exposed urban sites, especially on walls and roof edges, and they can look glassy when wet. If the hair-point is hyaline and obvious, you may be heading toward genera like Syntrichia or Tortula, depending on other traits.
Cusps are different from hair-points, because the tip is leaf tissue that narrows into a stiff point rather than a clear hyaline awn. In some acrocarps the cusp is short but consistent across leaves, which is a better clue than overall color.
Rounded tips can be real, especially in some pleurocarps, but they can also be a sign of abrasion on concrete or foot traffic near paths. I trust rounded apices only when I see them on protected shoots tucked under a ledge or inside a dense mat.
Do not forget leaf posture, because tips that look blunt on a curled dry leaf can look sharp once the plant opens. If you are doing moss identification using simple keys in the field, a mist bottle is basically a truth serum for leaf tip characters.
Step 4: Stem and branching checks that confirm your path
Once you have a tentative path through a moss dichotomous key, use stem and branching traits as a reality check. This is where you catch the classic mistake of forcing a tufted pleurocarp into an acrocarp couplet because the patch looked “cushiony” from far away.
Look closely at whether stems creep along the substrate with leaves on all sides, or stand upright with a clear base anchored in soil or mortar. Creeping stems often show irregular branching that makes the mat look braided when you tease it apart with a toothpick.
Check for paraphyllia, the tiny leaf like filaments on stems that some pleurocarp families show, because they can confirm you are in the right neighborhood. You will not always see them with a hand lens, but when you do, they are hard to unsee.
Also note whether branches are pinnate, meaning featherlike, or more chaotic, because many common lawn and sidewalk pleurocarps have a tidy feather pattern. A clean pinnate look often points you toward familiar mat formers like Hypnum or Brachythecium groups, though species calls still need more work.
For acrocarps, check whether the stems have a dense cap of leaves at the top and older leaves below, because that can match the cushion habit many keys assume. If the stems are tall and lax instead of tight, you may be dealing with a different growth form than the couplet expects.
Step 5: Sporophyte clues when available
Sporophytes are the cheat codes of moss identification using simple keys, but city mosses often go sterile for long stretches. When you do find capsules, treat them like gold and photograph them from the side and from above.
Start with seta length and capsule position, because erect capsules on long setae read differently in a key than nodding capsules tucked near the mat. Capsule shape matters too, and “pear shaped” versus “cylindrical” is usually enough at the field key bryophytes level.
- Seta length relative to the leaves
- Capsule position, erect or nodding
- Capsule shape, ovoid, cylindrical, or urn shaped
- Operculum shape, conic or rostrate
- Peristome teeth visible at the mouth
- Calyptra presence and hairiness
Handling uncertainty: how to park an ID at family or genus
Parking an ID is a skill, and it is the difference between a useful record and a confident mistake that spreads through iNaturalist and garden forums. When moss ID steps get messy, I stop at the last couplet where I can defend every choice.
Write the taxon level you trust, then list the characters you actually observed, like “acrocarp cushion, strong single costa, hair-point present, margins recurved.” That note set becomes your personal audit trail, and it makes your later microscope session faster.
Family level is often realistic for urban work, because many city species come from a small set of families that tolerate heat, salt, and compaction. If your key lands you in Pottiaceae, Bryaceae, Brachytheciaceae, or Hypnaceae, you already learned something actionable about ecology and care.
Genus level is possible when you have a clean combination of traits, like a strong hair-point plus curled dry leaves plus a tough wall habitat that fits Syntrichia. I still mark it as “cf.” in my notes when I did not check microscopic traits like laminal cell shape.
When you cannot even trust family, label it as “moss sp.” and keep the photos and substrate notes anyway. A year later, when capsules appear or you find a better patch, those old records become a baseline for phenology and spread.
How to avoid false certainty and confirmation bias
False certainty is the main enemy of moss identification using simple keys, because the key will always give you an answer even when your specimen is poor. The trick is to treat every couplet like a claim you must support with a visible feature, not a hunch.
When you think you know the genus, force yourself to read the alternative choice and ask what you would expect to see if that option were true. If both options sound plausible, your observation was weak and you should recheck the trait on a different shoot.
Confirmation bias shows up when you want a common name, like “star moss” or “fern moss,” and you start interpreting every leaf as proof. I avoid this by doing the key once without looking at photos, then doing a photo comparison only after I have a written endpoint.
Urban mosses also pick up weird forms, like stunted shoots from drought or elongated shoots from shade under a bench, and those forms break couplets. If a character seems to change across the same patch, assume stress morphology and sample from the healthiest looking area.
Keep a short list of “usual suspects” for your city, but do not let that list drive your answers in a moss dichotomous key. When your result surprises you, that is often a sign you finally saw a character clearly, not a sign the key failed.
Creating your own mini-key for your neighborhood species
A personal mini-key beats a thick book when you are identifying the same twenty sidewalk species all year. Once you have a handful of confirmed IDs, you can build a local field key bryophytes tool that uses traits you can actually see on your routes.
Start by listing your neighborhood mosses by growth form, then split them by one strong trait like hair-point presence, costa strength, or mat versus cushion habit. If you choose traits that require a microscope, you will stop using the key after a week.
Write your mini-key in plain language first, then add the formal terms in parentheses so you learn them over time. For example, “leaf edge rolled back (recurved)” is clearer than writing “recurved margin” alone when you are tired and kneeling on concrete.
Test the mini-key on fresh finds, and revise it when it fails, because failure shows you which couplet is vague. I like to include one “sanity line” under each endpoint that says what habitat I usually find it in, like “brick mortar in full sun” or “shaded soil in pots.”
Over time, your mini-key becomes a cultivation guide too, because you link identification traits to care traits like drought tolerance and light preference. That connection is where moss identification using simple keys stops being a hobby trick and becomes a practical tool for urban moss gardens.
Conclusion
Moss identification using simple keys works because it forces you to look at stable characters in a repeatable order, even when the specimen is small and the setting is messy. If you practice the same moss ID steps on every patch, your accuracy climbs fast without fancy gear.
Use the big splits first, like growth form and acrocarp versus pleurocarp, then move to costa, margins, and leaf tips, and only then chase sporophytes when you get lucky. When the evidence is thin, park the ID honestly at family or genus and keep your notes clean.
A moss dichotomous key is not a quiz you pass once, it is a habit you build, and the habit makes you a better observer in every season. If you want a next step, build a neighborhood mini-key and watch how quickly your field key bryophytes work turns into real local expertise.