Urban moss species identification is a lot easier once you stop treating every green patch like a mystery blob and start treating it like a plant with repeatable traits. City mosses grow where people walk, wash, salt, and spray, so they develop patterns you can learn fast.
You do not need a microscope to get useful IDs, and you do not need to memorize Latin names on day one. You do need patience, a phone camera, and a willingness to get close enough to notice leaf texture and growth form.
This guide focuses on moss ID basics you can use on sidewalks, brick walls, park soil, and old wood. It also calls out moss look-alikes that trick beginners, especially liverworts that flatten into neat green sheets after rain.
What counts as a “moss” in the city (mosses vs. liverworts vs. hornworts)
When people say “moss” in a city, they often mean any small green thing that carpets damp surfaces. For urban moss species identification, you have to separate true mosses from liverworts and hornworts, because the clues and names work differently.
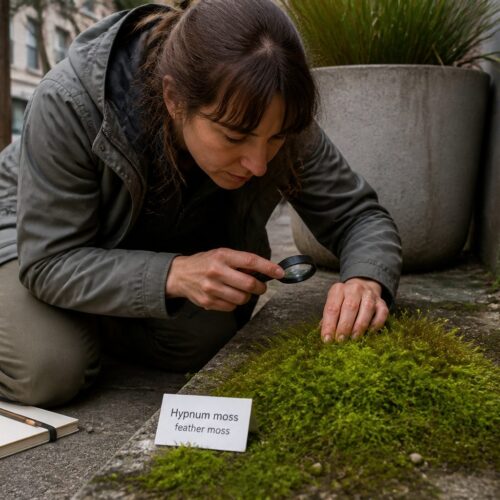
True mosses usually have leafy shoots, even when they are tiny, and they often show a clear stem with leaves spiraling around it. Many common city mosses also make obvious tufts or mats that hold their shape when you poke them gently.
Liverworts come in two main city-friendly styles, leafy and thalloid, and both can fool you at first glance. Thalloid liverworts look like flat ribbons or lobed sheets pressed to concrete, and they often have a slick, wet shine after rain.
Hornworts are less common on hard urban surfaces, but you can find them in disturbed soil in planters or garden beds. They make a flat thallus like some liverworts, then push up narrow horn-like sporophytes that look like tiny green spikes.
If you only remember one field rule, remember this: mosses look like miniature forests, liverworts often look like miniature seaweed. That mental image cuts down moss look-alikes early and keeps your notes cleaner.
The 5 features you can reliably see without a microscope
Beginners get stuck because they chase species names before they build a short checklist of visible traits. Urban moss species identification gets smoother when you commit to five features you can see with your eyes and a phone zoom.
First, look at growth form, because a cushion on a brick capstone narrows options faster than any leaf detail. Second, check color and sheen, since some common city mosses stay yellow-green while others go dark and glossy when wet.
Third, inspect leaf posture when dry versus wet, because many mosses curl or twist as they dry out. That curl pattern is one of the best moss ID basics for sidewalks that swing between splash and drought.
Fourth, look for a midrib, called a costa, running up the leaf, because many groups either always have it or usually lack it. Fifth, hunt for sporophytes, since a capsule on a stalk can turn a vague guess into a confident genus-level call.
Write these five traits down every time, even when you think you will remember, because you will not. Repeating the same checklist is how you stop confusing mosses with moss look-alikes and start seeing the city as a set of habitats.
Growth forms that narrow your options fast (cushion, mat, tuft, feather)
Growth form is the quickest filter in urban moss species identification, because it stays visible even when leaves are too small to read. You can usually sort a patch into cushion, mat, tuft, or feather in under ten seconds.
Do not overthink the labels, because they are field shorthand, not a scientific rank. The point is to get you away from random guessing and toward a short list of common city mosses that share a body plan.
| Growth form | What it looks like in the field | Where you often see it in cities |
|---|---|---|
| Cushion | Dome or pillow, dense and springy | Brick caps, stone ledges, roof tiles |
| Mat | Flat carpet, spreads sideways | Concrete seams, shaded sidewalks, retaining walls |
| Tuft | Small clumps, upright shoots | Soil edges, planters, cracks with grit |
| Feather | Fern-like sprays, branching in one plane | Moist wood, park soil, shaded tree bases |
Leaf clues: shape, tip, margins, and the midrib (costa)
Leaves are where moss ID basics start to feel like real botany, but you can keep it practical. For urban moss species identification, you are mostly comparing shapes and edges, not counting cells.
Start with overall shape, since many sidewalk mosses have narrow, lance-shaped leaves that taper to a point. Others have broader, oval leaves that look blunt and soft, especially when the patch stays wet in shade.
Next, check the leaf tip, because some species end in a sharp point while others end in a clear hair tip that looks pale or silvery in sun. Those hair tips can make a dry patch look frosted, which is a strong field clue on exposed concrete.
Margins matter more than you would expect, even without magnification. Some leaves look smooth-edged, while others look slightly toothed or rolled under, and rolled margins can make a leaf look thicker than it is.
The costa is your anchor feature, so try to spot it on several leaves, not just one. A strong costa that runs to the tip points you toward certain common city mosses, while a short or missing costa can steer you toward different groups or even toward moss look-alikes.
Stem and branching patterns you can spot in the field
Stems sound like a microscope topic, but you can read stem structure in the field by how the plant holds itself. Urban moss species identification gets easier when you notice whether shoots stand upright, creep along the surface, or do both.
Look for creeping stems in mats on concrete, because those often send up short upright branches like tiny streetlights. That mix of horizontal and vertical growth is common in city cracks where water comes and goes.
Feather mosses show a different look, with side branches that line up in a flatter plane and create a mini frond shape. When you see that, you can often rule out many sidewalk specialists and focus on moister park or wood habitats.
Also pay attention to whether the patch has obvious individual stems you can separate with a fingernail. If everything smears into a thin sheet with no clear stems, pause and consider liverworts as moss look-alikes.
Branching is also tied to age, so do not judge a whole patch by one stressed corner. I like to check the healthiest middle section, because the newest growth shows the most reliable posture and leaf spacing.
Sporophytes: when capsules and seta make ID easier
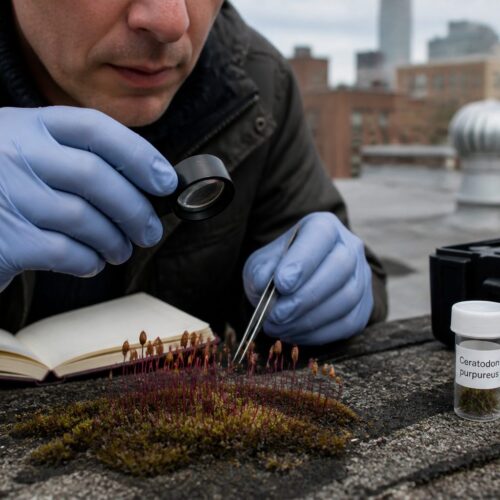
Sporophytes are the cheat codes of urban moss species identification, because they add shapes that do not depend on leaf details. A capsule on a stalk can be visible from standing height if you catch the patch at the right season.
The stalk is the seta, and its length and color are worth noting. Some common city mosses hold capsules well above the leaves, while others keep them low and half-hidden in the tuft.
Capsule shape is a big deal, even for beginners, since it can be round, oval, or more cylindrical. Take a side photo and a top photo, because a capsule that looks round from above can look pear-shaped from the side.
Look for capsules that tilt or hang, because that droop is a field clue you can see without tools. Also note whether capsules look smooth or slightly ridged, since ridges can show up as tiny vertical lines in a sharp phone shot.
If you see no sporophytes, do not treat that as failure, because many patches simply are not fruiting. Keep checking the same spots after rainy weeks, because urban microclimates can trigger sporophytes in one block and not the next.
Substrate matters: concrete, brick, asphalt edges, wood, and soil
Substrate is not background scenery, it is part of the ID. Urban moss species identification works best when you write down what the moss is stuck to, because different surfaces push different species to the top.
Concrete and mortar are alkaline, especially when new, and they favor a certain set of tough wall and sidewalk mosses. Brick can be similar, but older brick often has pockets of grit and soot that change water retention and chemistry.
Asphalt edges are weird, because asphalt itself sheds heat and dries fast, but the seam where asphalt meets curb can trap dust and water. That seam creates a narrow habitat strip where mats and tufts can thrive even on a sunny street.
Wood brings a different set of common city mosses, especially on old fence rails, rotting stumps, and shaded mulch piles. If the wood is treated, you may see less diversity, and you may see more moss look-alikes like algae films that stay slick.
Soil and compacted dirt in parks often host species that never show up on walls, including feather forms and taller tufts. If you want faster learning, pick one substrate per walk and focus, because mixing everything at once slows your pattern recognition.
Microclimates in urban spaces (shade, splash zones, heat islands)
Two moss patches can sit fifty feet apart and behave like they live in different cities. For urban moss species identification, microclimate notes often explain why your ID book expectations do not match what you see.
Shade is the obvious one, since north-facing walls and the base of buildings stay damp longer. In deep shade, mosses stay greener and flatter, and liverwort moss look-alikes show up more often after wet weeks.
Splash zones matter more than rainfall totals, because street runoff and sprinkler overspray create steady moisture. Look at the first foot above the ground on walls near downspouts, because that strip often holds the healthiest capsules and newest growth.
Heat islands change everything, especially on dark stone, metal edging, and roof surfaces that cook in summer. Mosses there often look scorched and tight, then rebound quickly after a storm, which can trick beginners into thinking they found two species.
Wind tunnels between buildings also dry moss fast, even in shade, and that affects leaf curl and color. If your photos show a patch that looks brown but the stems still have green tips, you are probably seeing drought posture, not a different taxon.
A simple step-by-step ID workflow you can reuse
If you want urban moss species identification to stick, use the same workflow every time, even when you are in a hurry. Consistency beats raw talent here, and it keeps your notebook from turning into a pile of half-IDs.
Start by ruling out moss look-alikes, especially flat thalloid liverworts and green algae films on wet concrete. If you can separate leafy shoots, move on and treat it as a true moss until evidence says otherwise.
Next, record growth form and substrate, because those two facts narrow your search faster than leaf shape. After that, check dry versus wet posture by misting a tiny corner with water, or by revisiting after a rain.
Then look for the costa and leaf tip details, using phone zoom and good side lighting. I often angle the phone so the sun skims across the patch, because that makes hair tips and rolled margins show up clearly.
Finally, scan for sporophytes and take photos that show them in context and close-up. When you sit down later with a regional key or a city moss list, those capsule shots often make the difference between “maybe” and a solid call.
How to document finds (photos, notes, and sample etiquette)
Good documentation is the quiet skill behind moss ID basics, because memory lies and photos do not. For urban moss species identification, you want repeatable photo angles and notes that capture the site conditions.
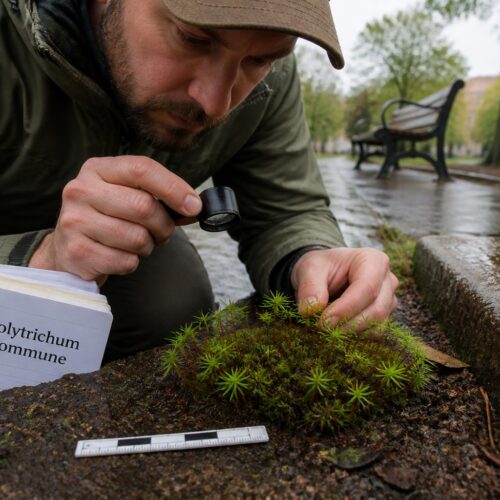
Take one wide shot that shows the whole patch and its substrate, then take close shots that show leaf posture and any sporophytes. If you can, include a finger, coin, or ruler edge for scale, because size clues separate many common city mosses.
- Wide habitat photo with substrate visible
- Close-up of growth form from above
- Side-angle shot to show leaf curl and height
- Macro shot of a single shoot tip
- Capsule and seta close-up when present
- Note shade level and water source nearby
Conclusion
Urban moss species identification gets fun when you stop chasing perfect names and start building a reliable set of observations. Growth form, leaf clues, stems, sporophytes, substrate, and microclimate will carry you through most beginner field IDs.
Keep your workflow tight and your notes honest, and you will learn the common city mosses in the places you already walk every week. When you do hit moss look-alikes, treat them as a reminder to slow down and confirm the basics before you label anything.