Moss identification photography is less about fancy gear and more about getting the right evidence into your frame. If your photos show the same few features every time, you can often narrow an unknown moss to genus, even with a smartphone.
I see plenty of moss photos that look nice but are useless for ID because they skip scale, skip structure, and shoot straight down like a document scan. With a few repeatable moss identification photography tips, you can make every outing produce images you can actually compare later.
Urban mosses add their own chaos, with dust, foot traffic, sprinkler water, and mixed colonies growing on brick, concrete, and tree bark. That mess is exactly why you need a consistent approach to macro photos moss and not just a single close up.
This article sticks to simple shots, wide to ultra close, that capture growth form, leaf behavior, and sporophyte details. Use it as a repeatable routine, and your camera roll will stop being a graveyard of green fuzz.
Why most moss photos fail (and how you can fix that)
The most common failure is shooting one pretty close up and calling it done. A single frame rarely shows both the colony pattern and the leaf level traits used in keys.
The second failure is missing focus on the actual diagnostic plane, which is usually leaf tips, costa, or capsule mouth. Your phone happily focuses on a shiny pebble or a bright bit of grit instead.
Another problem is angle, because a straight top down photo hides whether shoots are creeping, upright, or forming tufts. Side views show stem posture and branching, which can separate lookalikes fast.
Color is a trap in cities because wet concrete, algae, and reflected brick can tint everything. If you rely on green tone alone, you will mislabel common species and never know why.
Fixing these issues does not require a macro lens or a tripod, it requires a plan you repeat every time. Treat each find like a tiny specimen report, and your moss identification photography tips become a habit instead of a checklist you forget.
The 6 essential shots for moss ID (wide to ultra close)
Start with a wide habitat shot that shows what the moss is growing on, like mortar, asphalt edge, roof tile, or oak bark. Include nearby clues like drainage streaks, irrigation spray zones, or shade from a fence.
Next take a medium shot that fills the frame with the colony so you can see whether it is a mat, a cushion, or scattered patches. This is where you capture the growth form that many field guides use first.
Third, shoot an oblique side view at a low angle, almost like you are photographing a miniature forest. This reveals shoot height, stem orientation, and whether the colony has a layered look.
Fourth, take a close up of several shoots together, sharp enough that you can see leaf arrangement along the stem. Many mosses look identical as a carpet, then separate once you see how leaves overlap.
Fifth, go for macro photos moss of a single shoot tip where leaf shape and tip behavior show clearly. If your phone has a macro mode, use it, and if it does not, back up slightly and crop later rather than forcing blur.
Sixth, take an ultra close photo of any sporophytes, capsules, or peristome teeth you can manage. Even a slightly soft capsule shot can be more useful than a perfect green carpet photo with no reproductive structures.
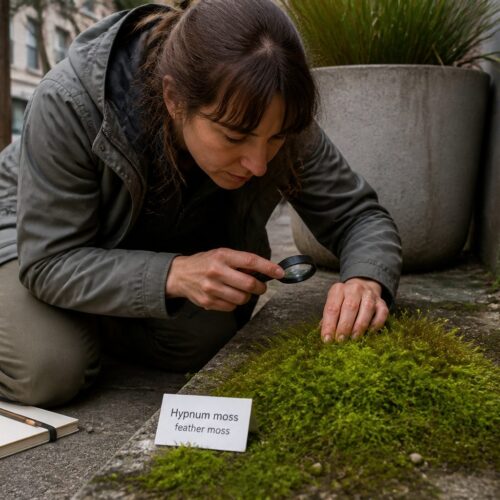
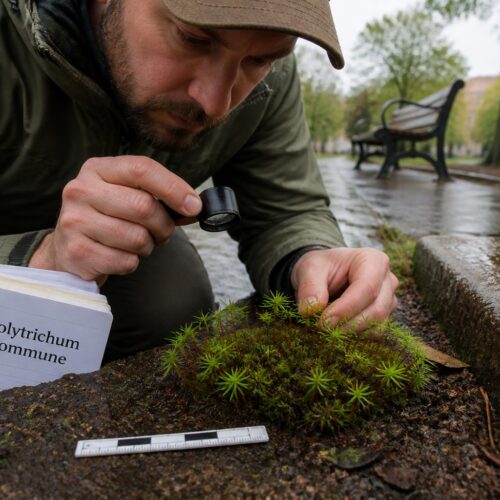
Getting scale right: coins, rulers, and natural reference points
Scale is the difference between a guess and a comparison, because moss size ranges overlap but still matter. A photo without scale makes a 3 millimeter plant look like a 3 centimeter plant.
I prefer a small ruler or a printed scale card, but a coin works if you keep it consistent and clean. Natural reference points like a pine needle or a brick seam also help when you cannot place objects on delicate colonies.
| Scale option | Best use | Common mistake |
|---|---|---|
| Small ruler (mm) | Colony and shoot height shots | Ruler not in same plane as moss |
| Coin (penny or nickel) | Quick field scale for mats | Coin blocks light and casts shadow |
| Scale card with grid | Close ups of shoots and capsules | Card too glossy, adds glare |
| Brick seam or tile edge | Urban surfaces when you cannot touch moss | Perspective distortion exaggerates size |
| Pine needle or grass blade | Woodland edges and parks | Reference object curls or moves in wind |
Focus and stability: handheld techniques that work
Handheld moss photography fails when shutter speed drops and your hands do what hands do. You can beat this by bracing your wrists on your knees, a wall, or the ground while you shoot.
Use tap to focus, then slide exposure down a touch so highlights do not blow out on wet leaves. Many phones also let you lock focus, which keeps the camera from hunting when you reframe.
For close ups, move your whole body forward and back instead of stabbing the phone toward the moss. That motion is smoother, and you can fire a short burst when the details snap into focus.
If your camera app offers a macro mode, learn its minimum focus distance and stay just outside it. When you push inside that limit, the phone will switch to digital sharpening and the image will look crunchy.
A cheap trick is to use the self timer for two seconds, even when handheld, because it stops the jab you make when you tap the shutter. This matters a lot for smartphone moss photography on shaded walls where shutter speed drops.
Lighting for texture: overcast days, shade, and diffusion
Moss texture is what your camera needs to show, and harsh sun turns that texture into glare. Overcast light is my favorite because it keeps highlights controlled and shows leaf edges cleanly.
If you are stuck with sun, move into open shade, like the shadow of your body or a nearby tree. You can also hold a white piece of paper as a diffuser above the colony, but keep it far enough away that it does not block your angle.
A phone flash usually flattens moss and makes wet shoots look like plastic. If you must add light, use a small flashlight from the side to rake across the surface and reveal leaf curl and costa ridges.
Watch for mixed light in cities, because green moss under a blue sky reflection from glass can shift weirdly. Step a foot to the left, and the color cast can change more than the species differences you are trying to document.
Texture also depends on exposure, so do not trust one frame. Take one normal exposure, one slightly darker, and pick the one that keeps leaf tips and capsule mouths from turning into white blobs.
Capturing wet vs. dry appearance without misleading color
Many mosses change shape dramatically when they dry, with leaves twisting, curling, or pressing tight to the stem. If you only photograph one moisture state, you can miss a key trait and misread the plant.
Color changes too, and phones exaggerate it by auto white balance that chases whatever is brightest. Your goal is to show the difference without making the wet shot neon green and the dry shot brown sludge.
- Shoot one frame wet, one frame dry, same angle
- Lock white balance if your app allows it
- Lower exposure slightly to protect wet highlights
- Avoid flash on wet shoots
- Include a neutral object like gray concrete for color reference
- Note recent rain, sprinklers, or mist in your field notes
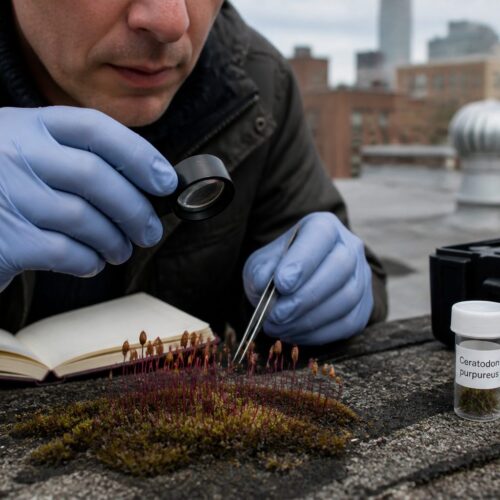
Photographing sporophytes and capsules clearly
Sporophytes are often the fastest route to an ID, but they are thin and sway with tiny air movement. Shoot them when wind is calm, or use your body to block the breeze.
Start with a frame that shows how many sporophytes are present and where they sit in the colony. Density and distribution can matter, and it helps you relocate the patch later.
Then get a side view of the seta and capsule, because capsule shape changes with angle. A straight top view can hide whether the capsule is symmetric, curved, or slightly angled.
For capsule mouths, take several shots at slightly different distances, because depth of field is razor thin in macro. If your phone supports focus stacking, use it, but do not trust it on moving setae.
Do not forget the calyptra if you see it, since it can be hairy, smooth, or shaped in ways that keys love. A quick macro photos moss frame of a capped capsule can save you from guessing later.
Background control: making the moss stand out
Busy backgrounds trick autofocus and make it hard to read leaf margins. You want the moss to be the sharpest, highest contrast thing in the frame.
Change your angle until the background becomes a simple blur, like dark soil or a uniform wall. A low oblique angle often does this better than shooting straight down.
If you can, place a matte card behind an upright tuft without touching the shoots, which is easier on a vertical wall than on a fragile mat. Black helps show pale capsules, and gray helps with color balance.
Watch out for bright gravel or white paint chips that pull your exposure down and make the moss look too dark. Sometimes the fix is as simple as cropping tighter or shifting the frame a few inches.
When you photograph mixed colonies, isolate one patch at a time and label it in your notes. A single image that blends three species is pretty, but it is a mess for identification.
Organizing photos and notes so you can compare later
If you cannot find your images later, the field work did not happen. I organize by date and location first, then by a short tag like “brick wall north side” or “park oak base.”
Use a consistent sequence so each find has the same story in your camera roll, wide shot first and ultra close last. This is where a moss photo checklist is practical, because it keeps you from skipping scale or side views.
Write down substrate, moisture, and light, because those three factors explain a lot of weird growth forms. A small note like “sprinkler overspray nightly” can explain why a species looks unusually lush on a curb.
Add a quick sketch map or a GPS pin, since urban patches disappear under construction or pressure washing. I also note height above ground, because moss at shoe level gets battered and looks different from moss at chest level on a wall.
When you compare later, group similar shots side by side, like all shoot tip macros in one album. That habit makes pattern recognition easier and improves your moss identification photography tips over time, because you see what worked and what failed.
Common photo traps: glare, motion blur, and wrong angles
Glare is the big one, especially on wet moss on stone where water beads act like mirrors. If you see sparkles, shift your angle a few degrees or block the sky reflection with your body.
Motion blur hides leaf teeth and costa lines, and you often do not notice it until you zoom in later. Use burst mode, brace your hands, and take one step back if the phone keeps hunting focus.
The wrong angle problem shows up when every shot is top down, because many diagnostic traits sit on the side of the shoot. Make yourself take at least one low side view even when the patch is awkward to reach.
Another trap is depth of field, where the front leaves are sharp and the capsule you care about is soft. Move the camera so the key feature sits in the same plane as the sensor, then refocus.
Finally, do not over edit, because heavy sharpening and saturation can invent traits that are not real. If you adjust anything, keep it mild and apply the same settings across a set so comparisons stay honest.
Conclusion
Good moss ID photos look repetitive on purpose, because repetition captures the traits keys and experts need. Wide habitat context, colony form, side posture, shoot tips, and sporophytes give you a complete record.
Once you build a routine, smartphone moss photography becomes reliable even on a quick walk past a brick planter. Keep a simple moss photo checklist, keep scale in frame, and your next unknown moss will be a problem you can actually solve.