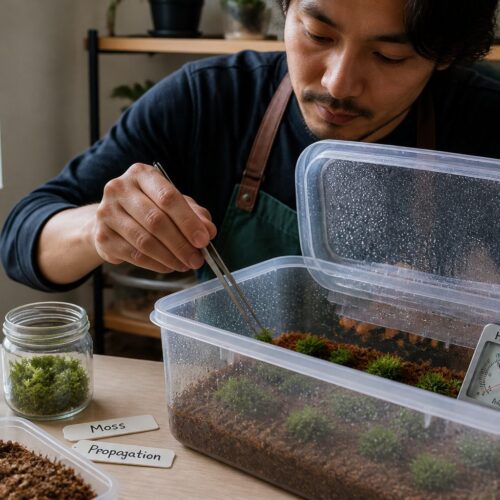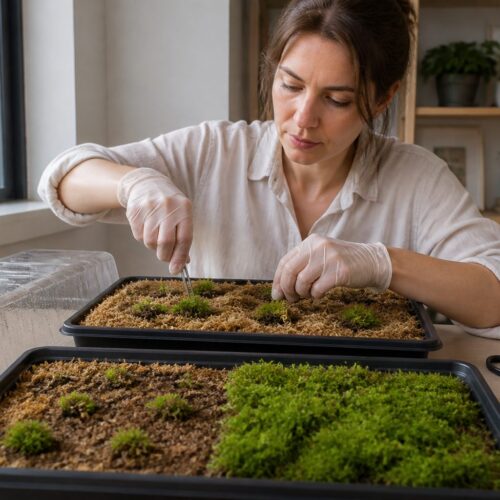

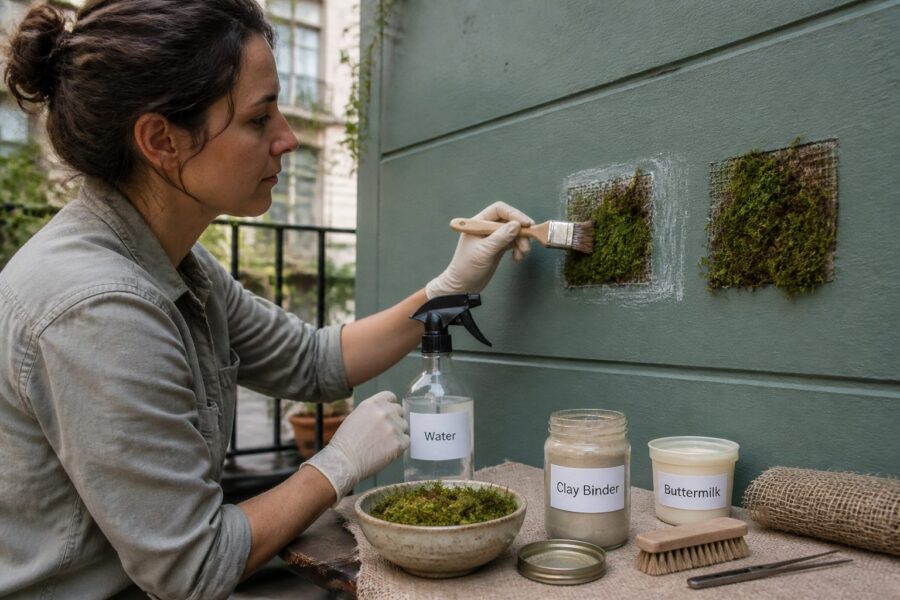
Cultivating living moss on painted walls offers a unique aesthetic, transforming sterile surfaces into soft, green tapestries. This biophilic design brings a calming, natural element to any environment. Many gardeners find their moss failing to thrive on such surfaces, as successful moss propagation on painted walls requires a specific, nuanced approach.
Unlike natural stone or brick, paint creates a smooth, often chemically treated barrier. Understanding these challenges and implementing proper techniques are key to growing moss exterior wall installations that last. This guide details meticulous surface preparation, appropriate species selection, effective attachment methods, and long-term care. Follow these guidelines to create a beautiful, vibrant, and enduring moss on painted wall feature, proving robust moss propagation on painted walls is entirely possible with the right strategies.
Why Paint Prevents Moss from Gripping the Wall
Paint creates a smooth, non-porous barrier that moss struggles to adhere to. Unlike natural stone or brick, painted surfaces offer little for delicate moss rhizoids to grip. A slick paint layer provides minimal physical purchase, making stable establishment difficult.
Many modern exterior paints contain fungicides or biocides, specifically engineered to prevent microbial growth. These agents are hostile to moss, inhibiting spore germination and making it impossible for moss fragments to thrive.
The slickness of a painted wall also impacts moisture retention. Water beads up and runs off quickly, leaving little moisture for moss to absorb. Moss needs consistent humidity, especially during initial establishment. Without persistent moisture, moss will dry out and fail.
Over time, paint can degrade, flake, or peel due to elements and UV radiation. Any attached moss will come off with the deteriorating paint layer. Long-term moss projects are unstable unless the underlying paint is robust and well-adhered. A failing paint job inevitably leads to a failing moss wall.
The pH level of the paint surface also influences moss growth. Most moss species prefer a slightly acidic to neutral pH (5.0-6.5). Some paints, like fresh masonry or high-lime content ones, create an alkaline environment unsuitable for many mosses. This chemical imbalance inhibits growth, making pH testing a critical preliminary step.
Finally, a clean painted surface lacks organic matter. Mosses absorb nutrients from rainwater, dust, and airborne particles. A pristine painted wall offers almost no substrate for these essential nutrients, hindering growth.
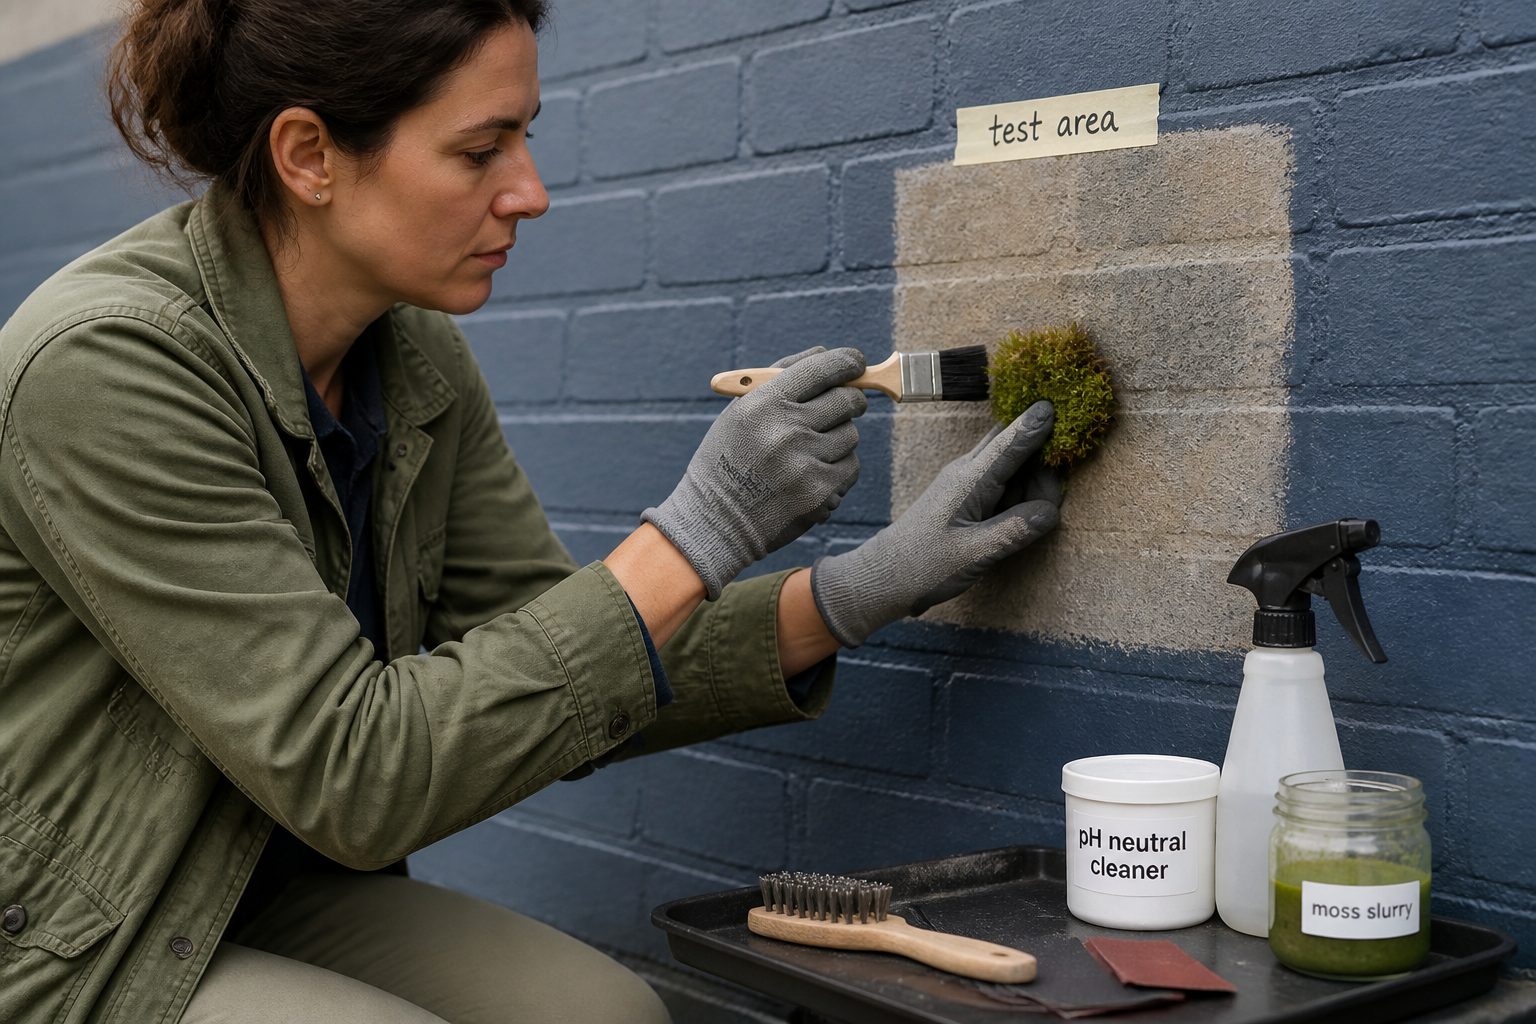
Understanding these inherent barriers is the first critical step. Paint presents several natural obstacles that must be actively counteracted through targeted preparation and application methods. This dramatically improves success and ensures longevity for your moss installation.
Testing Paint Type and Porosity Before Starting
Before extensive preparation, test your wall’s paint. Different paint types react differently to moisture, abrasion, and chemicals, all impacting moss propagation on painted walls. Knowing your paint type guides preparation, adhesive choices, and strategy, preventing wasted effort.
A simple water absorption test indicates porosity. Spray water onto an inconspicuous area. Observe how quickly it beads, runs off, or soaks in. Non-porous surfaces (glossy oil-based) bead and run off immediately. More porous paints (flat latex) absorb readily. Observe for 30-60 seconds to gauge moisture retention.
Perform an adhesion test. Score a small cross-hatch (1×1 inch) into an inconspicuous area. Apply strong masking tape, press, then quickly pull it off. If significant paint comes off, the underlying paint is unstable and will peel with the moss. You may need to scrape, prime, and repaint before moss installation.
Test for pH. Some paints, especially fresh masonry or lime washes, can be highly alkaline. Moisten a small area with distilled water and press a universal pH test strip against it. A pH above 7.0 (alkaline) may require aggressive treatment or specific moss species. Most mosses prefer a slightly acidic to neutral range (5.0-6.5).
If unsure about paint type, consult old cans or a professional. Knowing if it’s latex, oil-based, acrylic, elastomeric, or mineral coating informs mechanical preparation and adhesive choices. Oil-based paints, for instance, require more aggressive sanding.
Always perform tests in a discreet area, wearing safety gear. Thorough testing provides invaluable insights, allowing you to tailor your approach for optimal moss propagation on painted walls.
| Paint Type | Typical Porosity | Moss Attachment Potential | Recommended Prep Action |
|---|---|---|---|
| Glossy Oil-Based | Very Low | Poor, very slick, chemical resistance | Aggressive sanding (60-80 grit), deep scoring, strong non-toxic adhesive, textured primer |
| Satin/Semi-Gloss Latex | Low to Medium | Moderate, some grip, less chemical resistance | Medium sanding (80-120 grit), light scoring, good quality adhesive, optional textured primer |
| Flat Latex | Medium to High | Better, more absorbent, less slick | Light sanding or scuffing (120-150 grit), direct application with slurry/adhesive, good moisture retention |
| Mineral/Lime Wash | High | Good, very porous, but potentially high pH | Minimal prep, direct application possible, check pH, may need pH adjustment or specific moss species |
| Elastomeric Coating | Very Low | Poor, flexible but slick, can be very thick | Mechanical texturing (scoring, roughening), specific flexible and breathable adhesive, ensure coating is stable |
| Anti-Fungal/Mildew Paint | Varies | Extremely Poor, active biocides | Remove paint layer entirely, or avoid area. Moss will not thrive due to active chemical inhibition. |
Mechanical Prep: Sanding, Scoring, and Texturing the Surface
Mechanical preparation is essential for successful moss propagation on painted walls. You must physically alter the surface to create grip points for delicate moss rhizoids. Applying moss to a smooth, intact painted surface will fail, as moss has nothing to anchor to.
Sanding is fundamental to increase roughness. Use medium-grit sandpaper (80-120 grit) to scuff the entire area. This removes the slick outer layer, creating microscopic abrasions and increasing surface area. For very smooth paints, start with coarser grit (60-grit), then a finer grit. The goal is a noticeably rougher surface, providing a ‘tooth’ for the moss. Use an orbital sander for large areas, hand blocks for intricate ones. Wear a dust mask and eye protection.
Scoring involves making shallow patterns with a utility knife or wire brush. These cuts provide deeper channels and edges for moss rhizoids, offering more substantial grip than sanding alone. Create a crisscross or diagonal grid (1/2 to 1 inch apart) for ample attachment points. Only affect the paint layer, not the underlying wall material.
Texturing creates a more pronounced, three-dimensional relief. This can involve applying a thin layer of textured primer (with fine aggregates like sand) or a sand-mixed sealant. Apply as per manufacturer instructions for an even coat. Alternatively, mix fine sand, perlite, or peat moss into a clear, non-toxic, breathable sealant. Apply this mixture to the prepped area. This mimics natural textures, enhancing attachment and improving moisture retention for growing moss exterior wall features.
After any mechanical preparation, clean the surface thoroughly to remove dust and debris. A stiff brush followed by a damp cloth wipe-down is sufficient. Ensure the surface is completely dry before proceeding, as lingering dust hinders adhesion. Smoother paints require more aggressive texturing. Do not underestimate this foundational step for successful moss propagation on painted walls.
Using Carriers and Adhesives to Bridge the Attachment Gap
Even with mechanical preparation, a painted wall lacks the natural organic substrate moss thrives on. Carriers and adhesives bridge this gap for successful moss propagation on painted walls, providing physical anchorage and a temporary nutrient-rich medium.
A common method is creating a “moss slurry” or “moss milkshake.” This blends fresh moss fragments, a liquid binder (buttermilk or yogurt), and water. Dairy products offer temporary adhesive and mild nutrients. Blend 2 cups fresh moss, 2 cups buttermilk/yogurt, and 1 cup water to a paint-like consistency. Apply this slurry directly to the prepped wall with a brush or sponge, ensuring an even, thick coating. It acts as temporary glue and a starter culture for germination.
For robust attachment, specialized non-toxic, pH-neutral, water-permeable, and flexible adhesives or sealants are crucial. Options include clear silicone caulk (applied thinly) or acrylic-based outdoor sealants. Always verify non-toxicity and breathability for plants.
A “moss mat” technique uses natural, breathable fabric (burlap, coco coir) as a base. Soak the fabric in a moss slurry or attach moss fragments directly with non-toxic adhesive. Secure the mat to the wall with strong, non-toxic construction adhesive, or small nails/staples. This provides a stable, pre-grown, moisture-retentive base for growing moss exterior wall features, offering immediate visual impact.
Another option is applying a thin layer of organic substrate: fine peat moss, coco coir, or composted bark fines blended with a non-toxic, breathable binder (e.g., clear acrylic sealant or natural clay). Trowel this mixture onto the prepped wall to create a substantial organic layer for moss to root. This significantly improves moisture retention and nutrient availability, mimicking a natural growing environment, especially for larger installations.
Always prioritize non-toxic adhesives that won’t harm moss or leach chemicals. Research product specifications for “plant-safe,” “non-toxic,” “low-VOC,” and “breathable.” The adhesive must also be durable for outdoor elements. Combining mechanical preparation with a suitable carrier or adhesive is the best strategy, tackling both physical adhesion and biological needs for increased success and longevity.
Best Species Choices for Painted and Semi-Smooth Walls
Selecting the right moss species is critical for successful moss propagation on painted walls. Not all mosses cling well to vertical, semi-smooth surfaces. Choose species known for tenacity, resilience, and strong rhizoidal connections in less-than-ideal conditions. Understanding growth habits is key.
Acrocarpous mosses are a good starting point. These grow upright in dense cushions or tufts, forming robust mats. They typically have stronger rhizoids than pleurocarpous (creeping) mosses, aiding grip on vertical surfaces. Their compact form also helps retain moisture, crucial on exposed walls.
- Dicranum scoparium (Broom Moss): Forms dense, upright tufts. Excellent for vertical surfaces due to strong rhizoids and moisture-retaining cushions. Thrives in shaded to partially shaded, damp environments.
- Hypnum cupressiforme (Hypnum Moss): Versatile pleurocarpous moss, spreads readily. Adaptable to various substrates, good for textured painted walls in shaded areas. Tolerates a range of light but prefers consistent moisture.
- Thuidium delicatulum (Fern Moss): Delicate, feathery pleurocarpous moss, surprisingly tough. Forms intricate mats. Excellent for shaded, textured areas with consistent dampness, adding fine texture.
- Leucobryum glaucum (Pincushion Moss): Distinctive acrocarpous moss forming large, spherical, pale green cushions. Highly moisture-retentive, ideal where consistent humidity might be a challenge. Robust form provides excellent coverage.
- Ceratodon purpureus (Redshank Moss): Incredibly adaptable acrocarpous moss, colonizes disturbed soils and urban cracks. Tolerant of varying light, environmental conditions, and some pollution. Strong contender for challenging painted surfaces.
- Polytrichum commune (Haircap Moss): One of the tallest mosses, forms dense, upright stands. Robust, good for larger areas with consistent moisture and partial shade. Strong, fibrous stems contribute to resilience.
- Bryum argenteum (Silver Moss): Small, silvery-green acrocarpous moss found in urban cracks. Tolerates disturbance, varying light, and drier conditions better than many, making it good for exposed or challenging painted surfaces.
- Hedwigia ciliata (Fringed Hoar-moss): Acrocarpous moss often found on exposed rocks, known for exceptional drought tolerance once established. Forms silvery-green cushions and is very tenacious, excellent for painted walls experiencing periods of dryness or more direct sun.
Source moss ethically (with permission) or from reputable nurseries. Local species are often most successful. Before application, ensure moss is clean and gently break into small fragments if using a slurry. Matching the right moss to your wall’s conditions (light, moisture, texture) is paramount for long-term success in your moss propagation on painted walls project.
Irrigation Strategy for Vertical Painted Surfaces
Consistent, effective irrigation is paramount for initial establishment and long-term health of your moss on painted wall. Vertical painted surfaces shed water quickly, making regular, targeted moisture application critical. Moss cannot thrive without a dedicated watering regimen.
During the crucial first 4-8 weeks after moss propagation on painted walls, keep the surface consistently damp, never waterlogged. Misting two to four times daily, especially during dry, warm, or windy periods, is often necessary. Use a fine mist spray bottle to avoid washing away newly applied moss. The goal is constant humidity, mimicking its natural habitat. Dull or brown moss indicates thirst.
As moss establishes, gradually reduce watering frequency. However, daily misting or a good soak every other day will likely remain necessary for growing moss exterior wall features, particularly in sunny, windy, or arid locations. Mosses rely entirely on surface moisture absorption, so consistent external moisture is non-negotiable. Bright green indicates hydration; dull, shriveled signals thirst.
For larger installations or a hands-off approach, consider an automated irrigation system. Drip lines along the top can slowly release water, or automated misting/fogging systems can be programmed for short bursts multiple times daily. These maintain consistent humidity and moisture without constant manual effort.
Rainwater is ideal—soft, slightly acidic, and chemical-free. If using tap water, let it sit out for 24 hours to dissipate chlorine; avoid hard water if possible. In dry climates, increase misting or boost local humidity with nearby moisture-loving plants or temporary windbreaks. Monitor weather and adjust irrigation; water in early morning or late evening to minimize evaporation. Ensure proper drainage to prevent standing water, rot, and fungal issues, balancing consistent moisture with good aeration for optimal moss health.
What to Do When Moss Slides or Peels Off
Despite best efforts, moss sometimes slides or peels off a painted wall. This setback usually indicates an underlying issue with initial moss propagation, surface preparation, or ongoing care. Don’t despair; failures offer valuable learning opportunities.
Assess the failure’s extent: localized or widespread. Localized issues suggest inconsistent application, dry spots, or inadequate paint prep. Widespread failure points to a fundamental problem with your overall strategy or environmental suitability.
If moss is sliding off, it often means insufficient mechanical preparation. The surface may be too smooth for rhizoids or adhesive. Revisit affected areas and aggressively re-evaluate sanding, scoring, or texturing. Ensure a truly rough, porous surface with ample physical anchorage. Consider a textured primer or sand-mixed sealant.
Peeling moss, especially with paint attached, indicates unstable underlying paint. Address paint failure first: scrape off loose paint, prime, and repaint with durable outdoor paint. Only after a stable paint base should you restart your moss on painted wall project.
Lack of consistent moisture is a common culprit. If moss dries out too frequently, it will shrivel, detach, and die. Re-evaluate your irrigation schedule; increase misting frequency or volume. Ensure even coverage, especially in spots that dry faster due to sun or wind.
If a moss slurry alone wasn’t strong enough, consider reapplying with a stronger, non-toxic horticultural adhesive, or incorporating a more substantial organic base layer. A combination of methods (slurry over textured primer, plus adhesive mist) often works best for tenacious moss propagation on painted walls.
Environmental factors like excessive direct sunlight, strong winds, or extreme temperatures also contribute to moss drying out. Provide temporary shade during establishment if possible. If the location is consistently too exposed or hot, consider a more sheltered spot, as moss prefers shaded or partially shaded environments.
Patience is key; moss establishment takes weeks to months. Small early detachments don’t mean complete failure. Continue diligent irrigation and care; new growth may fill gaps. Observe, learn, and adjust. Perseverance and adaptability often lead to a vibrant and thriving moss wall.
Conclusion
Achieving successful moss propagation on painted walls demands careful planning, diligent preparation, and ongoing attention. Yet, the reward of a living, green wall is spectacular, transforming sterile surfaces into lush tapestries that add a unique, natural, and calming element to any space. This biophilic design enhances aesthetics and contributes to local biodiversity.
Overcome challenges by understanding paint’s properties and applying the right techniques. Success hinges on three pillars: meticulous mechanical surface preparation for texture, strategic use of carriers or adhesives for attachment, and a consistent irrigation strategy. These steps provide physical anchorage and vital moisture for a thriving, long-lasting moss on painted wall.
Experiment with different moss species and attachment methods; every wall and climate is unique. An adaptive approach, coupled with patience and keen observation, will yield the best results. The journey may involve trial and error, but each attempt refines your understanding and improves your chances of success. Embrace the process and enjoy the beautiful transformation. With these guidelines, confidently embark on your moss propagation on painted walls project. Transform plain walls into stunning, living works of art that enhance your outdoor space and evolve with the seasons, creating a truly remarkable and sustainable feature.