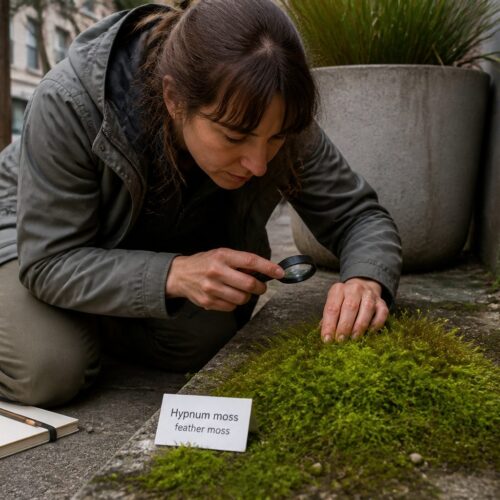
Most people start moss ID by color, then get stuck when everything looks like “green fuzz” on a shaded wall. Texture is the shortcut I trust when I am standing on a sidewalk with traffic behind me and no time for a microscope.
This guide focuses on moss identification by texture, the kind you can judge with your eyes and a careful fingertip. When you learn to separate velvety moss from stringy mats, spiky moss tufts, and crispy patches, a lot of common urban species stop blending together.
Texture also stays useful when a colony is dusty, sun faded, or partly dormant. I keep moss texture field notes because a photo alone rarely captures what your hand and angle of view can tell you.
Why texture is a real ID clue (not just a “feel” description)
Texture comes from structure, not mood, and that structure is tied to how a moss grows. Mat forming species lay shoots sideways, tufting species stack them upright, and those habits create repeatable surfaces you can learn.
When you see “velvety” or “spiky,” you are really noticing leaf angle, shoot density, and whether the colony has a tidy canopy or a messy top layer. Those traits often separate genera even when the color is identical.
Texture also tells you how the colony handles water, which matters in cities where runoff and drying cycles are extreme. A plush patch that stays springy after a dry spell behaves differently than a crisp mat that snaps and sheds fragments.
People dismiss texture because it sounds subjective, but you can make it consistent with a few anchor comparisons. I use fabric words on purpose, like velvet, felt, or broom bristles, because they map to real surface geometry.
Texture is also fast, and speed matters when you are trying not to trample a sidewalk colony or scrape a brick face. With practice, moss identification by texture becomes a first pass filter that tells you what to photograph and what to ignore.
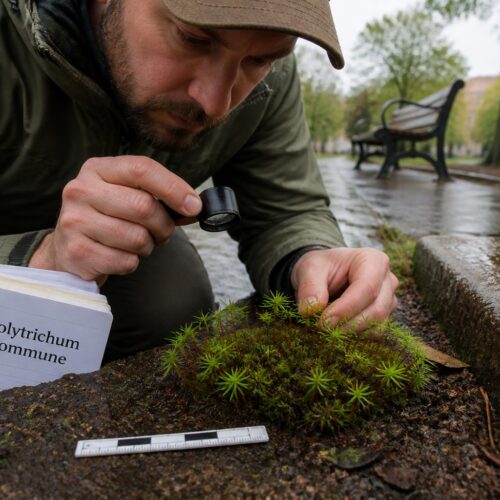
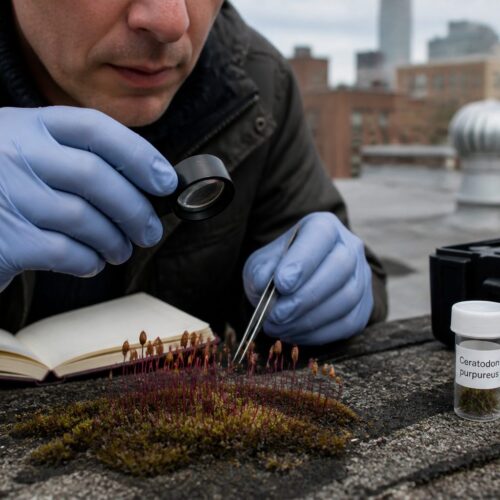
How to assess texture without damaging the colony
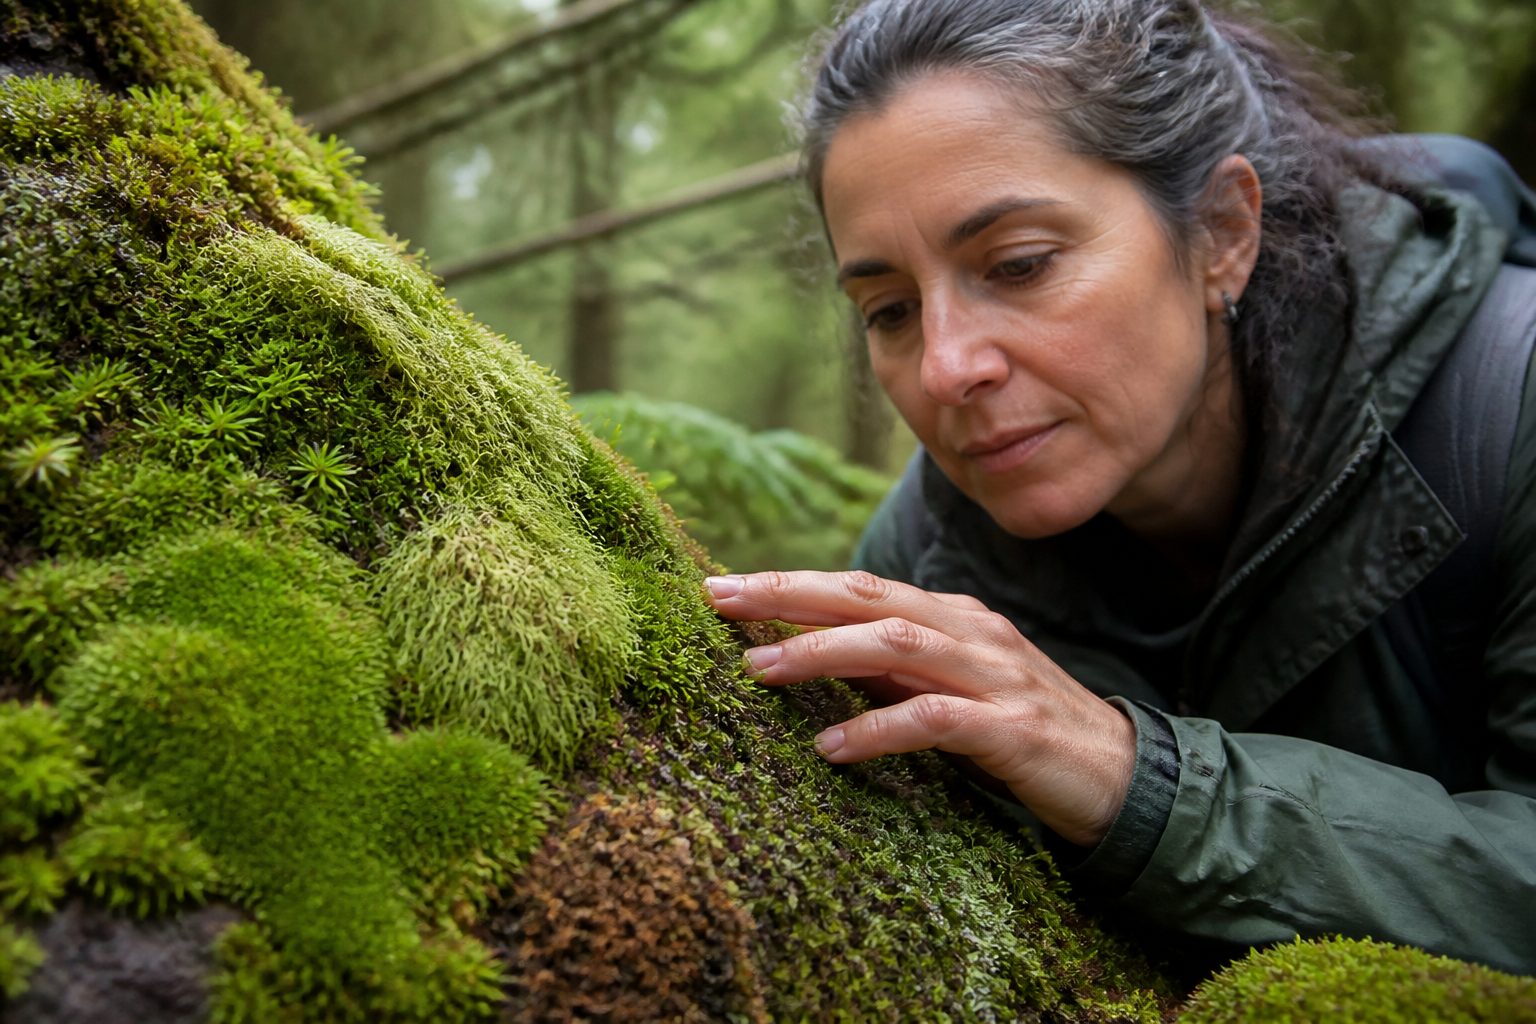
Start with your eyes, because most texture cues show up as shadow patterns across the surface. Crouch and look from a low angle so the moss throws tiny highlights and dark lines that reveal whether it is plush, stringy, or bristly.
If you touch, touch the edge, not the center, and use a clean fingertip with almost no pressure. A light brush across the tips tells you a lot, while pushing down compresses the canopy and can break dry shoots.
On hard substrates like mortar or granite, I prefer a soft paintbrush over fingers because it keeps oils off the colony. The brush also helps you feel whether the surface is smooth like suede or snaggy like tiny hooks.
Pay attention to how the colony rebounds after contact, because rebound is part of texture. A dense cushion springs back, while a loose mat stays ruffled and shows you its threadlike architecture.
When you write moss texture field notes, record the state of hydration and the weather from the last day. A dry afternoon can make a normally soft patch seem crisp, and that can send your ID in the wrong direction.
Velvety and plush textures: what structures create that look
Velvety moss usually comes from very dense, short shoots that form a tight canopy with minimal gaps. The surface looks matte because the leaf tips scatter light instead of reflecting it in shiny points.
Plush cushions often have upright stems packed so close that you cannot easily see individual shoots without parting them. When you run a fingertip lightly across the top, it feels like a soft brush with almost uniform resistance.
| Velvety look | What you are seeing | Where it shows up in cities |
|---|---|---|
| Matte, even surface | Dense short shoots with overlapping leaves | Shaded concrete, north facing brick |
| Soft “nap” when brushed | Leaf tips aligned and packed tightly | Tree bases with steady humidity |
| Little to no visible stems | Canopy hides the lower growth | Mortar joints, old stone walls |
| Slow rippling when pressed | Cushion compresses as a unit | Planter edges, compact soil banks |
Stringy and threadlike textures: spotting fine shoots and loose mats
Stringy moss textures come from longer, thinner shoots that sprawl and overlap in a loose weave. You often see tiny “threads” lifting off the surface, especially where the mat has grown over grit or bark ridges.
In the field, stringy mats look messy in a good way, like hair that has been windblown and never combed back down. When you tilt your view, the surface shows little lines and separations instead of one continuous plush plane.
Threadlike growth often means the colony can creep quickly across a substrate, grabbing new footholds after disturbance. That is why you see it along sidewalk cracks, curb edges, and the thin soil line where a wall meets pavement.
Touch is tricky here because a loose mat can snag and lift if you drag your finger. I tap the surface lightly and watch whether individual strands shift, which tells me the shoots are longer and less anchored.
For moss identification by texture, note whether the strings lie mostly in one direction or tangle randomly. Directional lay often points to water flow or repeated brushing, while random tangles suggest a colony that grows outward evenly.
Spiky and bristly textures: when upright leaves change the surface
Spiky moss is the texture that makes people say “it looks like a tiny forest,” and that instinct is accurate. The spikes come from upright shoots with leaves that stick out at sharper angles, turning the surface into a field of points.
Some spiky moss tufts look prickly even when wet, while others only turn bristly as they dry and the leaves curl or twist. That shift is a clue, so I always check a shaded side of the tuft and a sun hit side.
In urban settings, spiky textures often show up on compacted soil, roof edges with grit, and the tops of retaining walls where sun and wind hit hard. Those sites reward upright growth because the colony can lift its photosynthetic surface above dust and splash.
When you take moss texture field notes on spiky moss, write down the “spike size” relative to a grain of rice or a match head. Big coarse spikes and fine needle spikes can look similar in photos, but they behave differently when you touch them.
Be careful with pressure because bristly colonies snap at the tips when dry. I prefer to press near the base of a tuft, where the stems are supported, and then watch how the tips spread back out.
Crispy and brittle textures: dry-state behavior and what it indicates
Crispy patches are the ones that look like they could crumble into confetti, and sometimes they can. This texture usually shows up when the colony is dry and the leaves have curled tight, exposing stiff edges.
Dry crispness is often a survival posture, not a sign the moss is dead. Many urban colonies spend long stretches in a dry state, then revive fast after a mist or a light rain.
When a patch looks brittle, check whether the crispness is uniform or limited to the top layer. A living mat can have a crunchy sun baked crust with a softer, darker layer underneath.
Do not pinch or crumble a crispy colony to “test” it, because that breaks shoots that took months to build. Instead, use a fingertip hover and a gentle brush with a leaf or a blade of grass to see if fragments lift.
For moss identification by texture, crispy behavior often pairs with exposed substrates like concrete caps, asphalt seams, and thin rooftop soils. Those are the places where water arrives in bursts and then disappears, so the colony has to tolerate repeated drying.
Smooth vs. rough surfaces: how leaf overlap and margins affect texture
Two mosses can both be “green mats” yet one looks smooth like suede and the other looks rough like sandpaper. That difference often comes from how tightly the leaves overlap and whether the leaf margins stick out or lie flat.
Smooth surfaces usually come from leaves that hug the stem and overlap in a tidy pattern. Rough surfaces show more micro shadows because leaf tips, margins, or tiny teeth catch light and create a broken outline.
Roughness is easiest to see by moving your head, not your hand, because the texture pops as the highlights shift. If the surface sparkles with many tiny points, you are likely seeing protruding leaf parts rather than a flat canopy.
When you touch, rough mats feel snaggy, and they can grab a dry fingertip the way a wool sweater does. Smooth mats let your finger glide, which often means the leaves are lying close and the canopy is more sealed.
This is where moss texture field notes pay off, because “rough” can mean different things if you do not anchor it. I write whether the roughness looks like pebbles, bristles, or flaky scales, since each points to a different structure.
Texture changes after misting: a simple rehydration test you can do
A quick mist test is my favorite way to separate true crispness from temporary dryness. Use a spray bottle set to a fine mist, or flick a few drops from your fingers if you are outside and keeping it minimal.
Within a minute or two, many mosses shift texture as the leaves uncurl and spread. A patch that looked brittle can turn plush, and a spiky tuft can relax into a smoother dome.
- Mist the edge first, avoid soaking the center
- Watch for leaf uncurling within 30 to 120 seconds
- Note whether spikes soften or stay bristly
- Check if the mat darkens evenly or in blotches
- Look for a glossy sheen that appears after rehydration
- Photograph before and after from the same angle
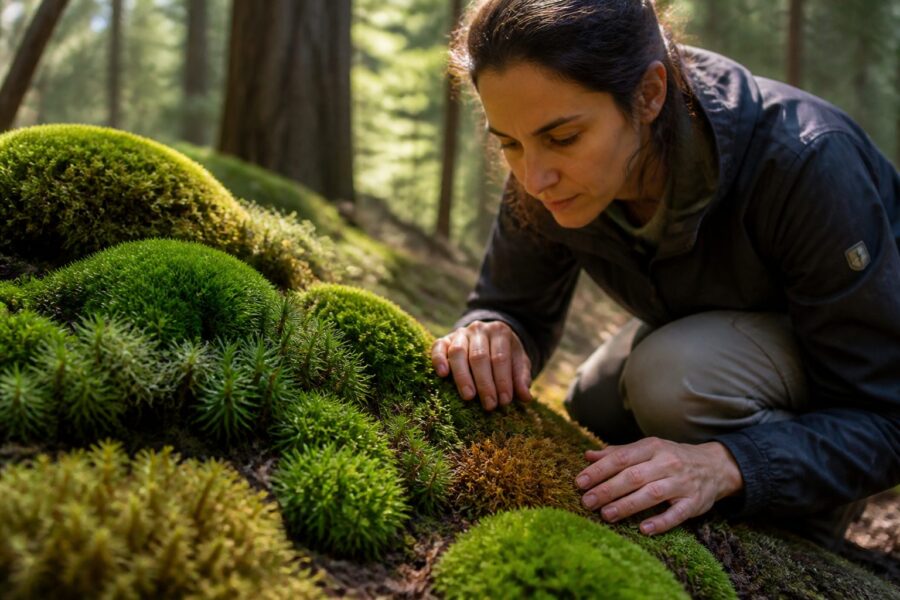
Mixed textures in one patch: recognizing multiple species growing together
Urban moss patches rarely belong to one species, even when they look uniform from standing height. Up close, you often find a velvety moss carpet with stringy runners crossing it, or spiky tufts punching through a smoother base.
Mixed colonies happen because different mosses exploit different micro spaces on the same rock or wall. One species tolerates sun, another tolerates shade, and they meet in the middle with a seam you can trace.
Look for texture boundaries, like a sudden shift from plush to bristly, or a change in how the surface reflects light. Those boundaries are often sharper than color boundaries, especially when everything is wet and dark green.
When you make moss texture field notes, sketch the patch like a map and label the zones by texture first. After that, take separate photos of each zone with a coin or ruler, because scale makes stringy versus velvety differences easier to see later.
Do not assume the “dominant” texture tells the whole story, because small amounts of a second species can change how the patch dries. A thin spiky moss layer can turn a smooth mat into a rough surface that traps dust and seeds.
Pairing texture with substrate and light for stronger identification
Texture alone can narrow your options, but substrate and light often finish the job. A velvety moss on shaded mortar points you to a different set of candidates than the same texture on acidic tree bark.
Write down the substrate in plain terms, like brick, limestone, concrete, asphalt, soil, or bark, because chemistry and water retention differ. Concrete and mortar often leach alkaline minerals, while bark can be acidic and fibrous.
Light is just as important, and I do not mean “sunny” versus “shady” in a vague way. Note if the patch gets morning sun, reflected heat from metal, or constant shade from an overhang.
Spiky moss textures show up a lot in brighter, drier exposures where upright growth helps the colony shed dust and capture brief moisture. Velvety moss tends to dominate where humidity stays higher, like the north side of buildings or near irrigation drift.
For moss identification by texture, the best notes combine all three, texture, substrate, and light, in the same line. A note like “stringy mat on shaded granite curb, stays dark after misting” is far more useful than “green moss on curb.”
Building a personal texture vocabulary: consistent terms for your notes
If you want your notes to help you later, you need repeatable words that mean the same thing every time you use them. I keep a short set of texture labels and resist the temptation to invent a new adjective for every patch.
Start with four anchors, velvety moss, stringy, spiky moss, and crispy, then add modifiers like dense, loose, fine, coarse, smooth, or rough. That small toolkit covers most common urban colonies without turning your notebook into poetry.
When you write moss texture field notes, include one comparison object to keep yourself honest. I use phrases like “spikes about match head height” or “threads thinner than a pine needle” because they force a real scale.
Be willing to write “mixed” when you cannot pick one texture, because that is often the truth. A patch can be plush in the center and crispy at the edge, and that gradient can matter more than the average texture.
Over time you will notice your own bias, like calling everything velvety when it is simply wet. That is why I reread old notes each season and update my vocabulary when a term stops being useful.
Conclusion
Texture is one of the most practical tools for moss identification by texture, especially in cities where colonies are small, disturbed, and hard to sample. If you train your eye for velvety moss, threadlike mats, spiky moss tufts, and crispy dry crusts, you will start sorting patches quickly and with fewer wrong turns.
The habit that pays off is writing moss texture field notes that include hydration state, substrate, and light, because those details explain why the surface looks the way it does. When you come back after rain or after a hot week, the same patch will teach you more than any single photo.
If you want one simple practice, do the mist test on the edge of a colony and watch how the texture changes in two minutes. That small experiment builds confidence fast, and it makes your next walk past a mossy wall feel like real observation instead of guessing.