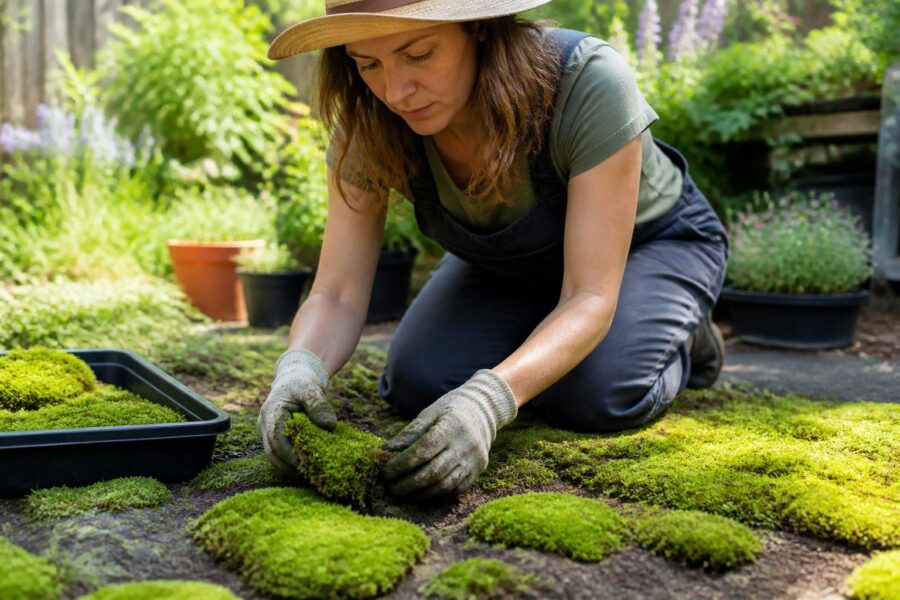
Sheet moss is one of the easiest entry points into moss growing because it already comes as a coherent mat. The trick is learning how to turn that one mat into many patches without shredding it into compost.
This guide focuses on moss propagation from sheet moss using methods that work on patios, shady courtyards, bonsai benches, and urban balconies. If you can keep a mat evenly moist and pressed to its new surface, you can multiply it.
I like sheet moss because it gives fast visual feedback, you can see contact points and edges right away. That also means mistakes show up quickly, usually as curling edges, pale tips, or dry crunchy spots.
What “sheet moss” usually means and how to assess what you have
“Sheet moss” is a retail label, not a single species, and it often includes several mosses growing together. Most bundles are pleurocarpous mosses that creep and knit into mats, which is why they hold together when you lift them.
Before you propagate, flip the mat over and look at the underside for rhizoids and trapped soil. A mat with lots of fine brown rhizoids usually reattaches faster than a mat that is mostly loose stems and duff.
Check thickness with your fingers because thick mats behave differently than thin ones. Thick mats can stay damp inside while the surface dries, which can confuse your watering and lead to hidden rot.
Smell matters more than people admit. A clean earthy smell is normal, but a sour or swampy smell usually means the mat sat waterlogged in a bag and needs extra cleaning and air time.
Finally, test how it rebounds after misting. If the moss greens up within an hour or two, it is awake and ready, but if it stays dull and gray it may be dormant or partly dead.
Choosing healthy donor mats: what to look for before you cut
Good propagation starts with donor material that is actively growing, not just surviving. For moss propagation from sheet moss, I look for mats with springy texture and consistent color across the surface.
Avoid mats that shed stems when you lightly tug, because that usually means the mat is already breaking down. If you see lots of bare brown stem bases, expect slower recovery after cutting.
Inspect for algae sheen, which looks like a slimy green film between shoots. Algae is a sign the mat stayed too wet with too much light, and it can smother new attachment points after you split it.
Watch for pests that hitchhike in urban setups, especially fungus gnats, springtails, and tiny snails. A few springtails are fine, but snail eggs in the underside can turn into overnight grazing once you move the moss indoors.
If the mat includes mixed species, decide whether you like that look. Mixed mats can be beautiful, but they can also separate over time, so your new patches may not match each other.
Cleaning and prepping sheet moss without tearing it apart
Cleaning is part of sheet moss care, and it is where most people get impatient and rip the mat. I prefer a shallow tub of cool water and a gentle swish, then I lift the mat with both hands like a wet tortilla.
Pick out sticks, leaf bits, and pine needles with tweezers instead of rubbing the surface. If soil is packed into the underside, loosen it with your fingertips under water and let gravity do the work.
| Problem you see | What it usually means | Prep move that works |
|---|---|---|
| Sour odor, slimy underside | Bag stayed waterlogged | Rinse twice, then air on a towel for 30 to 60 minutes |
| Crunchy edges, curled corners | Dehydration and edge lift | Soak 10 minutes, then press flat under a board |
| Lots of leaf litter embedded | Collected from forest floor | Float and pick debris with tweezers, avoid scrubbing |
| Soil clumps stuck underneath | Rhizoids tangled with dirt | Massage clumps underwater, then drain on mesh |
| Algae film on surface | Too wet plus light exposure | Rinse, reduce misting frequency, increase airflow |
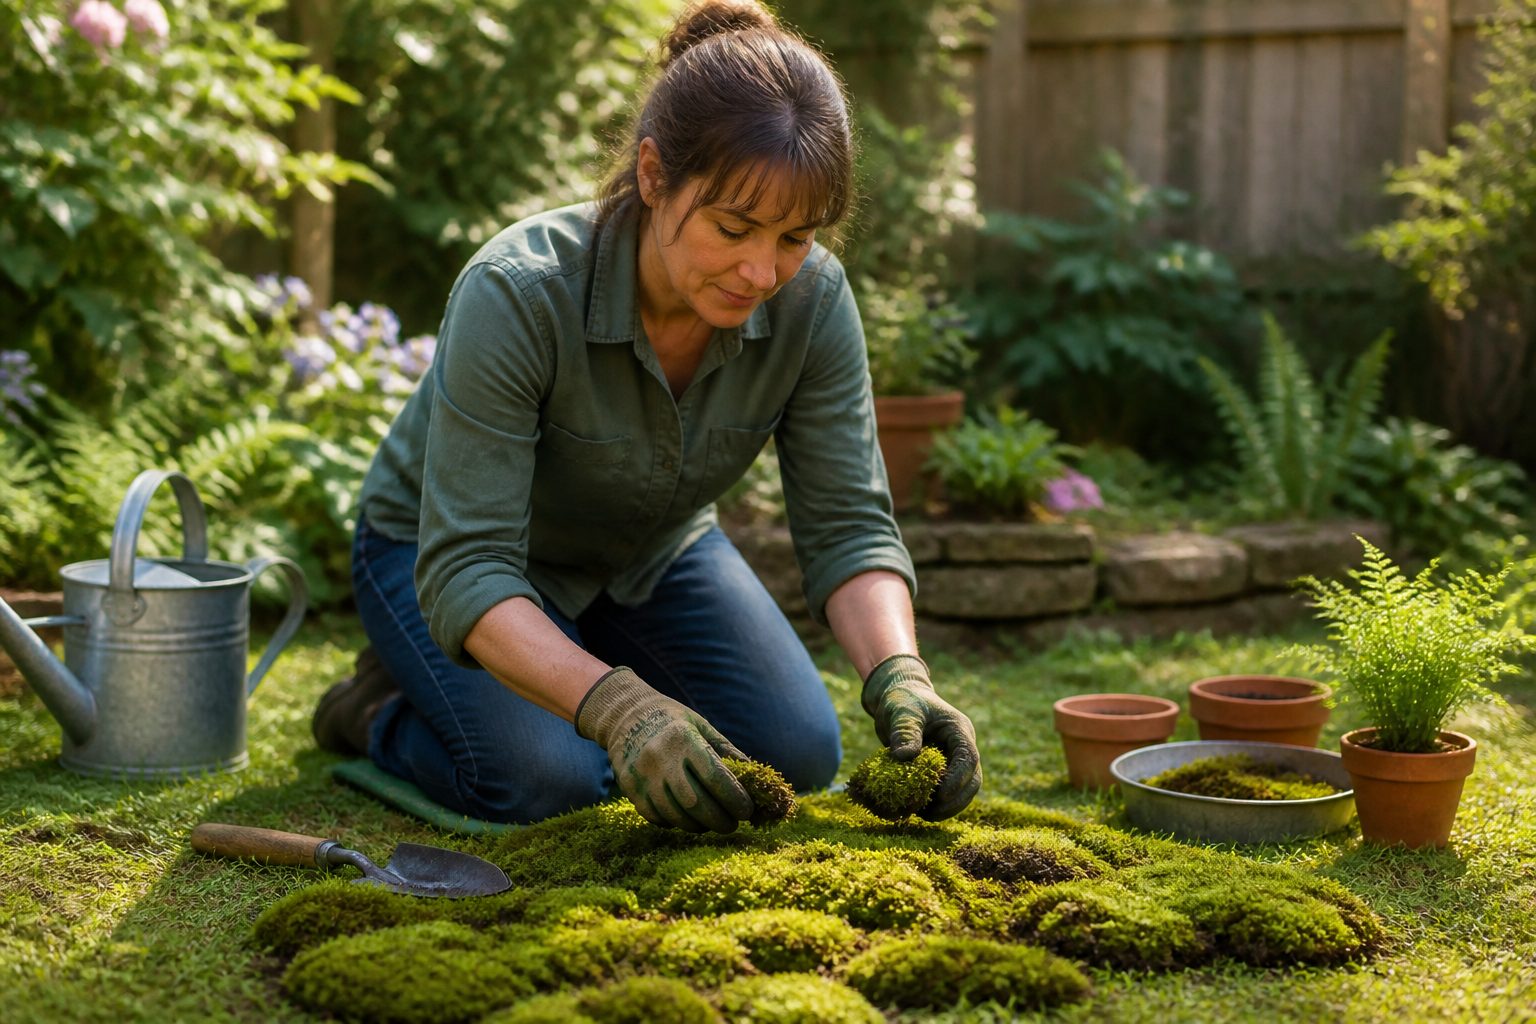
Two propagation approaches: patching vs. crumbling for coverage
You can multiply sheet moss by cutting it into intact patches, or by breaking it into small fragments for faster coverage. Both count as moss propagation from sheet moss, but they behave differently on the surface you are trying to colonize.
Patching is basically moss mat splitting with clean edges and decent thickness. It is the method I use when I want a finished look quickly, like lining stepping stones or filling a tray for a kokedama display.
Crumbling is better when you have a large area and you accept a slower, speckled start. You rub the mat gently into pea sized bits and press those bits into a damp substrate, which helps the moss find more contact points.
If you are working on vertical surfaces, intact patches usually hold better than crumbs. Crumbs can work on a wall, but you need a binder, and binders can turn into a mold party if you keep them too wet.
For moss patch establishment in an urban courtyard, I often combine both methods. I set a few anchor patches first, then I crumble the leftovers into the seams and bare spots to knit everything together.
Getting good contact: pressure, pinning, and edge sealing
Moss attaches by staying in contact long enough to grow rhizoids and new creeping stems into the surface. If the mat lifts even a few millimeters, the edge dries first and the whole patch starts to curl.
Pressure should be firm but not crushing, and I use a flat board or the bottom of a pot to press the mat evenly. You want the moss to conform to the micro texture of the substrate, not hover over it like a carpet.
Pinning is underrated for outdoor work, especially on slopes or along stone borders. U shaped landscape staples work, but so do bent stainless steel wire pieces, and you can hide them under the moss canopy.
Edge sealing is the difference between a patch that stays flat and a patch that becomes a potato chip. I tuck edges slightly under themselves where possible, or I press a thin line of damp soil or sifted akadama around the perimeter.
On hard surfaces like concrete, contact is harder because there is no give. In that case, I rough up the surface with a stiff brush, then press the moss into a thin layer of gritty fines so it has something to grab.
Moisture strategy for the first two weeks
The first two weeks decide whether your new pieces stay alive long enough to attach. Your goal is steady moisture with oxygen, not constant saturation that turns the underside sour.
I mist lightly in the morning and check again in late afternoon, adjusting for heat and wind. In a dry apartment, a clear humidity dome helps, but I always vent it daily to avoid fungus.
Water quality matters more than people expect in sheet moss care. If your tap water is hard, use rainwater, distilled, or filtered water, because mineral crust can build up on tips and slow growth.
Think in terms of surface dampness, not puddles. If you can press a finger and see water squeeze out, you are already too wet for most mats.
For outdoor patches, wind is the real enemy, not sun. A simple shade cloth windbreak or a temporary plastic tote cover with side vents can keep your moss from drying between checks.
Light strategy for preventing scorch and encouraging fill-in
Most sheet moss sold for crafts came from shaded conditions, so sudden full sun is a fast way to bleach it. I treat new divisions like transplants and give them bright shade first, then increase light slowly.
Scorch often shows up as pale tan tips, especially on the highest points of the mat. If you see that, reduce midday exposure immediately, because damaged tips do not recover and the patch looks thin for weeks.
Indoors, a north window can work, but only if you manage air dryness. Under LED grow lights, keep intensity modest and raise the fixture, because moss does not need the same photon blast as herbs.
Greenhouse plastic and glass can magnify heat even in spring. I have cooked moss on a cool day just by leaving a closed lid in direct sun for an hour.
For moss patch establishment, the best light is stable and predictable. Dappled morning sun with afternoon shade tends to push steady creeping growth without turning the surface into algae soup.
Handling dieback: trimming, re-pressing, and rehydrating
Some dieback is normal after moss mat splitting, especially at cut edges and high spots. The goal is to keep dead material from becoming a dry barrier that prevents new shoots from touching the substrate.
If a corner lifts and dries, rehydrate it with a short soak or repeated misting over an hour. Then press it back down and pin it, because rehydration without pressure usually leads to the same curl again.
Trim crispy brown tips with small scissors, and do not worry about being too neat. Moss responds well to a haircut, and trimming removes material that would otherwise trap air and shed water.
If you see blackened, mushy patches, you have a wetness problem rather than a dryness problem. Increase airflow, reduce misting, and consider lifting the mat to rinse the underside, then re-press it onto fresh damp substrate.
Algae and liverwort can move in during recovery, especially in trays. I scrape algae film gently with a toothbrush and let the surface dry slightly between waterings until the moss regains control.
Scaling up: turning one tray into multiple starter patches
Once you get one tray to knit together, you can treat it like a donor farm. This is where moss propagation from sheet moss becomes a repeatable routine instead of a one time project.
I like shallow nursery flats with drainage holes and a gritty base layer, then a thin top layer of sifted fines. The moss sits on top, and the fines lock it in place while still letting air reach the underside.
When the tray fills in, cut it like a brownie pan into starter squares. Each square becomes a patch you can move to a stepping stone, a bonsai slab, or a new propagation tray.
Spacing matters if you are trying to multiply fast, so I do not cover every inch with donor moss. I leave small gaps between pieces, because creeping species will bridge them, and those bridges give you extra cutting lines later.
Keep notes on what worked in your microclimate, because urban conditions vary block by block. A windy roof deck and a shaded courtyard need different watering rhythms, even if the moss came from the same bundle.
When your new patches are “established” and ready to move
Established moss resists lifting, and you can test that gently at an edge with a toothpick. If the patch slides easily, it is still sitting there, but if it grips, rhizoids and new growth have started to anchor it.
Color is another clue, but it is not foolproof. A patch can look green because it is wet, so I look for new creeping tips and a slightly thicker, more knitted texture across seams.
Timing depends on conditions, but many mats settle in within four to eight weeks outdoors in mild weather. Indoor trays can take longer because airflow is lower, and stagnant air slows the whole system down.
Move patches on a cool, cloudy day if you can, and keep the receiving surface pre dampened. Transplant shock in moss is mostly a contact issue, so press the patch firmly and pin it again if needed.
After moving, treat it like week one again for several days. That means careful misting, stable shade, and watching edges, because edges are where moss patch establishment either succeeds or unravels.
Conclusion
Turning one mat into many comes down to three habits: start with clean healthy donor moss, keep strong contact, and manage moisture with restraint. If you do those things, moss propagation from sheet moss becomes predictable instead of luck based.
Patching gives fast results, while crumbling fills gaps and stretches your material, so you can use both in the same project. With steady sheet moss care and a willingness to re-press problem edges, your moss mat splitting efforts pay off in durable, movable patches.

