Soil is optional for moss, and once you accept that, a lot of urban growing problems get easier. You can propagate moss without soil on hard, clean surfaces as long as you manage moisture, light, and physical contact.
In apartments and small courtyards, soil often means mess, fungus gnats, and heavy containers that you do not want on a balcony rail. Inert bases like rock, mesh, ceramic, and foam let you build thin green surfaces that behave more like living wall material than a potting project.
Moss is honest about its needs and unforgiving about shortcuts. If you keep it damp without suffocating it, and you keep it pressed to a stable base, it will usually settle in and start creeping.
When soil-free propagation makes sense in urban spaces
Soil-free setups make sense when you want moss in places where soil falls out, dries too fast, or stains everything. Think window ledges, rooftop planters with wind exposure, and vertical surfaces where gravity makes potting mix a constant headache.
If you are working indoors, skipping soil cuts down on moldy smells and the slow creep of algae in soggy potting mix. It also makes it easier to quarantine new moss, since you can rinse and inspect the whole patch without digging.
For public-facing urban projects like courtyard stones or shaded entry features, inert bases are easier to clean and reset. You can pull a rock, scrub it, and reattach moss without rebuilding a whole bed.
Soil-free propagation also helps when you are trying to match a specific aesthetic, like a thin, tight carpet on stone instead of a fluffy mound. Many common urban mosses naturally cling to concrete seams, brick mortar, and tree bark, so rock and ceramic are familiar territory for them.
I also like inert setups for testing, because they tell you fast if your care routine works. If the edges crisp or the patch slides, you get immediate feedback instead of blaming the soil mix for everything.
Understanding what moss needs: water, light, and contact
Moss does not have true roots, so it does not pull water up from a soil reservoir the way a houseplant does. It drinks across its whole surface, which is why humidity, frequent wetting, and a base that holds a thin film of water matter so much.
Contact is the part beginners underestimate when they propagate moss without soil. If the moss is not pressed against the base, it dries faster, lifts at the edges, and never forms the tight attachment that lets it ride out short dry spells.
Light is usually the second mistake, because people put moss in deep shade and then wonder why it turns brown and thin. Many species like bright shade or gentle morning sun, and they stall when the light is too low for too long.
The nutrient needs of moss are modest, but they are not zero. Moss gets minerals from dust, rainwater, and tiny amounts of dissolved nutrients, so extremely pure water and perfectly sterile surfaces can slow growth in a way that feels confusing.
Airflow matters because moss stays wet on the surface, and stagnant air invites rot and slime. The sweet spot is damp moss with moving air, which is why a sheltered outdoor spot often beats a sealed terrarium for long-term health.
Choosing inert bases: rock, ceramic, mesh, and foam
An inert substrate for moss is any base that does not break down into soil and does not supply much nutrition on its own. The goal is stability and texture, so the moss can anchor and you can control water without a muddy layer.
Pick your base based on where the moss will live, because a patio stone behaves differently than a hanging panel. Weight, porosity, and surface roughness decide whether you will be misting twice a day or soaking once a week.
| Inert base | Where it works best | Main tradeoff |
|---|---|---|
| Porous rock (lava rock, sandstone) | Outdoor trays, shaded courtyards, bonsai slabs | Holds salts if water is hard |
| Dense rock (granite, slate) | Entry stones, tabletop displays, drip walls | Needs more frequent wetting |
| Ceramic tile or unglazed pottery shard | Indoor dishes, windowsill panels, humid bathrooms | Glazed surfaces stay too slick |
| Moss on mesh (plastic canvas, stainless mesh) | Vertical walls, frames, living art panels | Dries fast at edges |
| Foam (florist foam, pond foam, EVA sheet) | Temporary rooting, props, craft builds | Can stay waterlogged and rot |
Preparing the base: cleaning, texture, and moisture priming
Start by cleaning the base, because oils, dust, and old algae make moss slip. I scrub rock and ceramic with a stiff brush and plain water, then rinse until the runoff looks clear.
If the base has soap residue, moss will sulk and sometimes bleach at the contact points. Skip detergents unless you can rinse like you mean it, and avoid anything with fragrance or antibacterial additives.
Texture is your friend, and slick surfaces are a slow-motion failure. For dense stone or tile, I rough up the surface with sandpaper, a diamond pad, or even a few shallow scratches, then rinse again.
Moisture priming helps, especially for rock that starts bone dry. Soak porous stone for 10 to 30 minutes, or at least run it under water until it stops shedding bubbles.
If you are mounting to mesh, pre-wet the mesh and whatever backing it sits on, because dry plastic pulls water away from the moss edges. I also like to mist the moss itself before mounting, since dry moss cracks when you press it flat.
Best propagation method for soil-free setups
The best method is almost always transplanting intact moss fragments, not blending them into a slurry. A blended mix can work, but it is messy, it dries unevenly, and it tends to grow algae before it grows moss.
Use small, healthy pieces with green tips and minimal brown thatch, and keep species separated if you can. Mixed species look fun on day one, then one type usually wins and the rest fade out.
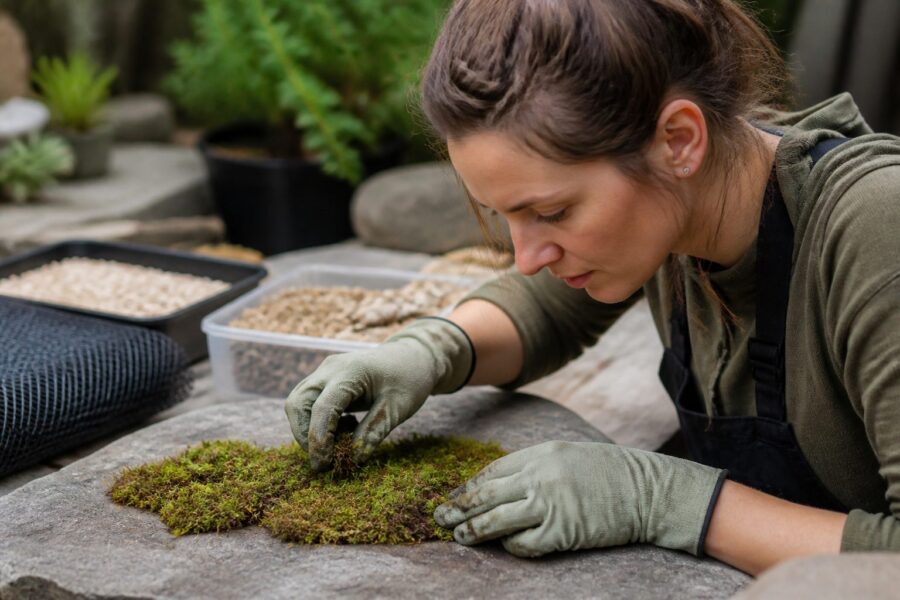
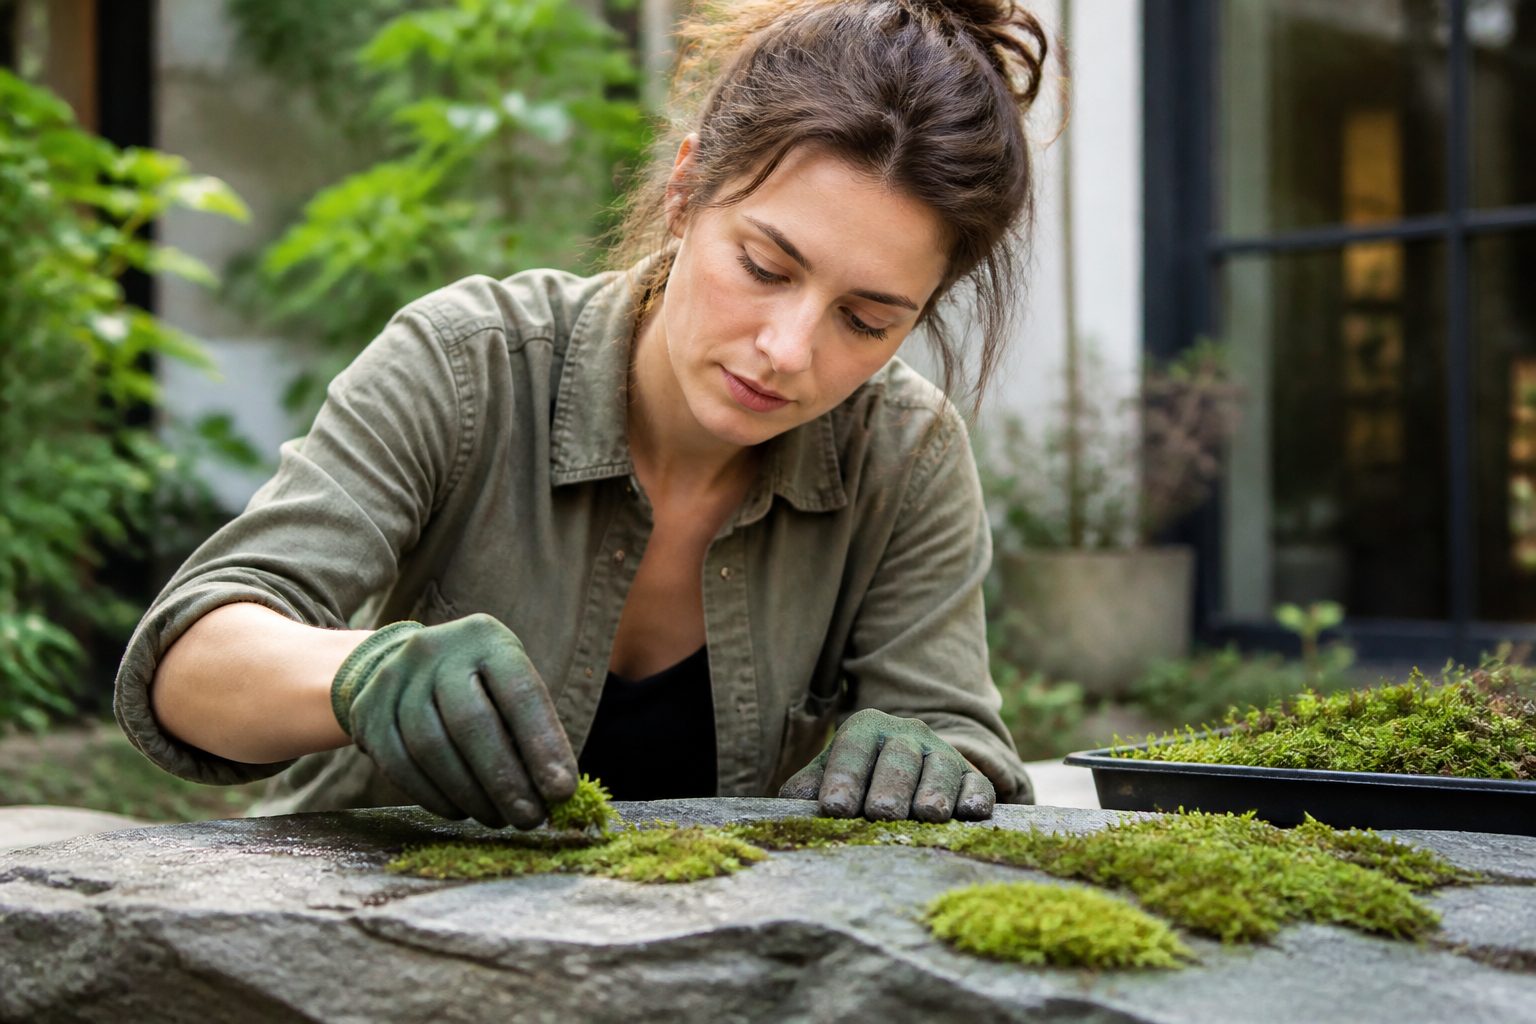
Press fragments firmly onto the primed base so the underside makes full contact. If you can lift a corner easily, it is not tight enough and it will dry from underneath.
Spacing matters, and I prefer a tight mosaic over scattered crumbs. Leave small seams between pieces so new growth has somewhere to creep, but do not leave wide gaps that turn into algae stripes.
If you are tempted to add fertilizer, pause and think about the nutrient needs of moss in the real world. A tiny amount of minerals from tap water or collected rain dust is usually enough, and heavy feeding often triggers slime and competing growth.
Holding moss in place: nets, clips, and temporary wraps
Gravity is the enemy when you propagate moss without soil on vertical or tilted bases. Your job is to keep the moss pinned until it grips, which can take weeks depending on species and humidity.
I like simple mechanical holds more than glue, because you can remove them without ripping the moss. A loose wrap that keeps contact is better than a tight wrap that crushes and blocks airflow.
- Nylon netting cut slightly larger than the patch
- Stainless steel mesh clips or binder clips on frames
- Cotton thread tied in a loose grid over stone
- Jute twine for outdoor rocks that need grip
- Plastic wrap used as a short-term humidity tent
- Rubber bands around small stones or pottery shards
Watering approach: misting vs soaking and how to decide
Misting works when the base holds moisture and the air is not brutally dry. It is also the easiest way to keep moss on mesh hydrated without blasting it off the panel.
Soaking works when the base is dense or the patch dries from underneath. A short dunk in a shallow tray rehydrates the whole mat, which is hard to do with a spray bottle alone.
Decide based on how the moss dries, not on a schedule you found online. If the tips stay green but the underside goes pale and crispy, you need deeper watering or better contact.
Water quality changes outcomes more than people admit, especially on porous rock. Hard water leaves mineral crust, and that crust can block the thin capillary film moss relies on.
If you can, rotate between rainwater and tap water, or at least flush with softer water once in a while. That small habit supports the nutrient needs of moss without turning your setup into a salt collector.
Light and airflow: preventing crispy edges and rot
Crispy edges usually mean the moss is getting light and heat without enough water reaching the perimeter. Mesh panels are famous for this, because air hits both sides and dries the border first.
Rot usually means the moss stays wet and warm with weak airflow. If the patch smells sour or looks translucent and slimy, you are keeping it too sealed or too soaked for the temperature.
Bright shade is my default recommendation for most urban moss projects, like under an awning or on the north side of a balcony. Indoors, a bright window with filtered light often works, but keep the moss back from hot glass.
Airflow does not mean a fan blasting the patch all day. It means the air changes, so the surface can dry slightly between waterings without becoming brittle.
If you are using a humidity cover, vent it daily and watch for condensation that never clears. Moss likes humidity, but it also likes oxygen, and stale air turns your inert substrate for moss into a petri dish.
Encouraging spread across inert surfaces
Once the moss is attached, your goal shifts from survival to steady creeping. Spread happens when the tips stay active and the base stays consistently damp at the contact zone.
Keep the surface clean, because dust and algae form a slick layer that slows attachment. A gentle rinse and a soft brush around the edges can keep the growth front moving.
On rock and ceramic, micro-pockets help, so I sometimes tuck tiny crumbs into scratches or pores. Those crumbs look insignificant, but they often turn into new islands that bridge gaps.
For moss on mesh, backing matters more than people think. A mesh panel mounted a few millimeters off a moisture-holding backing, like felt or a thin sponge, spreads faster than mesh hanging in open air.
Be patient with seasonal slowdowns, because moss growth is not linear like basil on a windowsill. If the patch stays green and attached, it is working, even if you cannot see daily change.
Common issues: slipping, drying, and patchy colonization
Slipping almost always comes from a dirty or smooth base, or from moss that was mounted too dry to conform. Fix it by re-wetting, roughing the surface, and using a temporary net so contact stays constant.
Drying problems show up first at corners and ridges, especially on dense stone. Either increase mist frequency, switch to periodic soaking, or add a moisture-holding backing if you are working with moss on mesh.
Patchy colonization often means uneven light, with one side getting more sun or heat. Rotate the piece weekly if you can, or shade the hot side with a simple screen.
If some areas go dark and mushy while others look fine, you are watering too heavily for the airflow you have. Pull back on soaking time, vent more, and remove any wrap that traps stagnant moisture.
If growth stalls for months, look at water chemistry and the nutrient needs of moss before you panic. A light mineral input from tap water, or even letting a bit of outdoor dust settle naturally, can restart slow patches without adding fertilizer.
Conclusion
You can propagate moss without soil if you treat the base like a mount, not a pot. Choose an inert substrate for moss with texture, keep firm contact, and water in a way that rehydrates the underside.
Rock and ceramic reward steady moisture, while moss on mesh rewards careful edge management and good backing. If you respect the nutrient needs of moss and avoid heavy feeding, the patch usually spreads on its own schedule.
The best sign you got it right is boring consistency: green tips, tight attachment, and no slime. Give it time, make small adjustments, and let the moss do the slow work it is built for.

